
Use this indicator directly on TradingView — the world's most popular charting platform.
What does the Perfect Entry Zone indicator do?
FibAlgo - Perfect Entry Zone is an adaptive Fibonacci-based support and resistance indicator that identifies recurring retracement zones, projects Fibonacci time zones, and displays a real-time market pressure gauge on the chart.
Unlike static Fibonacci tools that require manual drawing, this indicator automatically detects pivots using a zigzag algorithm, analyzes historical retracement patterns across multiple lookback windows, and highlights the zones where price has reversed most frequently. It aims to help traders identify potential entry areas based on observed Fibonacci clustering, without making any guarantees about future price behavior.
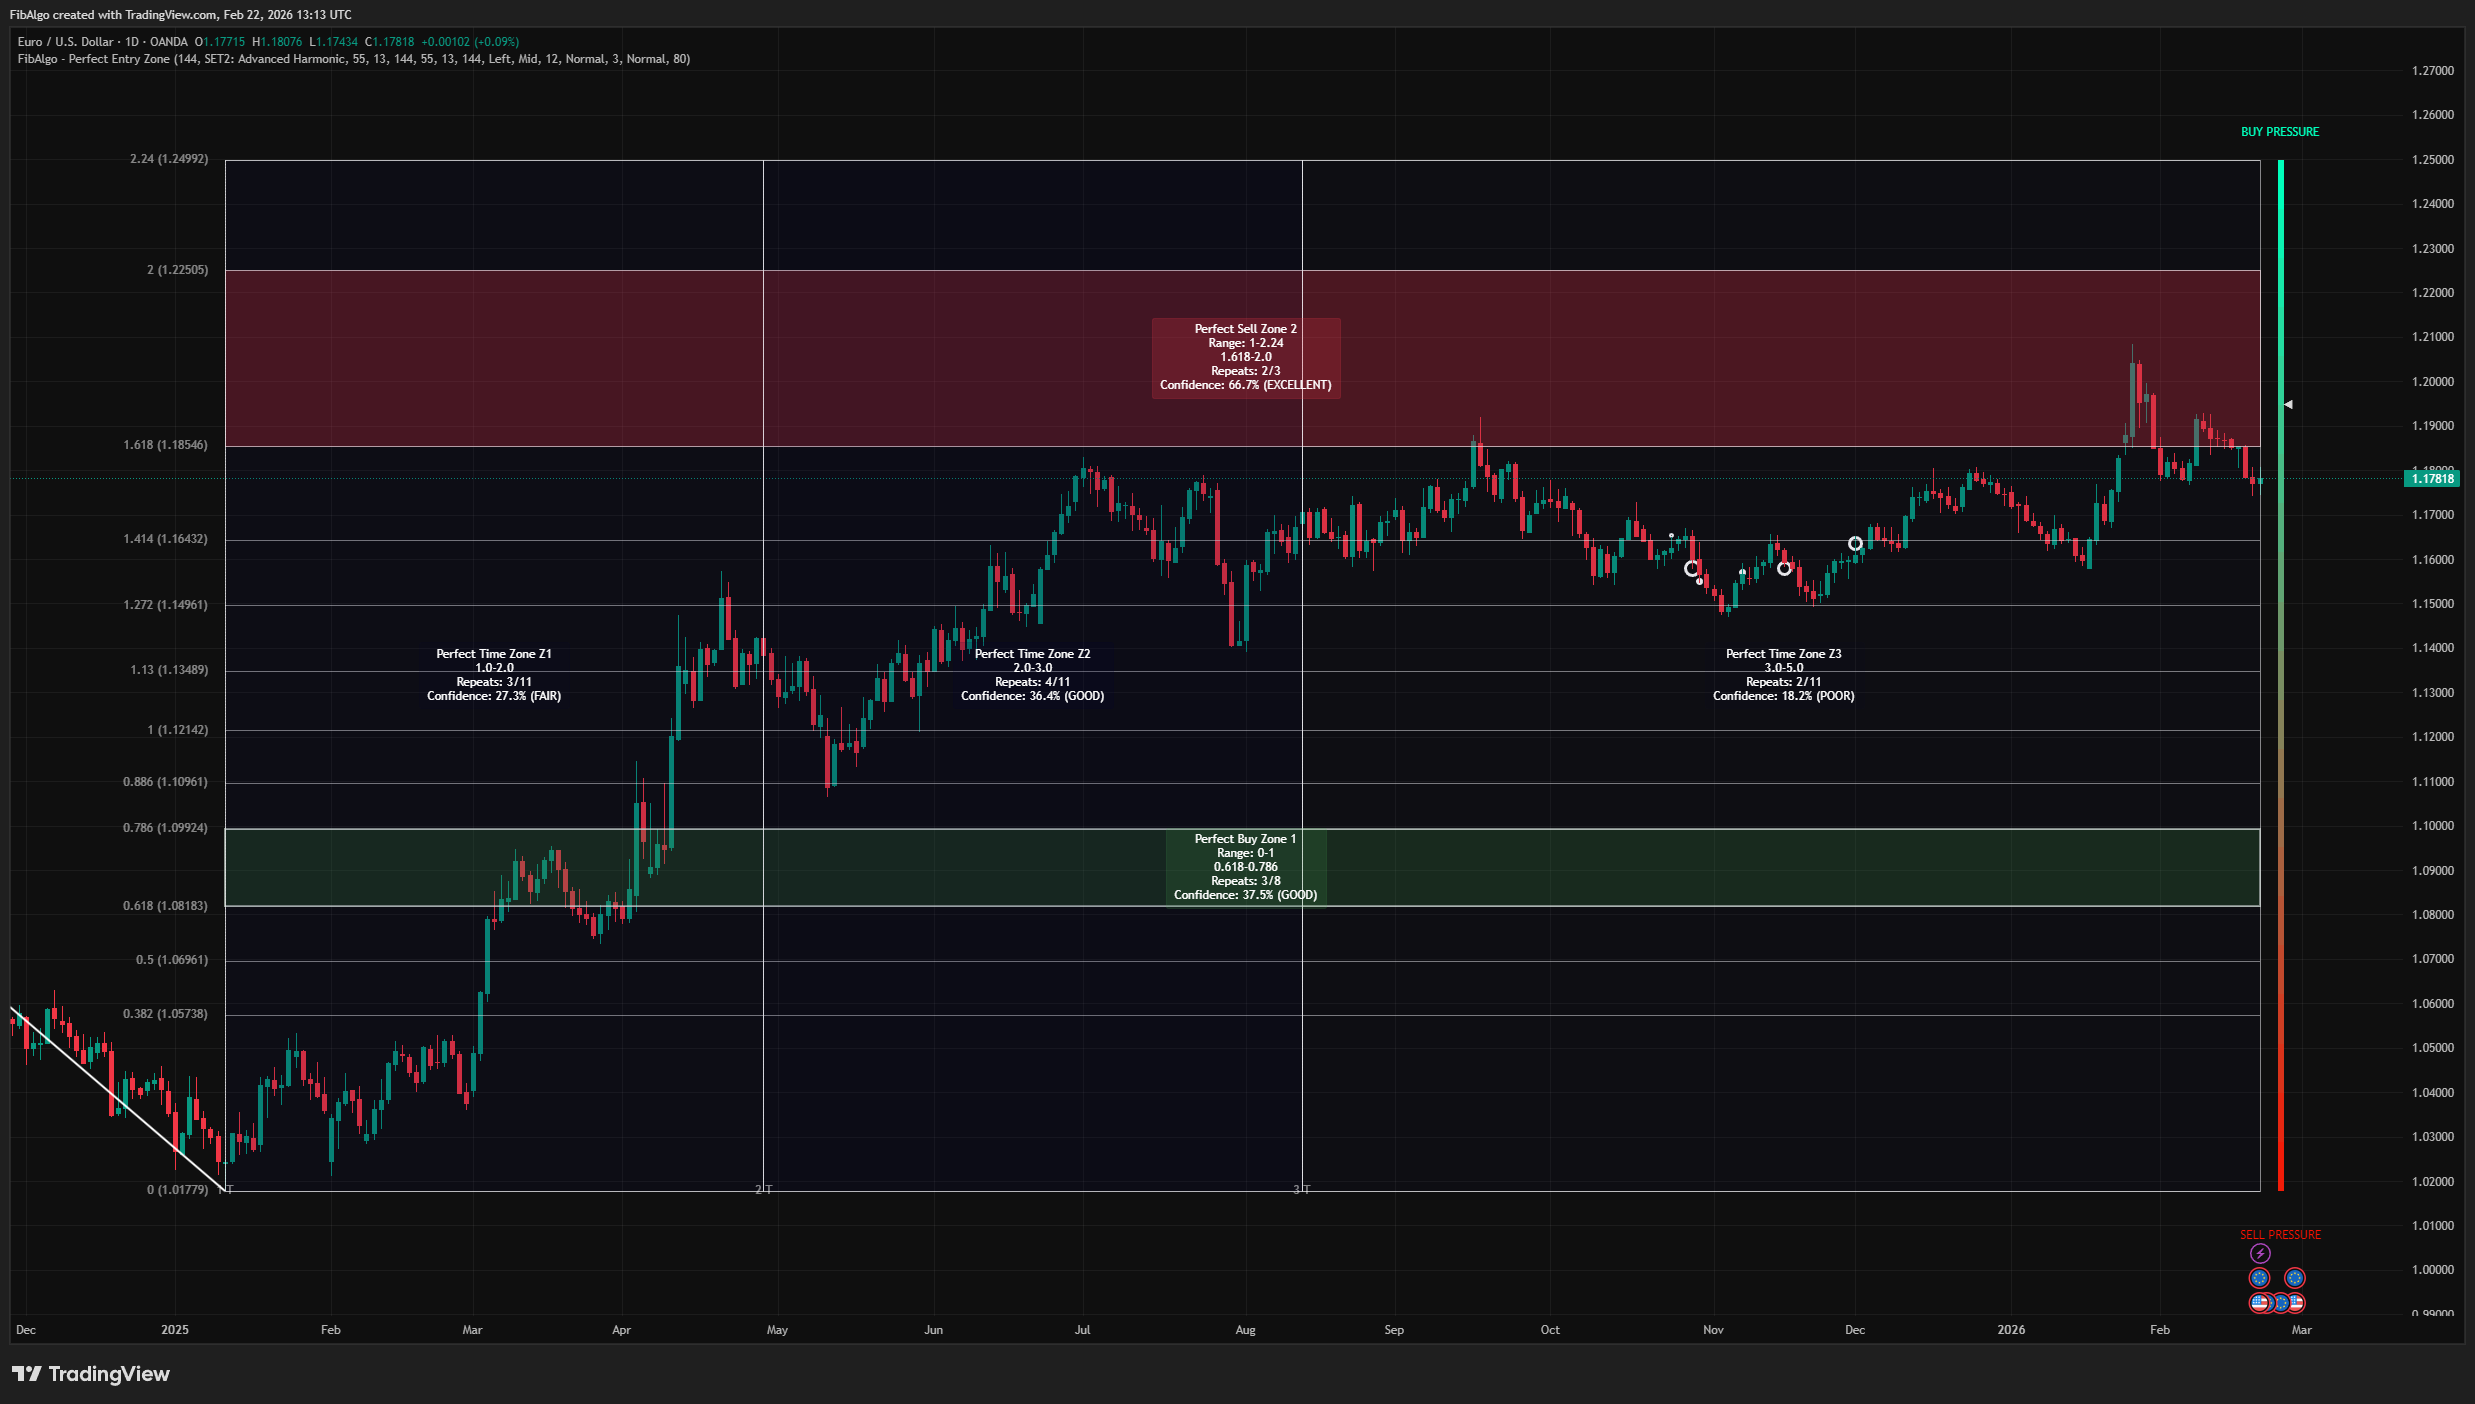
Key Concepts
Adaptive Fibonacci Retracement Analysis
Traditional Fibonacci tools draw fixed levels (0.382, 0.500, 0.618, etc.) between two user-selected points. This indicator takes a different approach: it examines where price has actually reversed across recent pivot swings, not where textbook levels suggest it should. The system tests multiple lookback windows (default: 13 to 144 pivots) and selects the window that produces the highest weighted confidence score. This means the zones adapt as the market's behavior evolves.
Three-Zone Hierarchy
Retracement patterns are organized into three priority zones:
- Zone 1 (Primary) — Covers Fibonacci levels from 0.0 to 1.0 (standard retracement range). This is where most reversals occur in trending markets.
- Zone 2 (Extension) — Covers levels from 1.0 to approximately 2.0–2.6 (depending on the analysis set). Captures extended moves beyond the initial swing.
- Zone 3 (Deep Extension) — Covers levels from 2.0 to 4.0. Identifies deep retracement areas that occur during strong counter-trend moves.
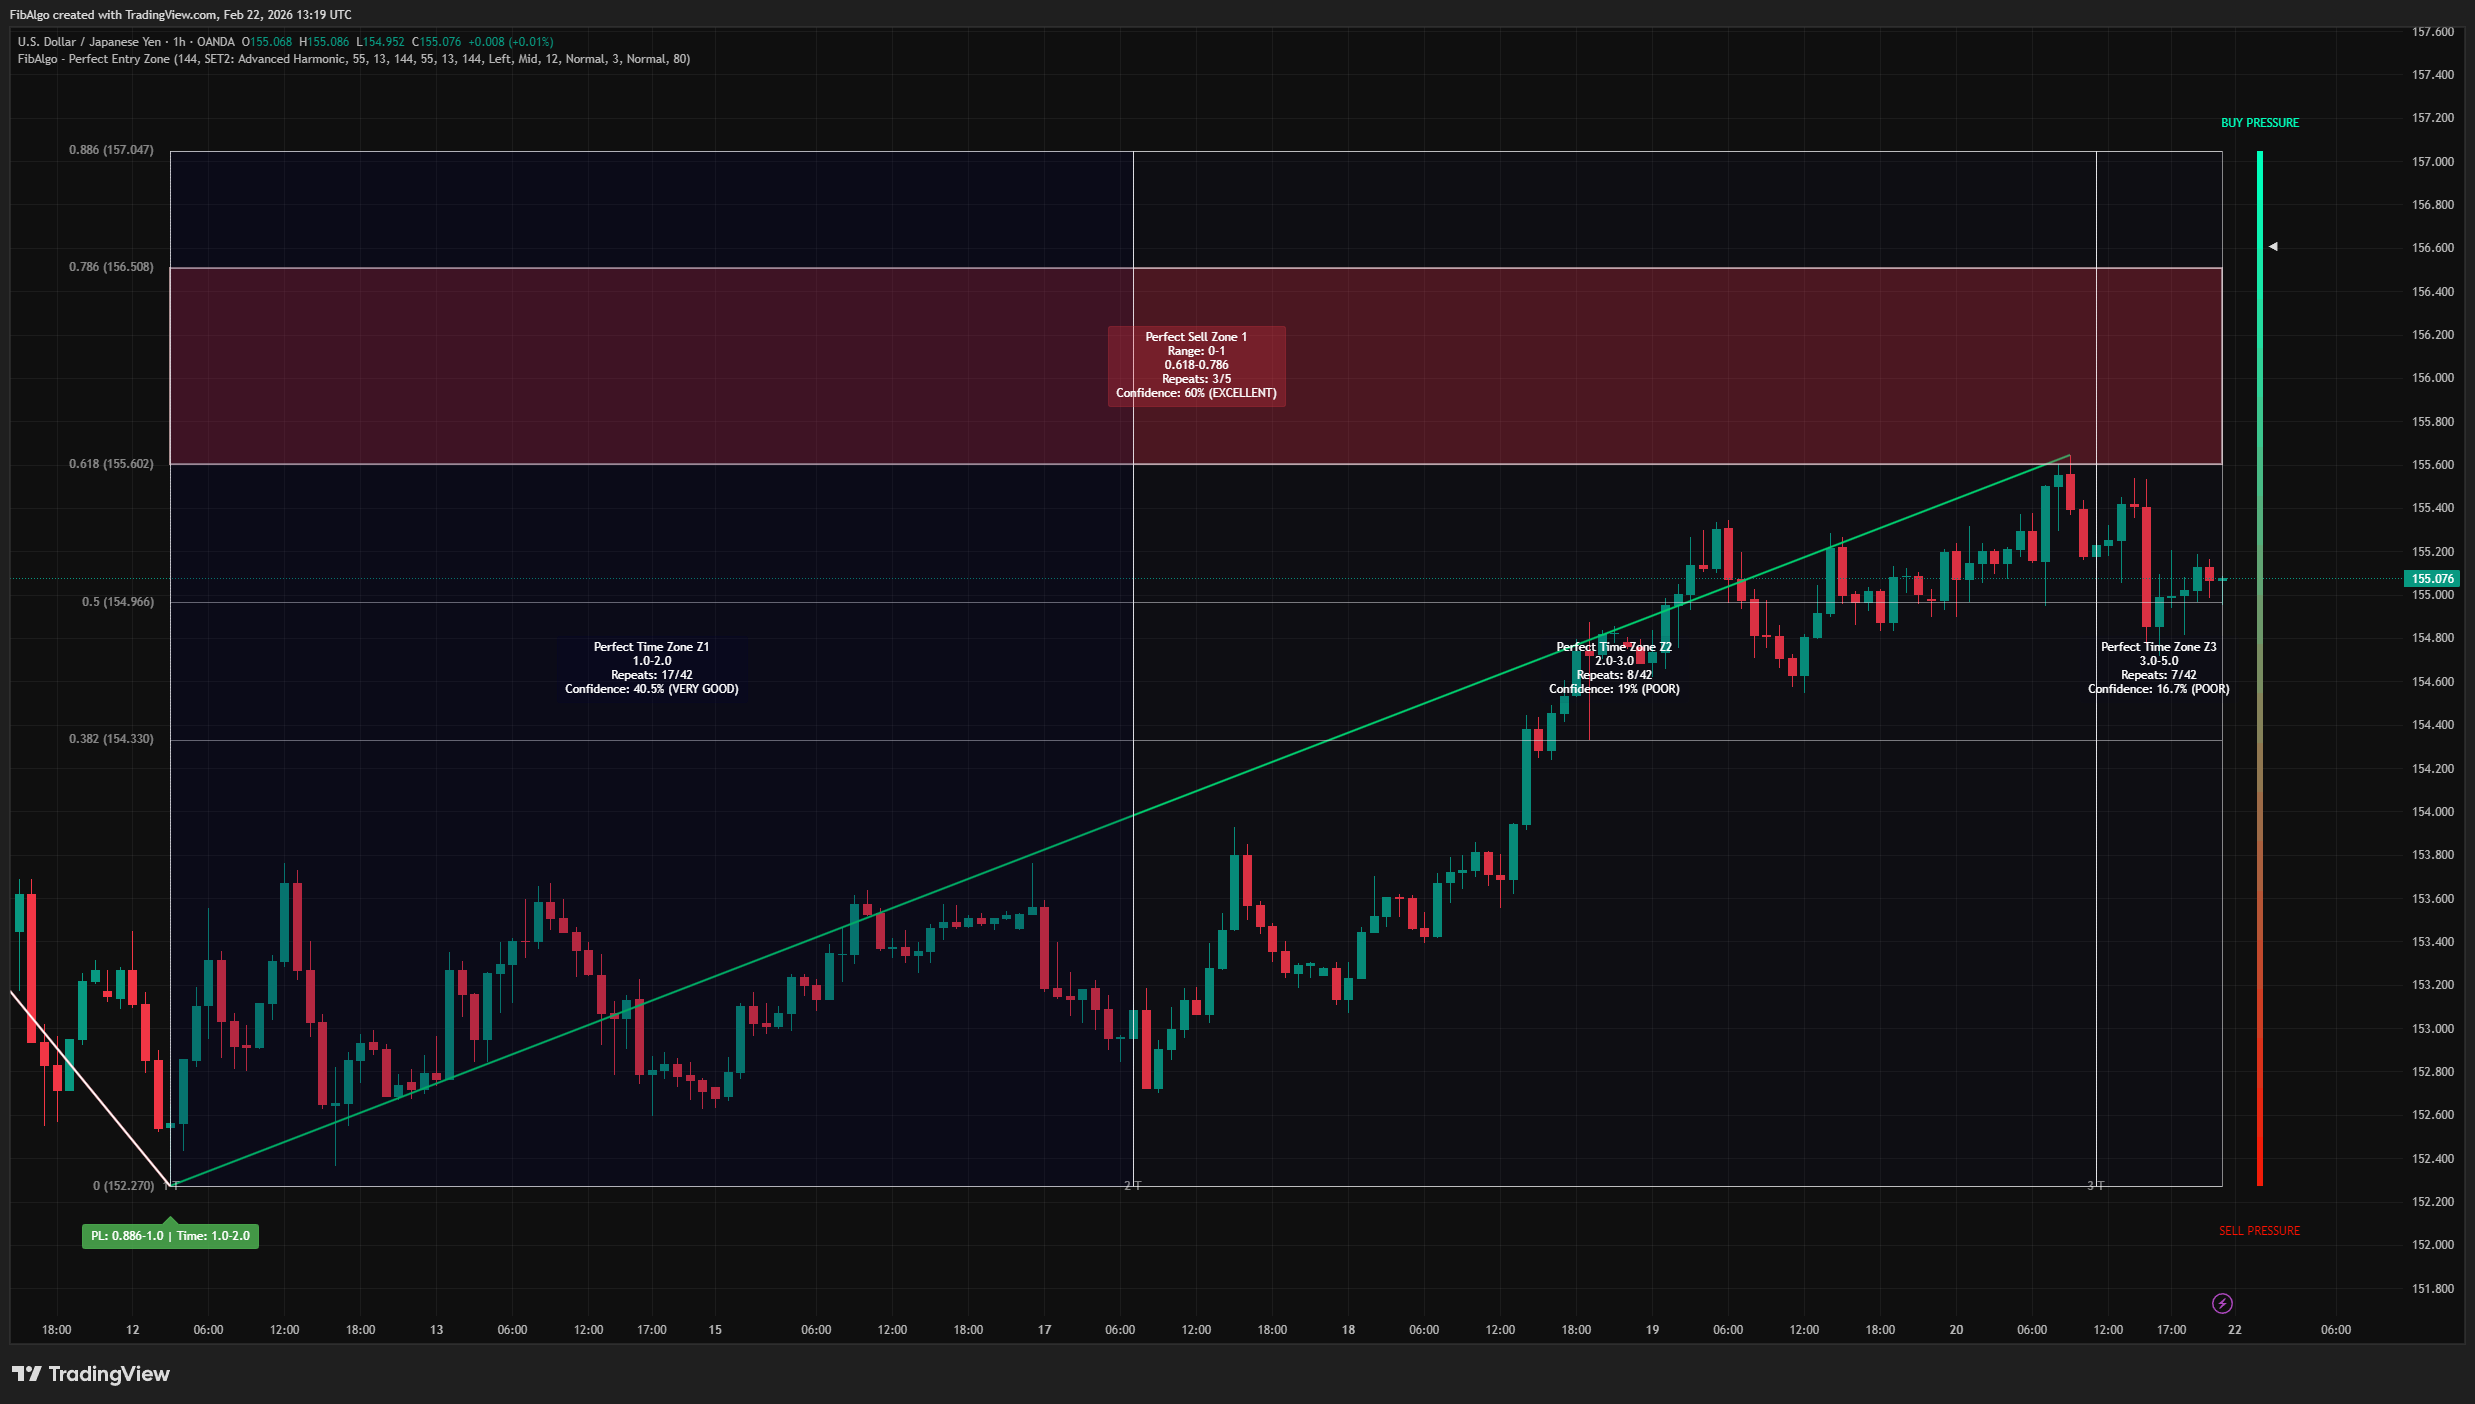
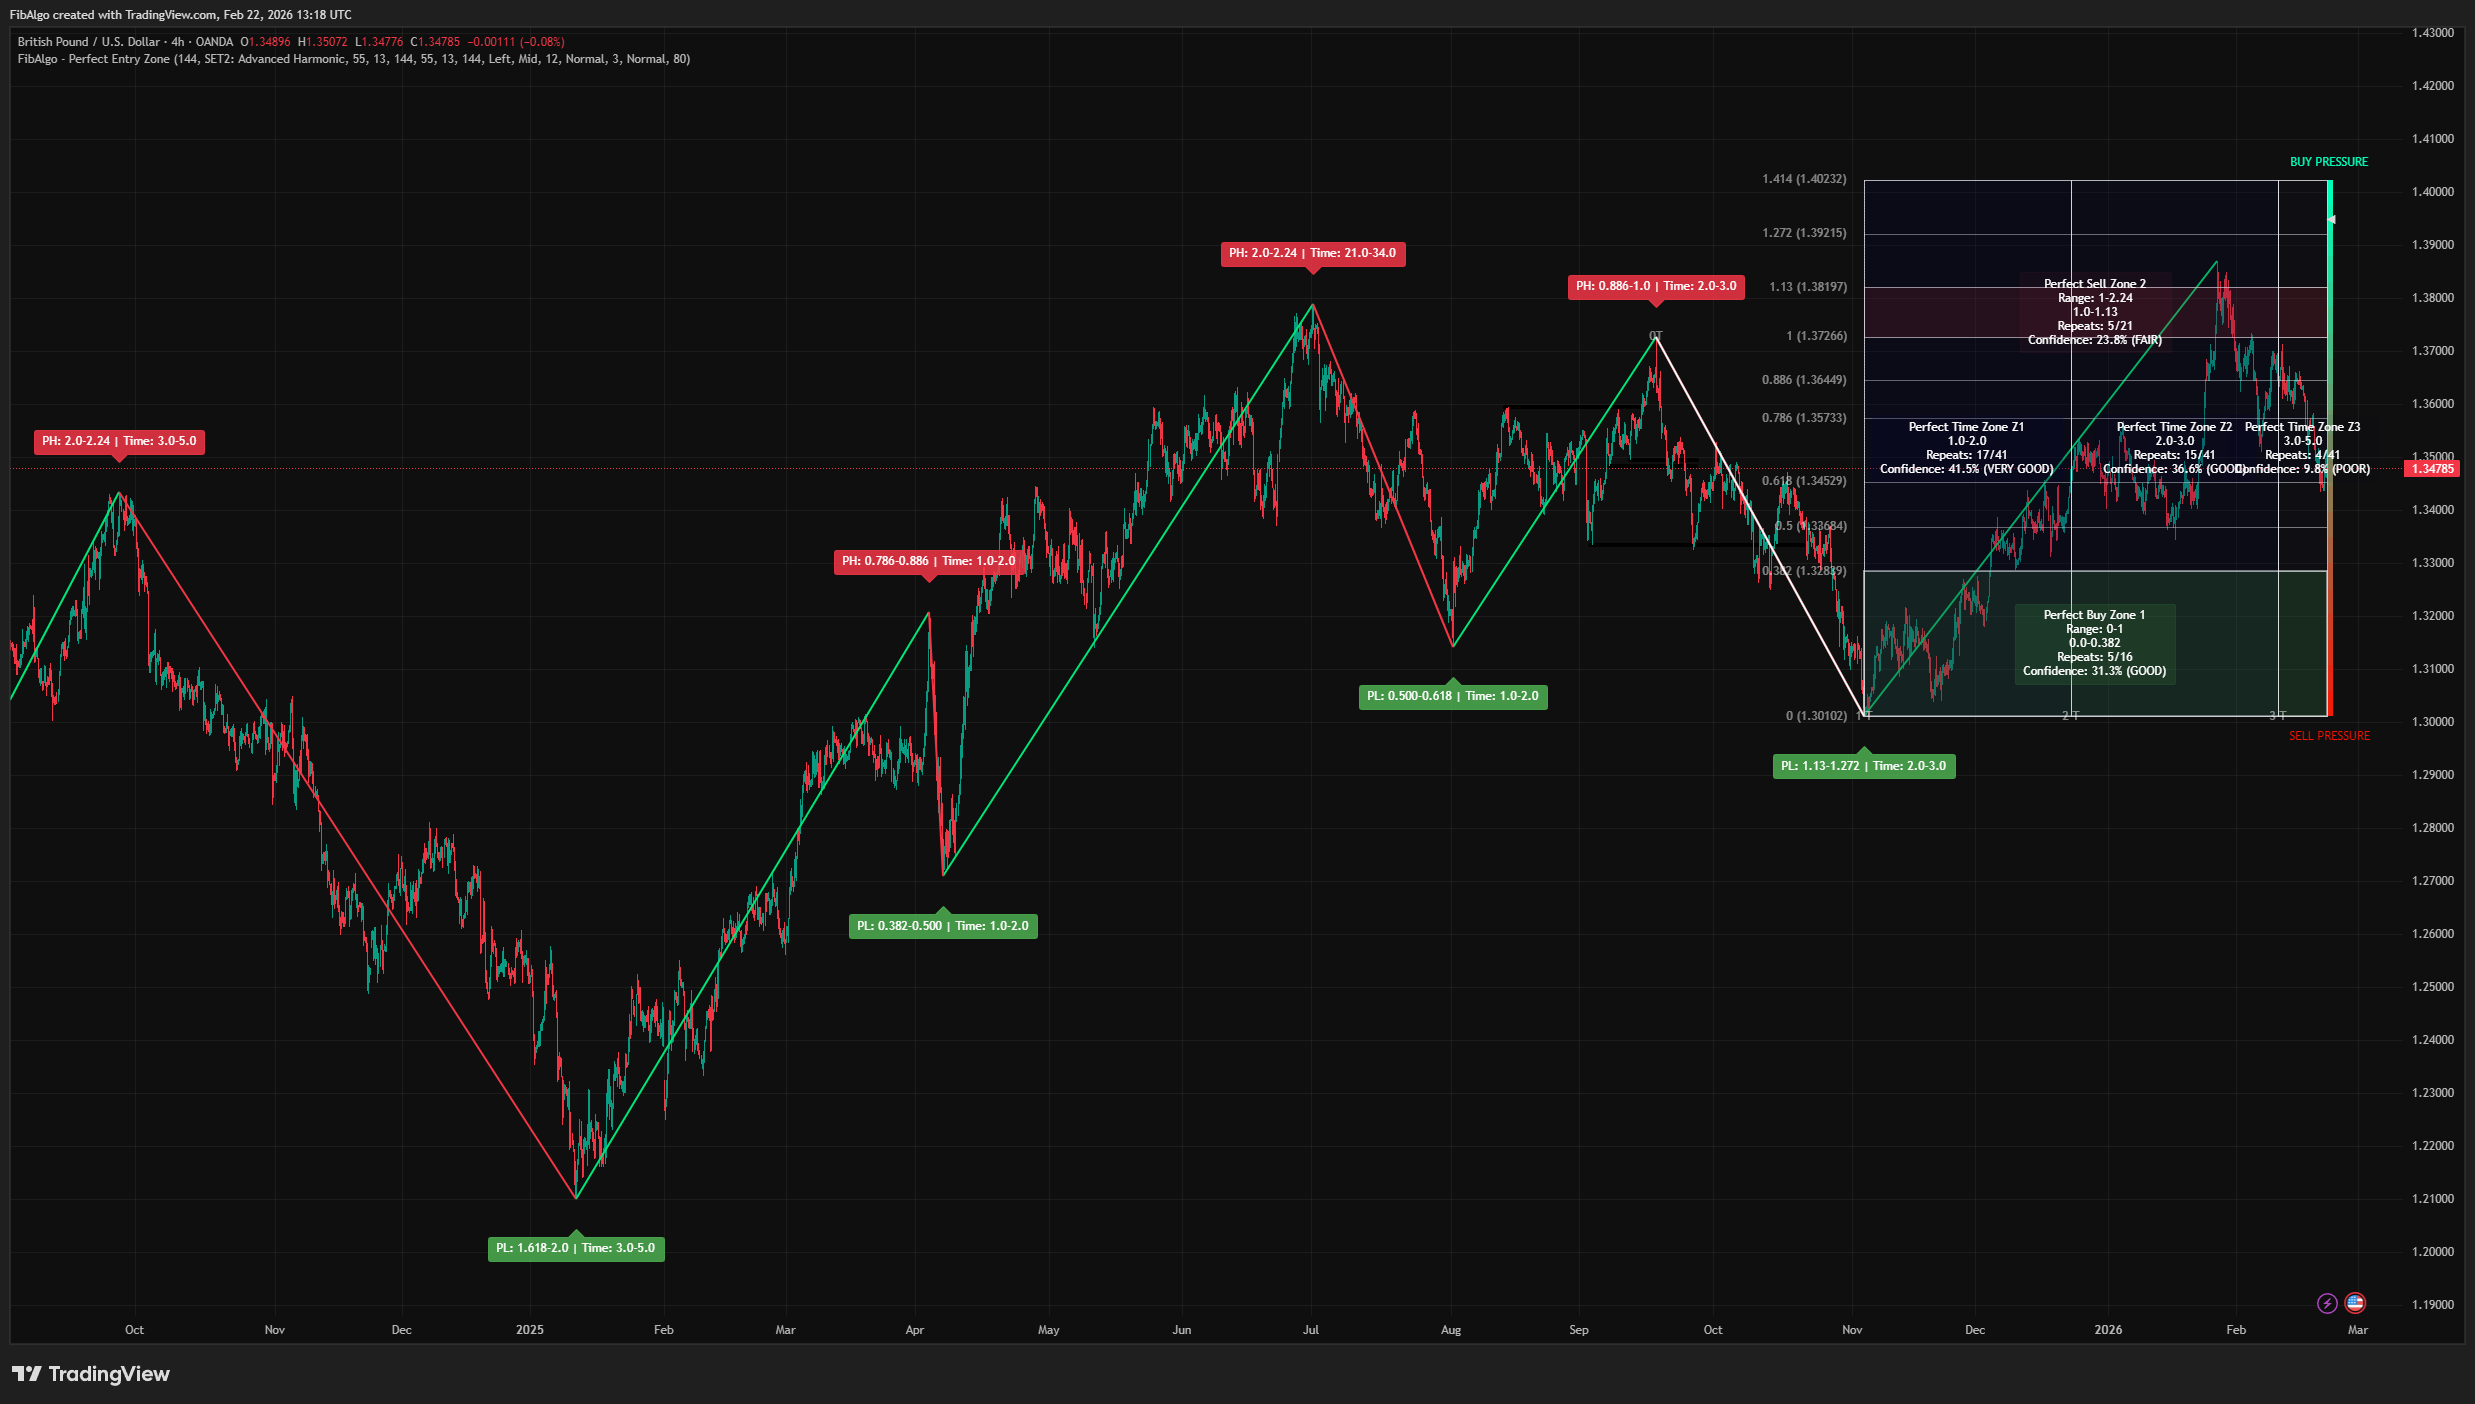
Each zone displays its Fibonacci range, repeat count (how many times price reversed within that range), and a confidence percentage.
S/R Flip Logic
Zones change state dynamically based on price action:
- A zone starts as red (resistance/support — potential reversal area).
- When price breaks through the zone's upper boundary and reaches the next Fibonacci level, the zone flips to green (confirmed breakout — former resistance becomes support, or vice versa).
- If price falls back below a key level, the zone can revert to red.
This progressive state system helps distinguish between zones that are holding and zones that have been broken.
Fibonacci Time Zones
In addition to price-based zones, the indicator projects time-based Fibonacci zones using the distance between the two most recent pivots. The time axis is divided using Fibonacci number ratios (1, 2, 3, 5, 8, 13, 21, 34, 55), and the same adaptive analysis is applied to determine which time intervals have historically coincided with new pivot formations.
Market Pressure Gauge
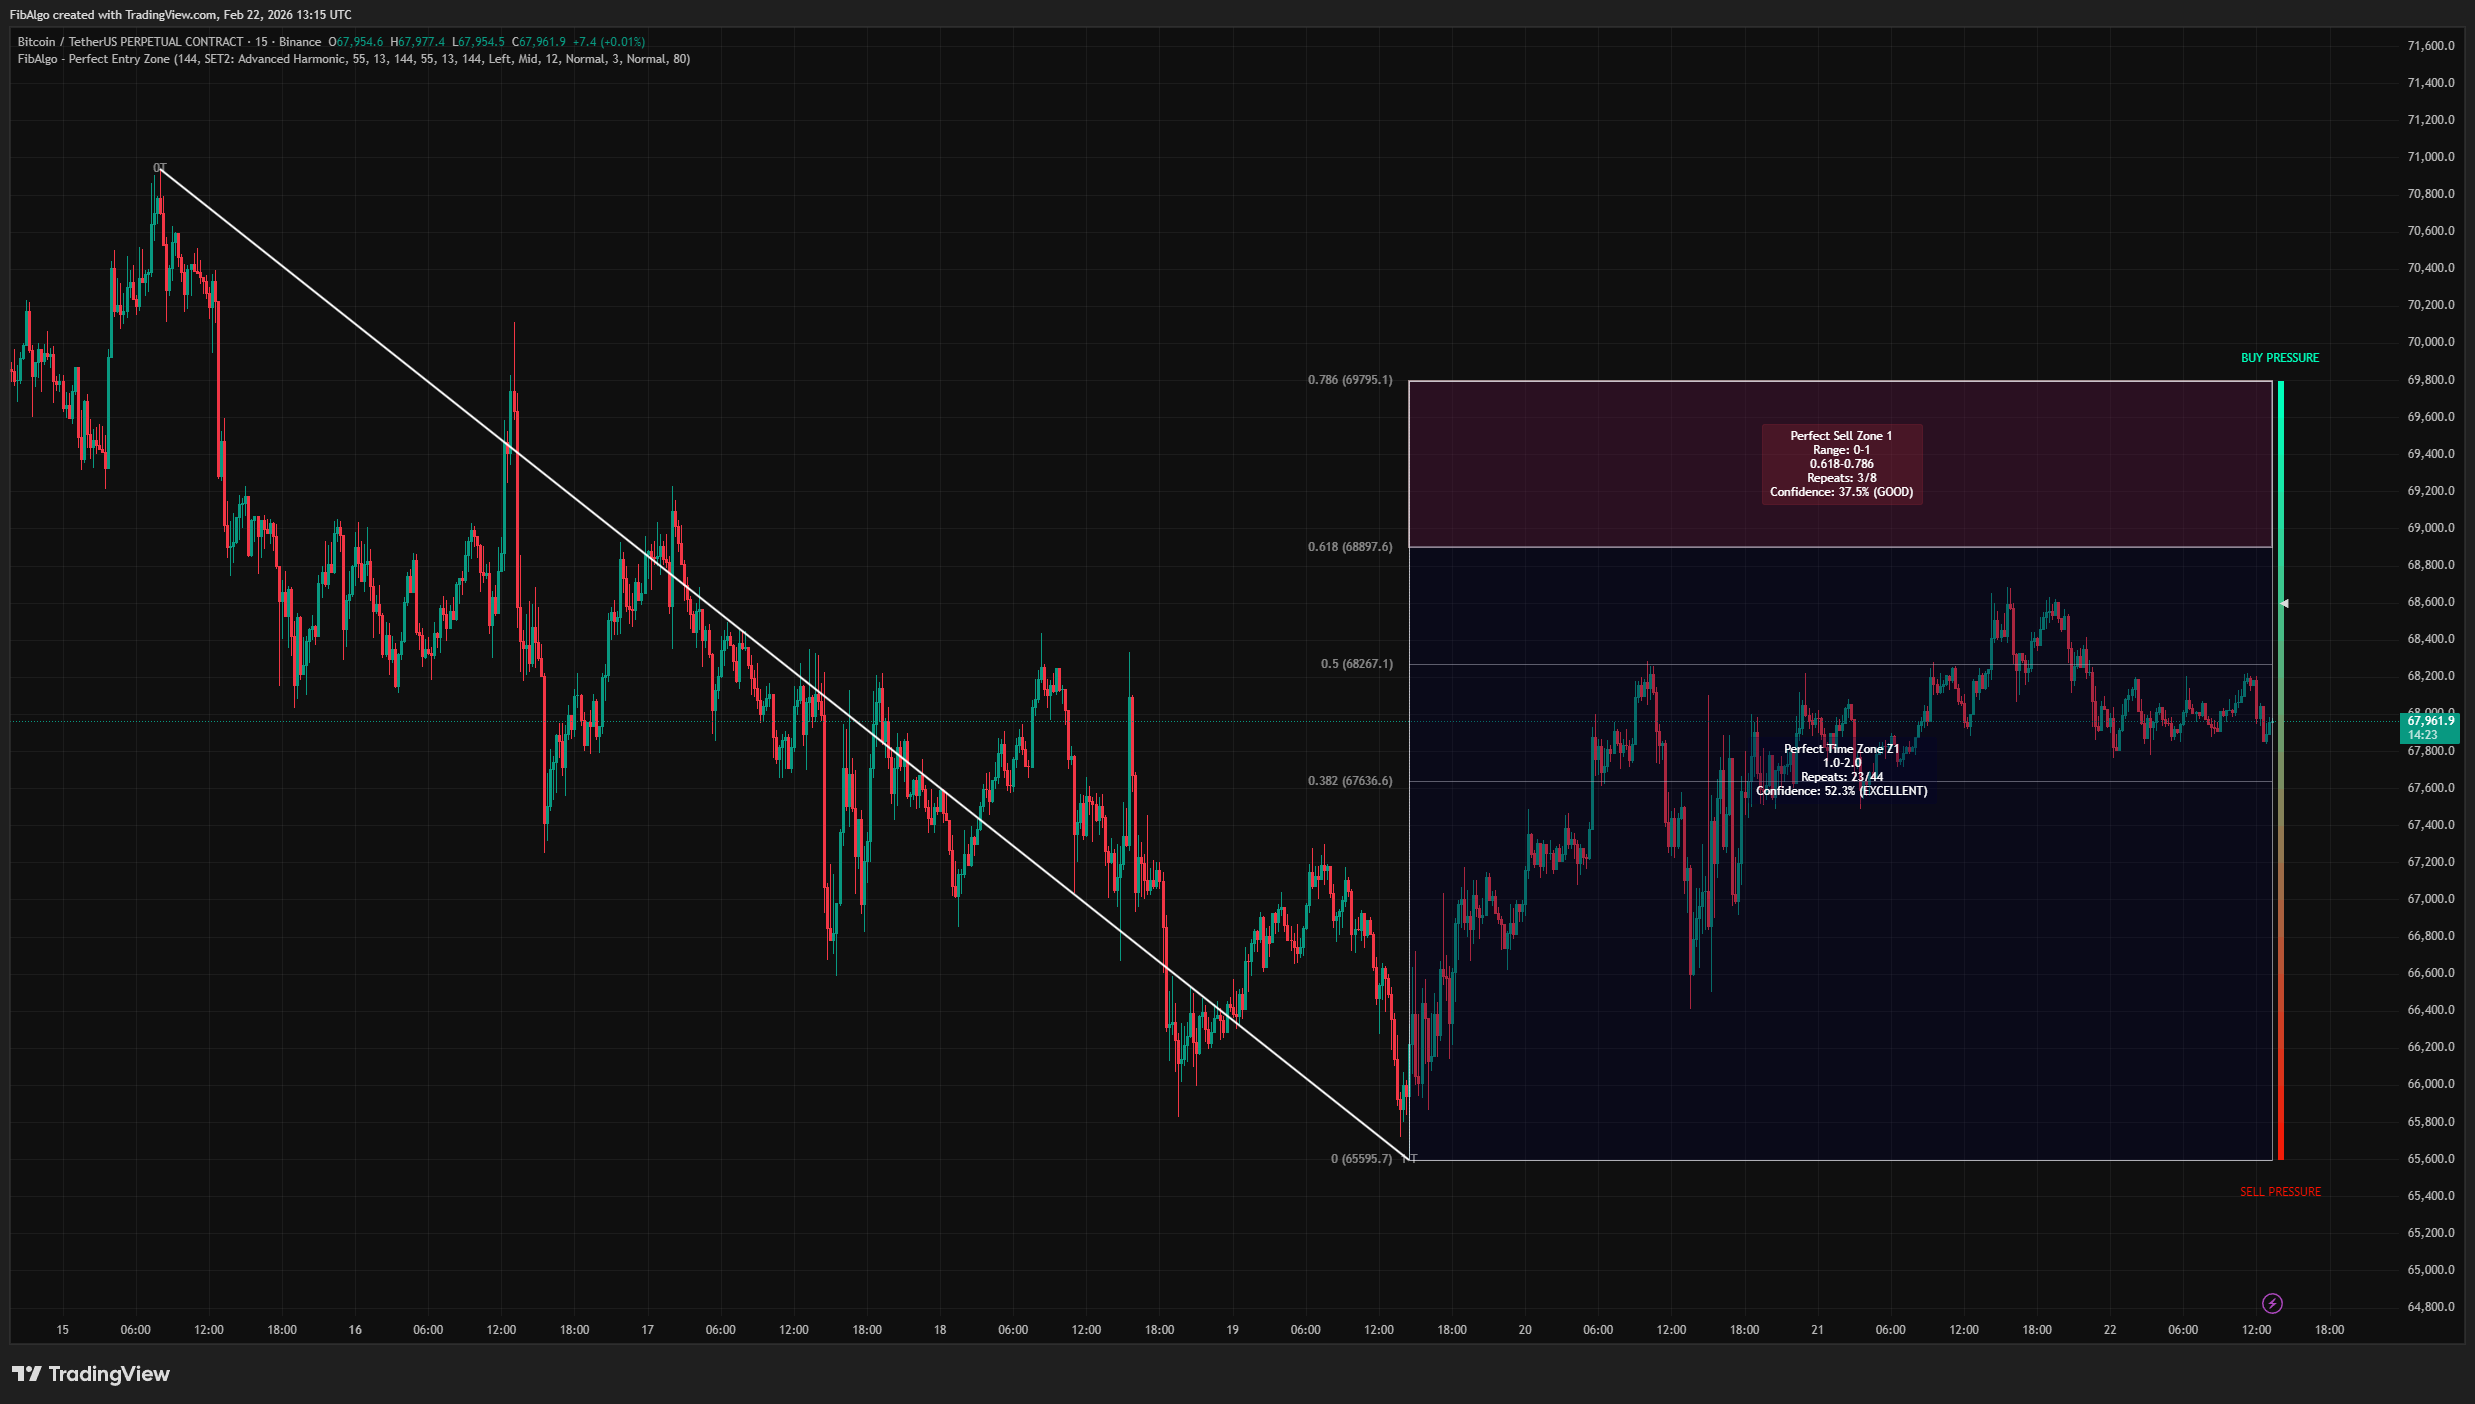
A vertical gauge displayed at the right edge of the chart shows the current buying vs. selling pressure. The calculation uses a volume-weighted intensity formula (INTSUM) that measures where each bar's close falls relative to its high-low range, scaled by volume. The gauge dynamically adjusts its measurement period based on the distance from the last completed pivot.
How does the Perfect Entry Zone indicator work?
The indicator's logic follows a sequential flow:
Step 1 — Pivot Detection
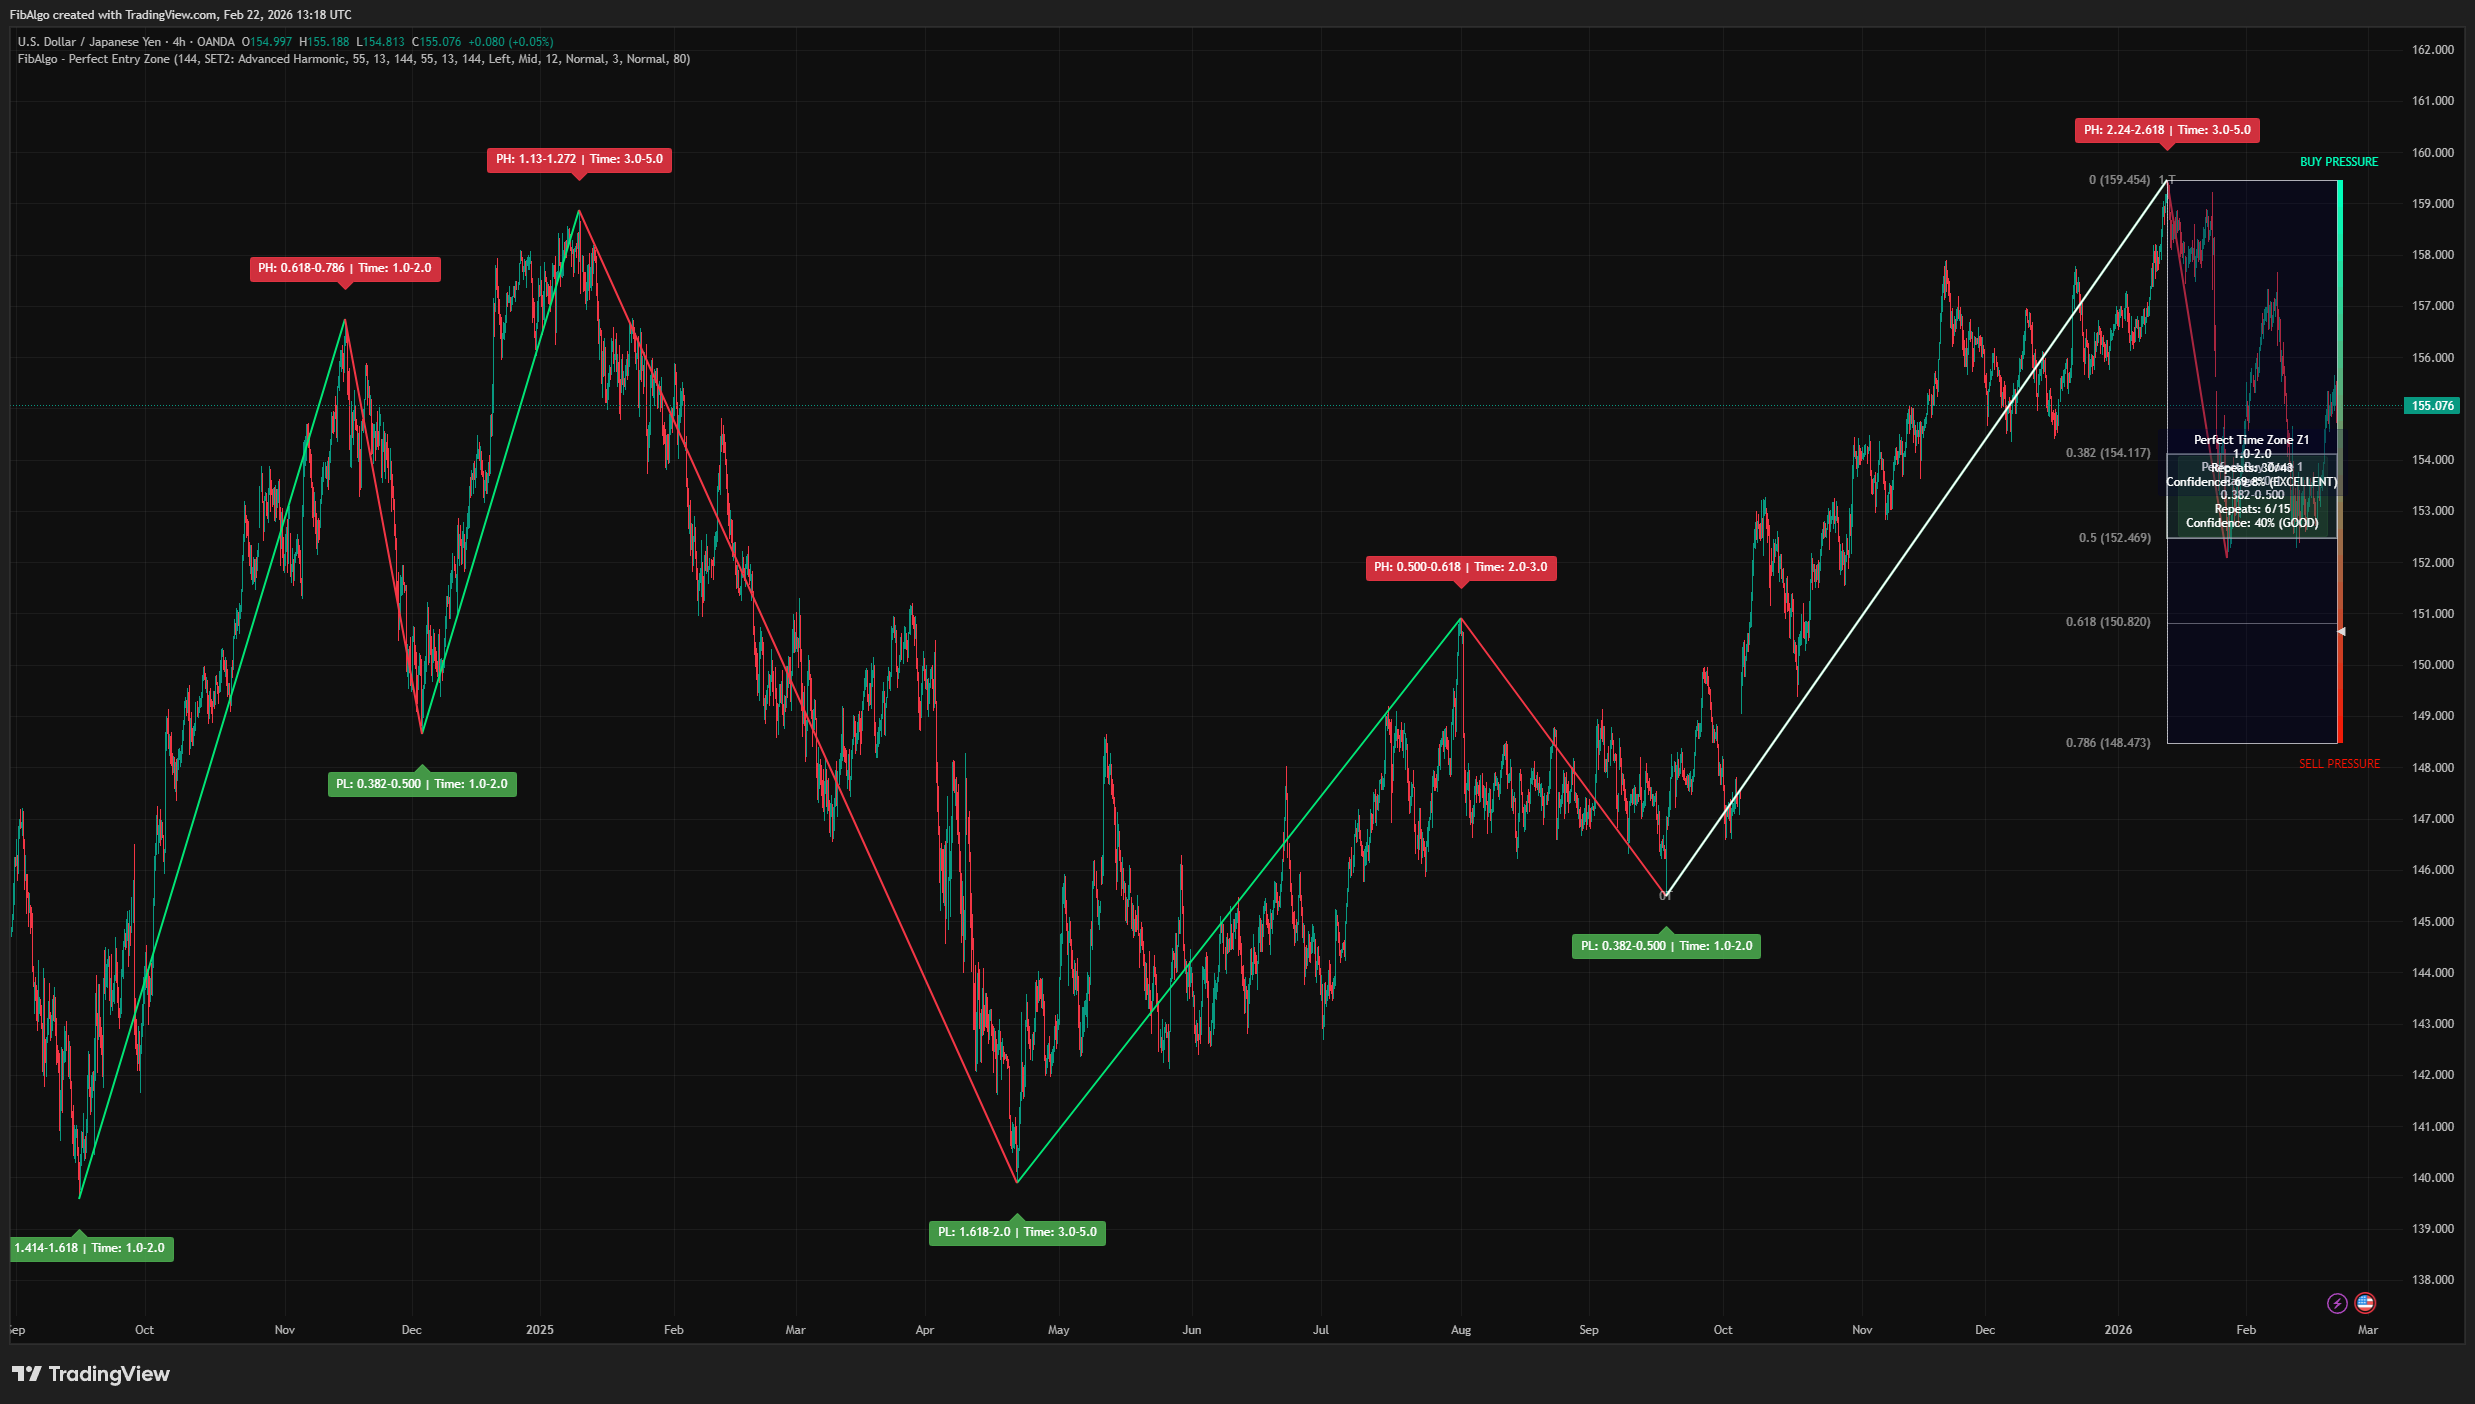
A zigzag algorithm identifies pivot highs and pivot lows using a configurable Fibonacci period (default: 144 bars). Each confirmed pivot is stored with its price, bar index, and type (high or low).
Step 2 — Fibonacci Ratio Calculation
For every set of three consecutive pivots (A → B → C), the indicator calculates the Fibonacci retracement ratio: how far C retraced the A→B move. Each ratio is classified into a predefined range (e.g., "0.382–0.500", "0.618–0.786") and stored separately for pivot highs and pivot lows.
Step 3 — Adaptive Lookback Optimization
The system tests every lookback window from the minimum to the maximum (default: 13 to 144). For each window, it counts how many pivots fell within each zone's Fibonacci range and calculates a confidence score weighted by statistical significance. The lookback that produces the highest combined score is selected automatically.
Step 4 — Zone Drawing
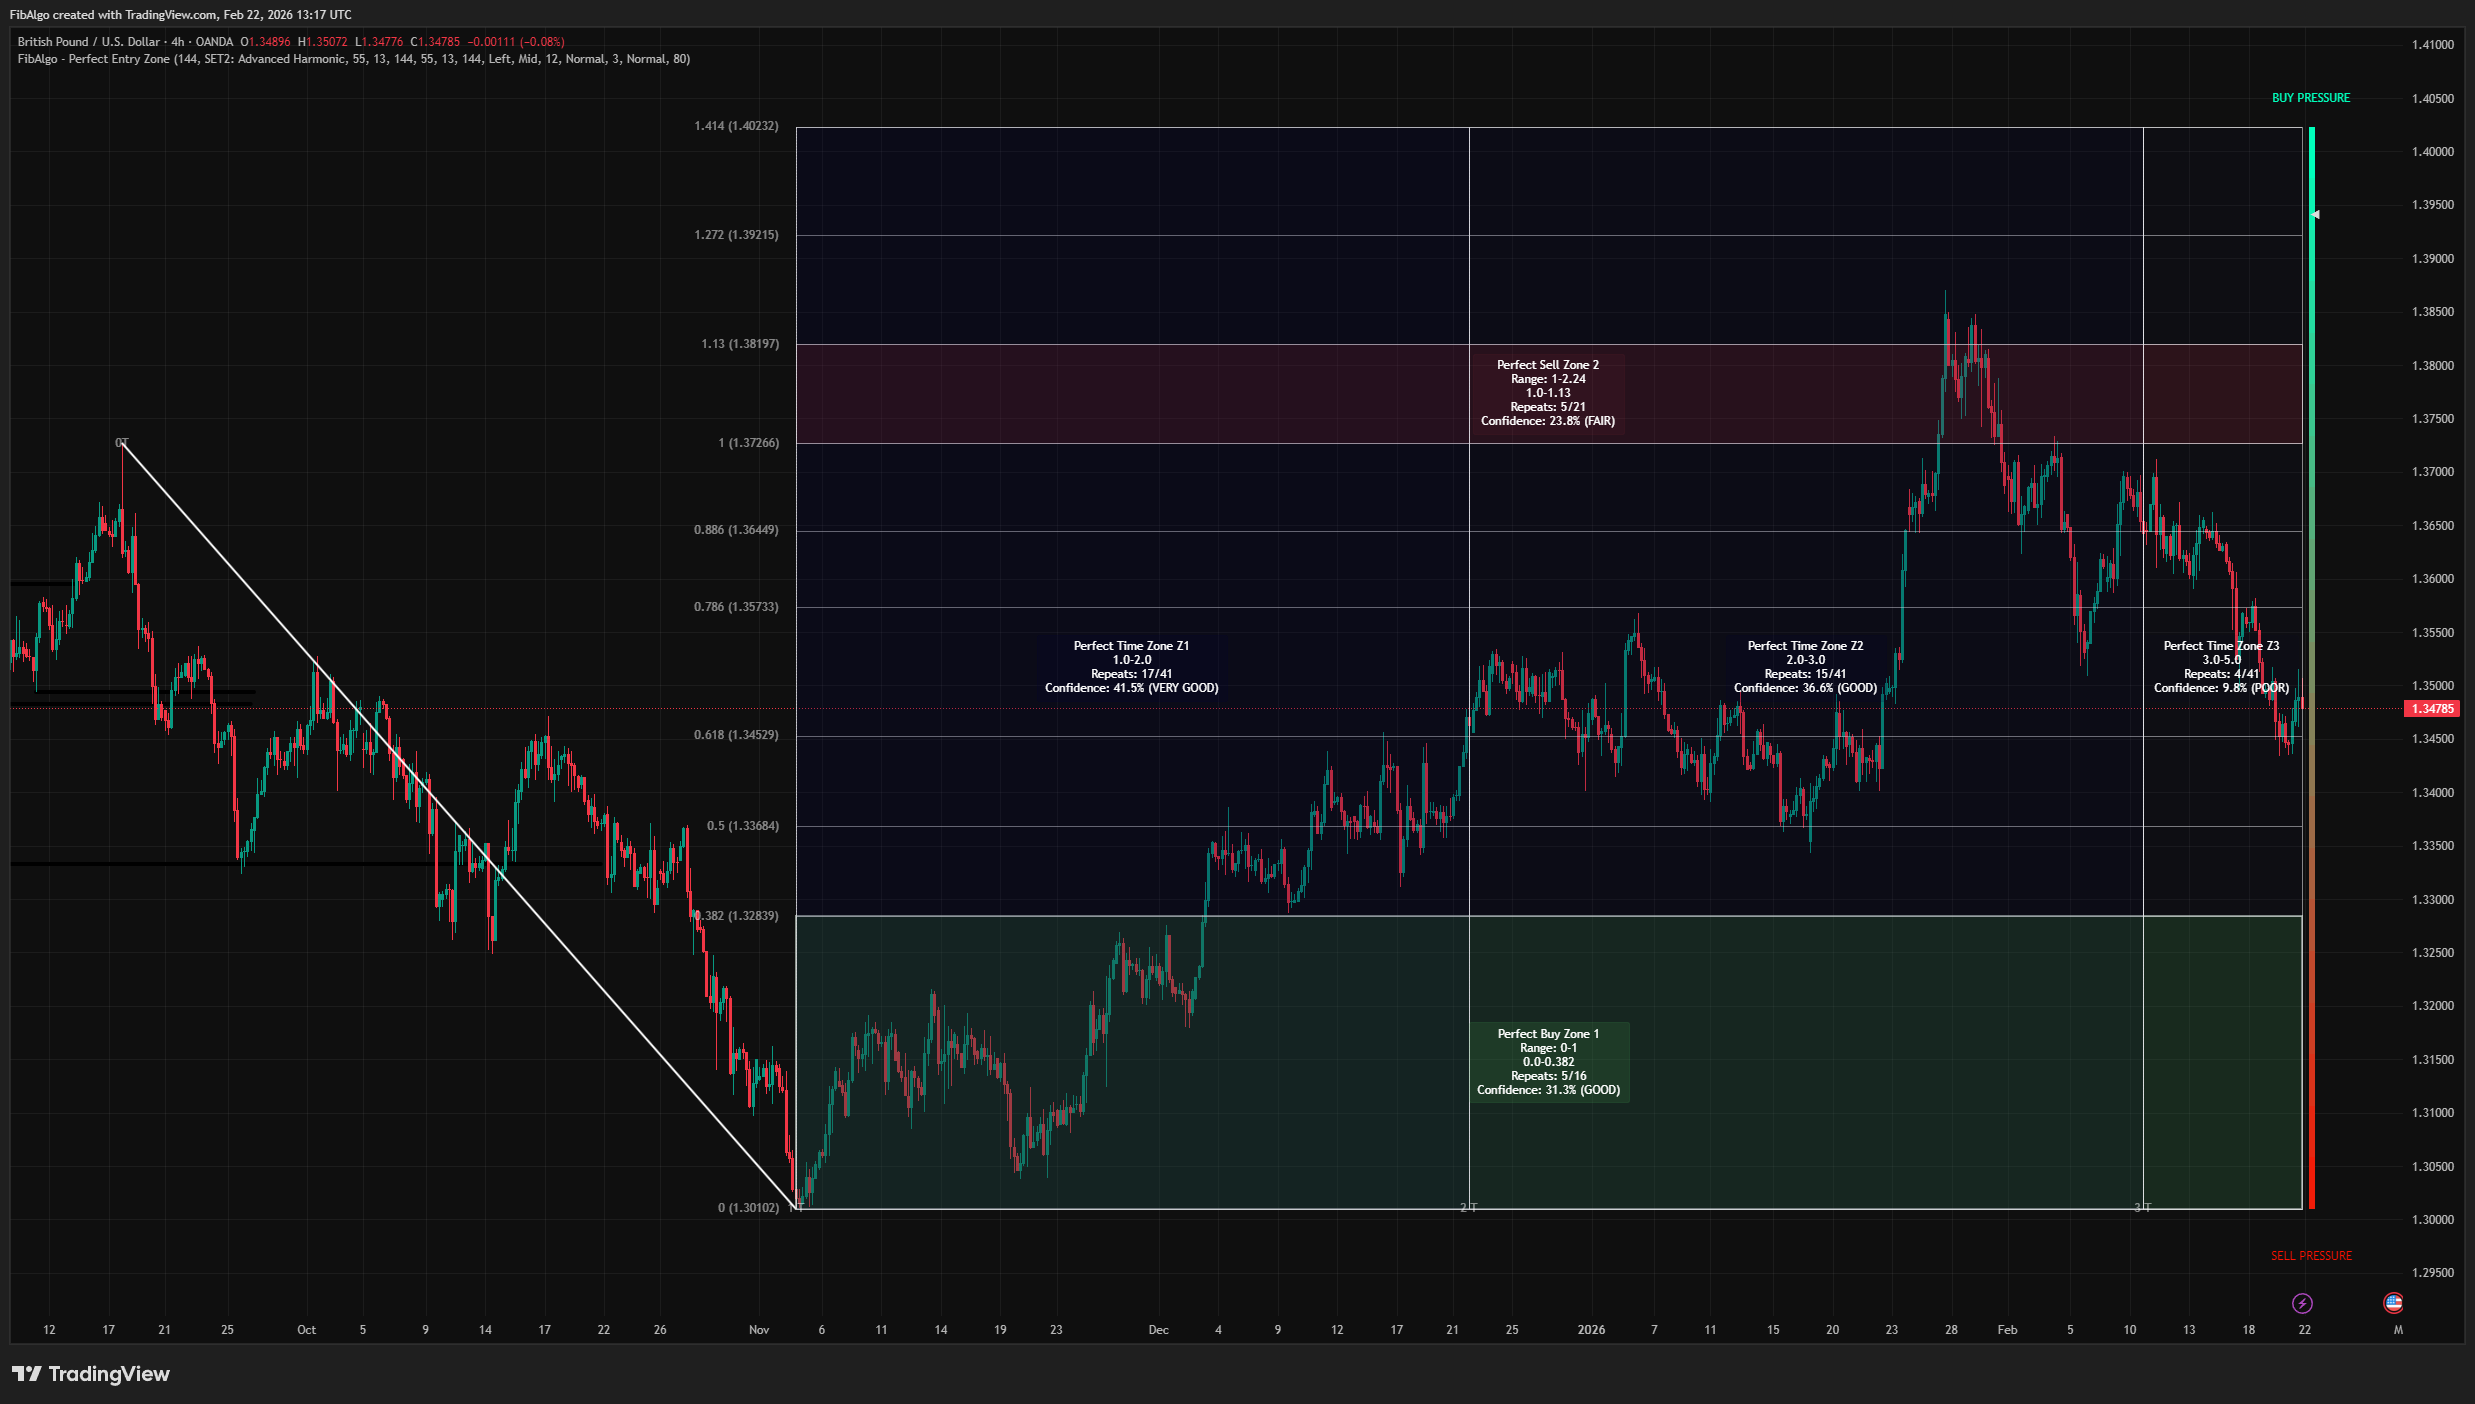
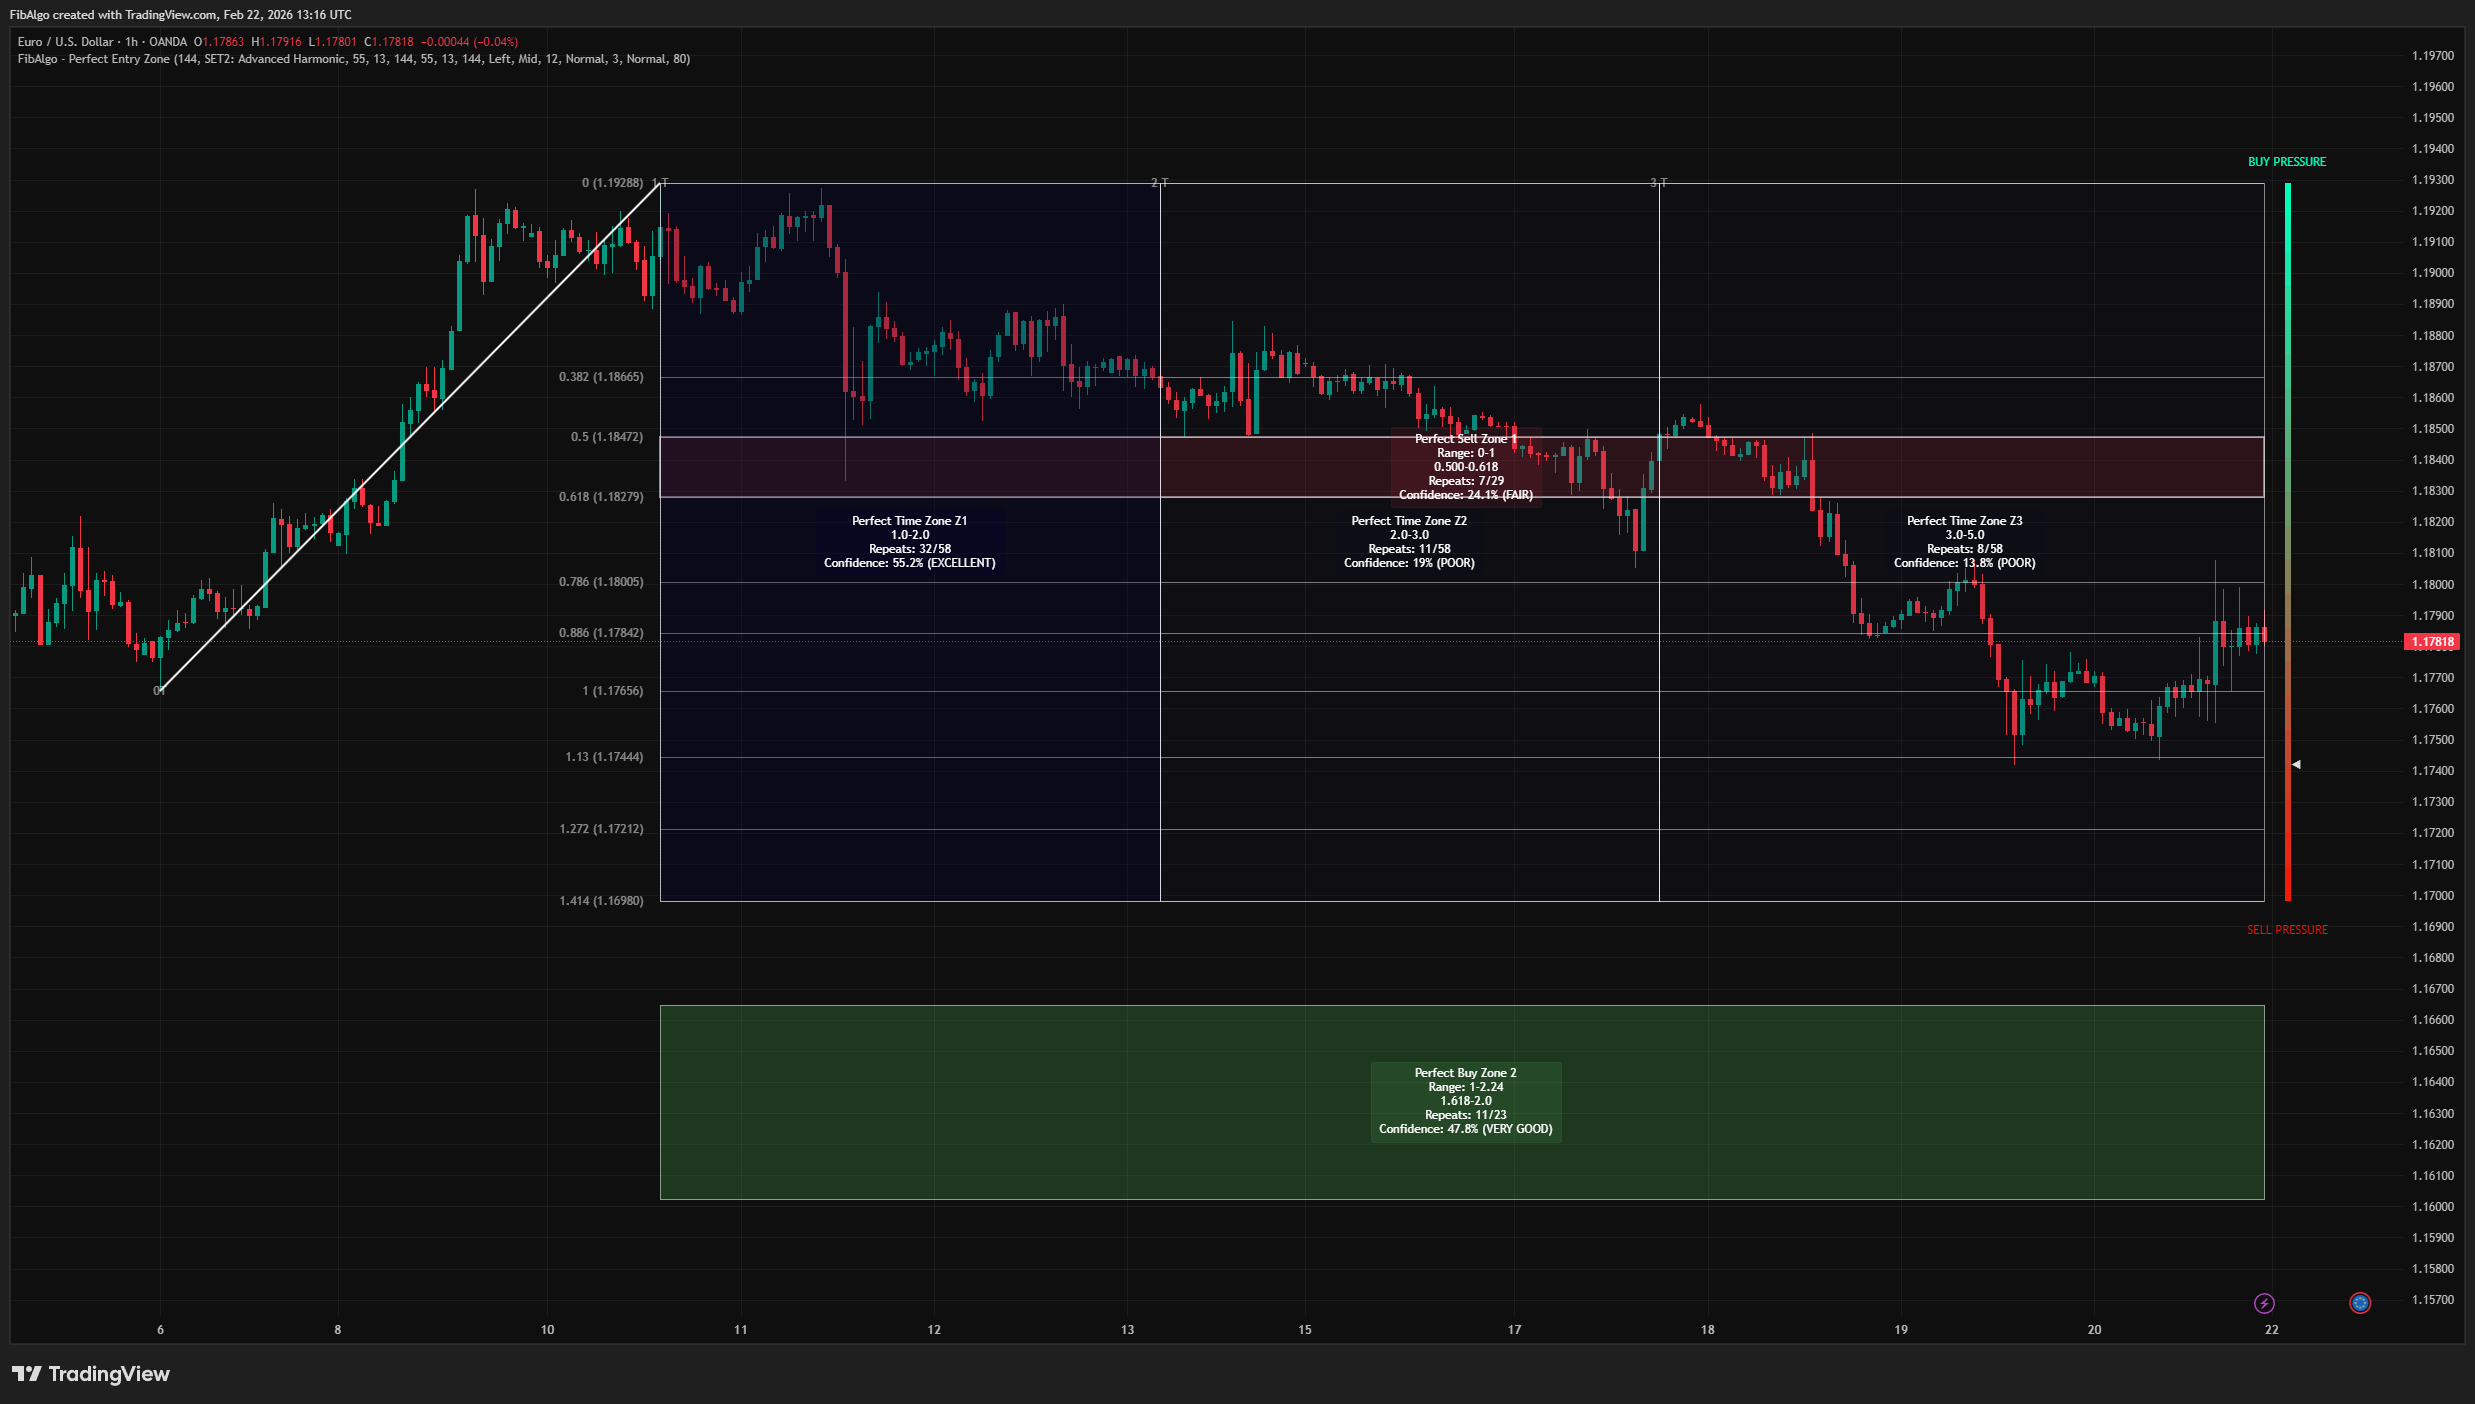
Using the optimal lookback's results, up to three zones are drawn for the current trend direction (buy zones in an uptrend, sell zones in a downtrend). Each zone box displays:
- Zone number and Fibonacci range
- Repeat count (e.g., "Repeats: 8/13")
- Confidence percentage with qualitative label (Low / Medium / High / Very High)
Step 5 — S/R Flip State Management
As price interacts with zones, a state machine tracks each zone's status (red → green → inactive). When price breaks through Zone 1, Zone 2 activates. When Zone 2 breaks, Zone 3 activates and Zone 1 deactivates. This cascading logic models progressive breakout behavior.
Step 6 — Fibonacci Time Zone Projection
The two most recent pivots define the base time unit. Fibonacci numbers (1, 2, 3, 5, 8, 13, 21, 34, 55) are multiplied by this base to project future time lines. An adaptive system (identical in structure to the price system) identifies which time intervals have historically produced new pivots, and draws background-shaded time zones with confidence scores.
Step 7 — Market Pressure Gauge
A volume-weighted intensity sum (INTSUM) is calculated over a dynamic period equal to the distance from the last pivot. The result is normalized against its own high-low range to produce a percentage. A colored vertical bar with a pointer arrow visualizes the current pressure state.
Features
Adaptive S/R Zones
- Three-tier zone hierarchy (Primary, Extension, Deep Extension) drawn automatically.
- Adaptive lookback selects the best-fitting analysis window.
- Manual lookback mode available when adaptive is disabled.
- Zones display repeat counts, confidence scores, and Fibonacci ranges.
- S/R flip logic changes zone colors as price breaks through levels.
Four Fibonacci Analysis Sets
- SET1: Comprehensive Analytical — 30+ levels including deep extensions up to 4.236.
- SET2: Advanced Harmonic — Harmonic pattern ratios (0.886, 1.128, 1.272, etc.).
- SET3: Standard Trend — Classic Fibonacci levels for standard trending markets.
- SET4: Universal Standard — Minimal set focusing on the most significant ratios.
Fibonacci Time Zones
- Time projections based on Fibonacci number series (1, 2, 3, 5, 8, 13, 21, 34, 55).
- Adaptive time lookback with independent confidence scoring.
- Background-shaded zones highlight historically recurring timing windows.
- Time zone labels with repeat counts and confidence percentages.
Market Pressure Gauge
- Volume-weighted buying/selling pressure visualization.
- Dynamic measurement period tied to the last pivot distance.
- Color-gradient gauge with a real-time pointer.
- Customizable bullish/bearish colors and label sizes.
Comprehensive Alert System
- Zone entry and exit alerts for all three S/R zones.
- Time zone entry and exit alerts for all three time zones.
- Trend change alerts (bullish/bearish direction changes).
- Extreme pressure alerts (bullish and bearish thresholds).
- All alerts include ticker, timeframe, price, confidence, and zone boundaries.
- All alerts are individually toggleable.
Visualization Controls
- Zigzag pivot lines with customizable colors.
- Trend line connecting the two most recent pivots.
- Fibonacci level lines and labels with price display.
- Adjustable font sizes, label positions, and box label alignment.
- Unified color control for levels, time zones, and Fibonacci values.
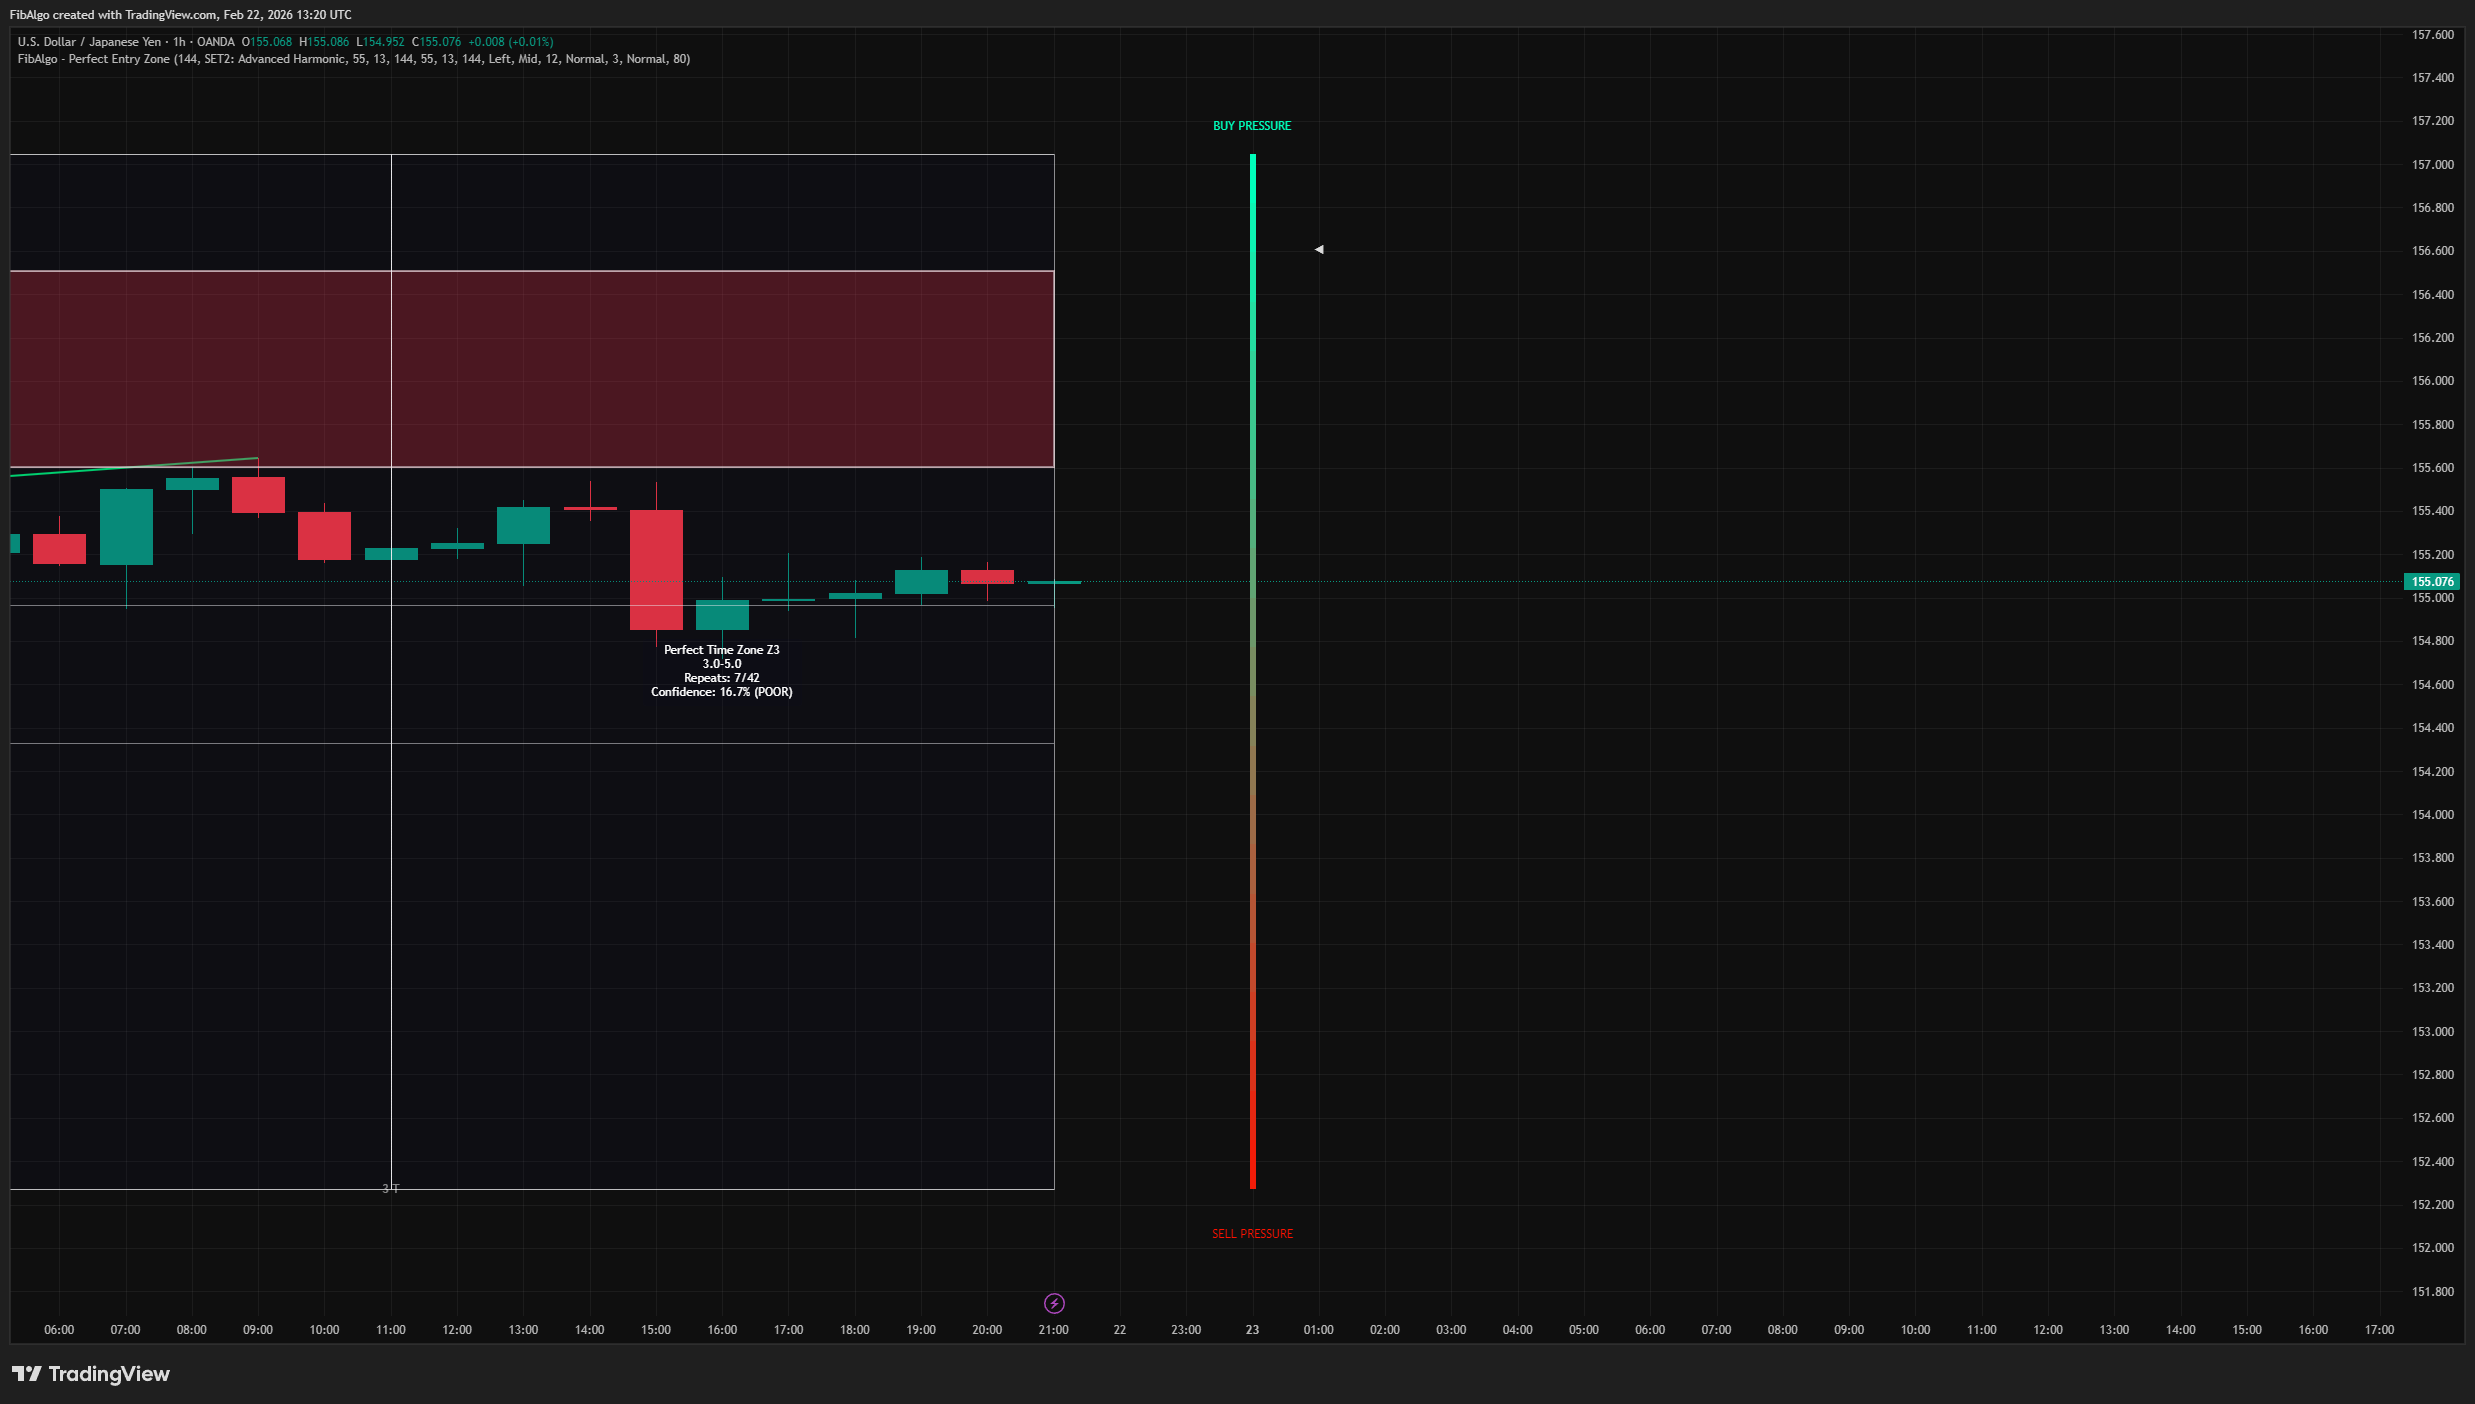
How to use the Perfect Entry Zone indicator
Getting Started
Add the indicator to any chart. The default settings (Fibonacci Period: 144, Analysis Set: SET2 Advanced Harmonic, Adaptive enabled) work well for most liquid instruments on 1H to 4H timeframes.
Reading the Chart
- Red zones = Active resistance (sell zones) or support (buy zones) — potential reversal areas.
- Green zones = Broken zones — former resistance/support that price has exceeded.
- Purple shaded areas = Time zones — historically recurring timing windows where pivots have formed before.
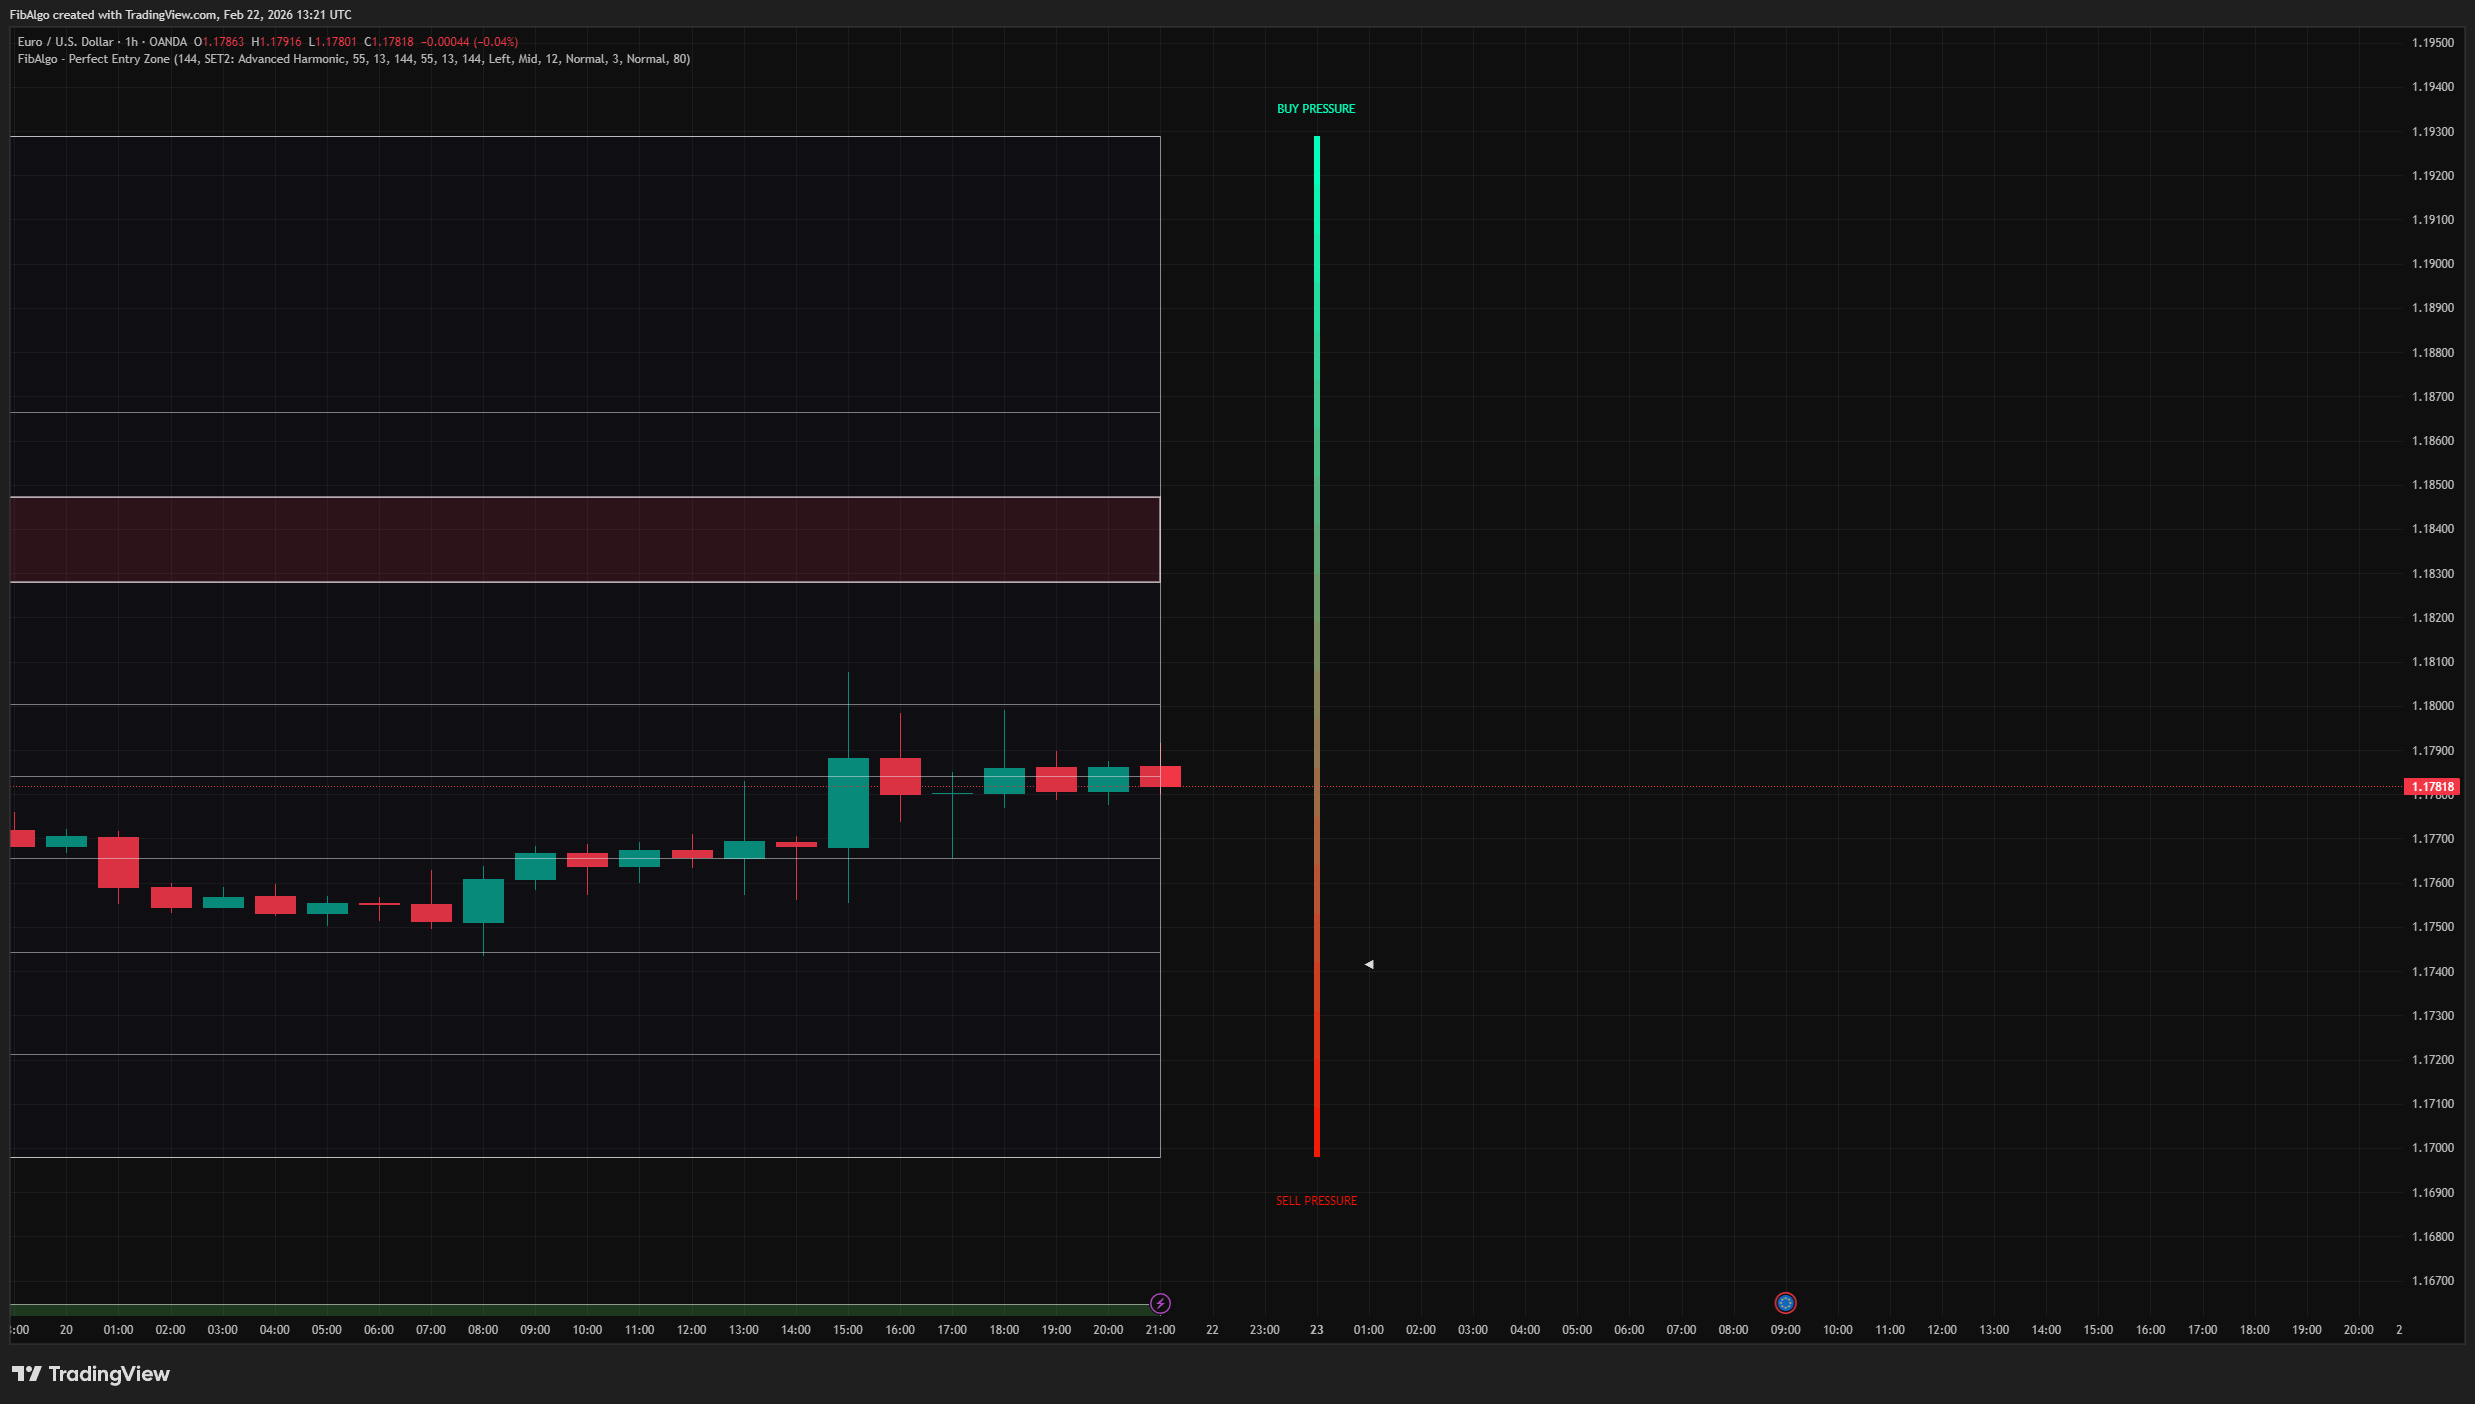
- Vertical gauge = Market pressure — pointer near top indicates buying pressure, near bottom indicates selling pressure.
- White lines = Fibonacci retracement levels from the current swing.
Key Inputs
- Fibonacci Period (21–200): Controls the zigzag sensitivity. Higher values detect larger swings.
- Fibonacci Analysis Set: Choose between four predefined level sets for different trading styles.
- Enable Adaptive S/R Lookback: When on, the system automatically finds the optimal analysis window. When off, uses the manual lookback value.
- Show Time Zone: Toggles the Fibonacci time zone backgrounds and labels.
- Show Market Pressure Gauge: Toggles the vertical pressure visualization.
Suggested Workflow
1. Identify the current trend direction from the zigzag and trend line.
2. Observe which zones are active (red) — these are potential reversal areas. 3. Check the zone's confidence and repeat count. Higher values indicate more frequent historical occurrence within that range. 4. If a time zone overlaps with a price zone, the confluence increases the area's significance. 5. Use the pressure gauge as secondary confirmation — extreme readings may signal exhaustion. 6. Enable alerts for zone entries to receive notifications without watching the chart continuously.
Limitations
- This indicator is a technical analysis tool, not a trading system. It does not generate buy/sell orders.
- Zone confidence is based on historical pivot patterns. Past retracement behavior does not guarantee future reversals.
- The adaptive lookback optimization tests multiple windows on each new pivot. On instruments with very high pivot frequency, this may increase computation time.
- Time zones are projections based on historical Fibonacci ratios between pivots. Market structure can change, making time projections less reliable during regime shifts.
- The market pressure gauge uses volume data. On instruments with unreliable or absent volume information, the gauge may produce misleading readings.
- Zone accuracy depends on overall market conditions. Choppy, range-bound markets may produce frequent zone state changes.
The zigzag pivot detection algorithm and Fibonacci retracement concepts are based on well-established technical analysis principles. The adaptive lookback optimization, weighted confidence scoring, three-zone S/R hierarchy with flip logic, Fibonacci time zone system, market pressure gauge, and the alert system are original contributions.
Trading involves risk. This indicator is an analysis tool, not financial advice: use it alongside your own analysis and risk management.
Frequently Asked Questions
What is the Perfect Entry Zone indicator?
Adaptive Fibonacci-based support and resistance indicator for TradingView that identifies recurring retracement zones and projects Fibonacci time zones.
Is Perfect Entry Zone free to use on TradingView?
Perfect Entry Zone is an exclusive indicator included in the FibAlgo Ultimate and Lifetime plans. Visit fibalgo.com for pricing details.
How do I add Perfect Entry Zone to my TradingView chart?
Subscribe to FibAlgo, then search for "Perfect Entry Zone" in the TradingView Indicators panel. Once your account is linked, the indicator will be available in your invite-only scripts.
What trading strategies work best with Perfect Entry Zone?
Perfect Entry Zone suits pullback entries in the direction of the trend. Read the trend from the zigzag and the trend line, treat the active red zones as potential reversal areas and give priority to zones with a high confidence percentage and repeat count. A Fibonacci time zone that overlaps a price zone adds confluence, and the market pressure gauge serves as secondary confirmation, where extreme readings can signal exhaustion. The defaults are tuned for 1H to 4H charts, and zone entry alerts save you watching the chart.
Learn More
- Fibonacci Trading Strategy: The Complete GuideMaster Fibonacci retracement, extension, and time zones for crypto and forex trading. Learn how institutional traders use Fibonacci levels.
- AI Trading Indicators: How Machine Learning Changes Technical AnalysisHow AI-assisted trading indicators work: machine-learning pattern recognition, adaptive parameters and their limits, explained for traders.
- Best TradingView Indicators: Top 15 Tools Every Trader NeedsComprehensive ranking of the best TradingView indicators for crypto, forex, and stocks. Includes setup guides, settings optimization, and strategy combinations.
Unlock exclusive FibAlgo tools
Get every exclusive FibAlgo indicator on TradingView with Ultimate or Lifetime.
Related indicators
View All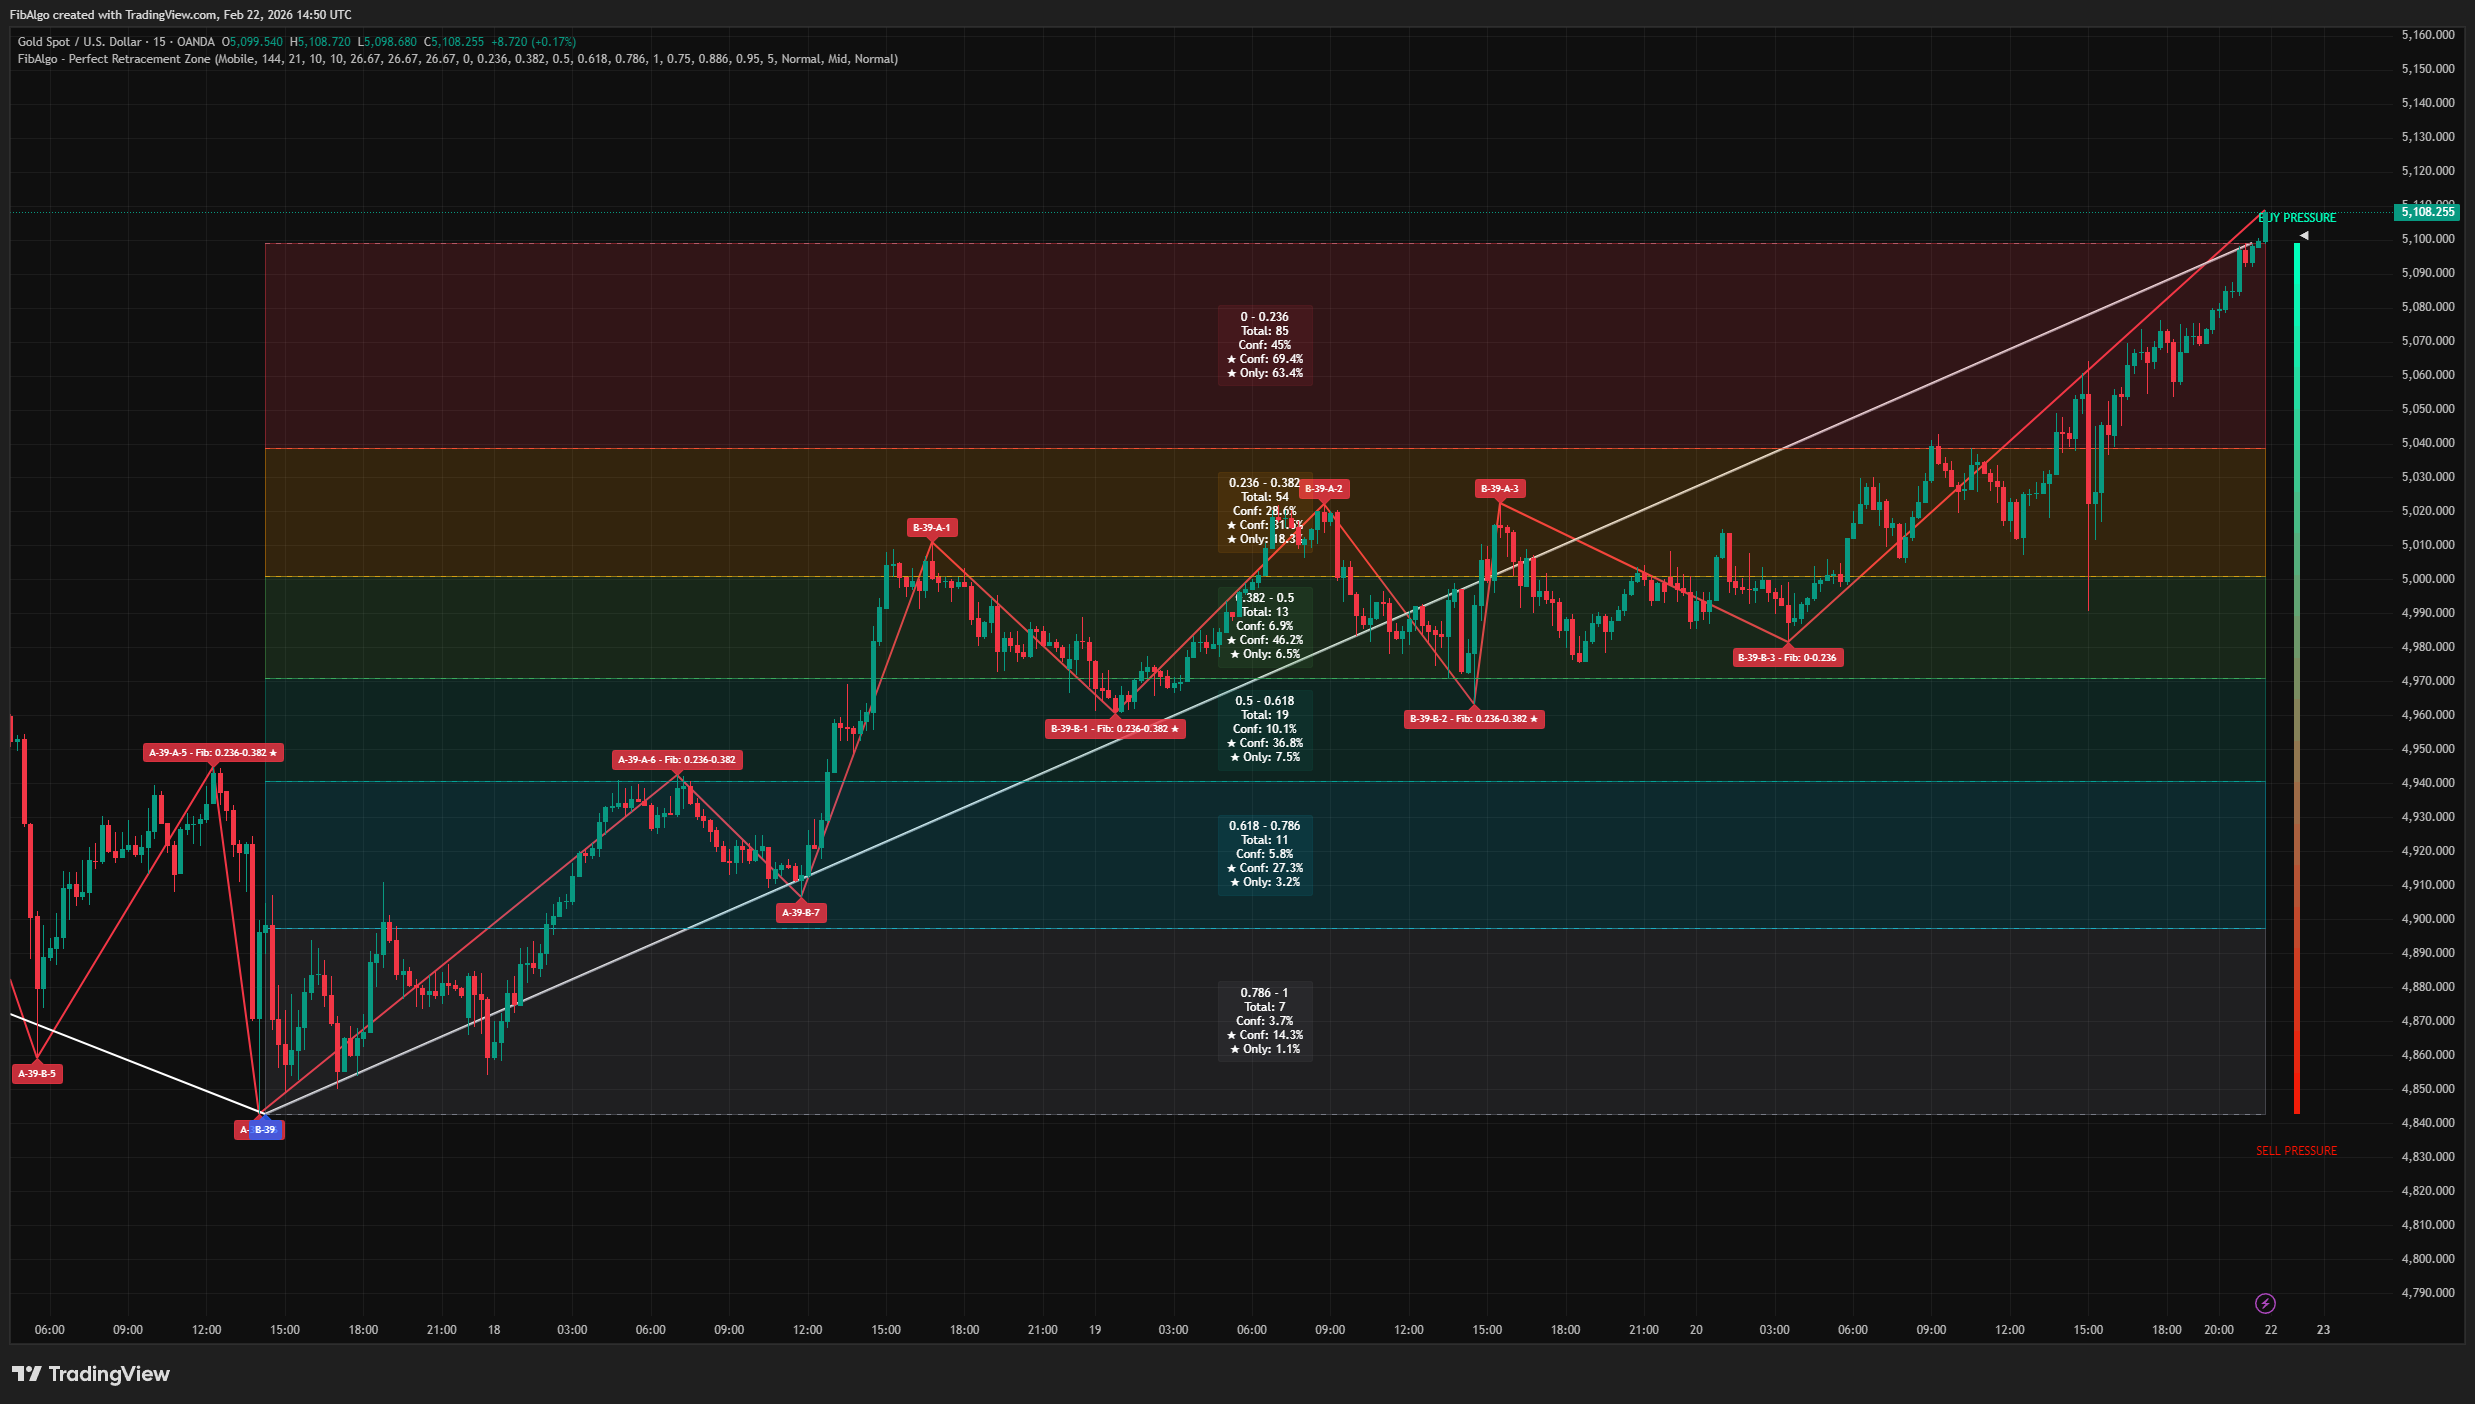
Perfect Retracement Zone
Dynamic Fibonacci retracement indicator for TradingView that identifies statistically significant support and resistance zones using pivot frequency analysis.
See Details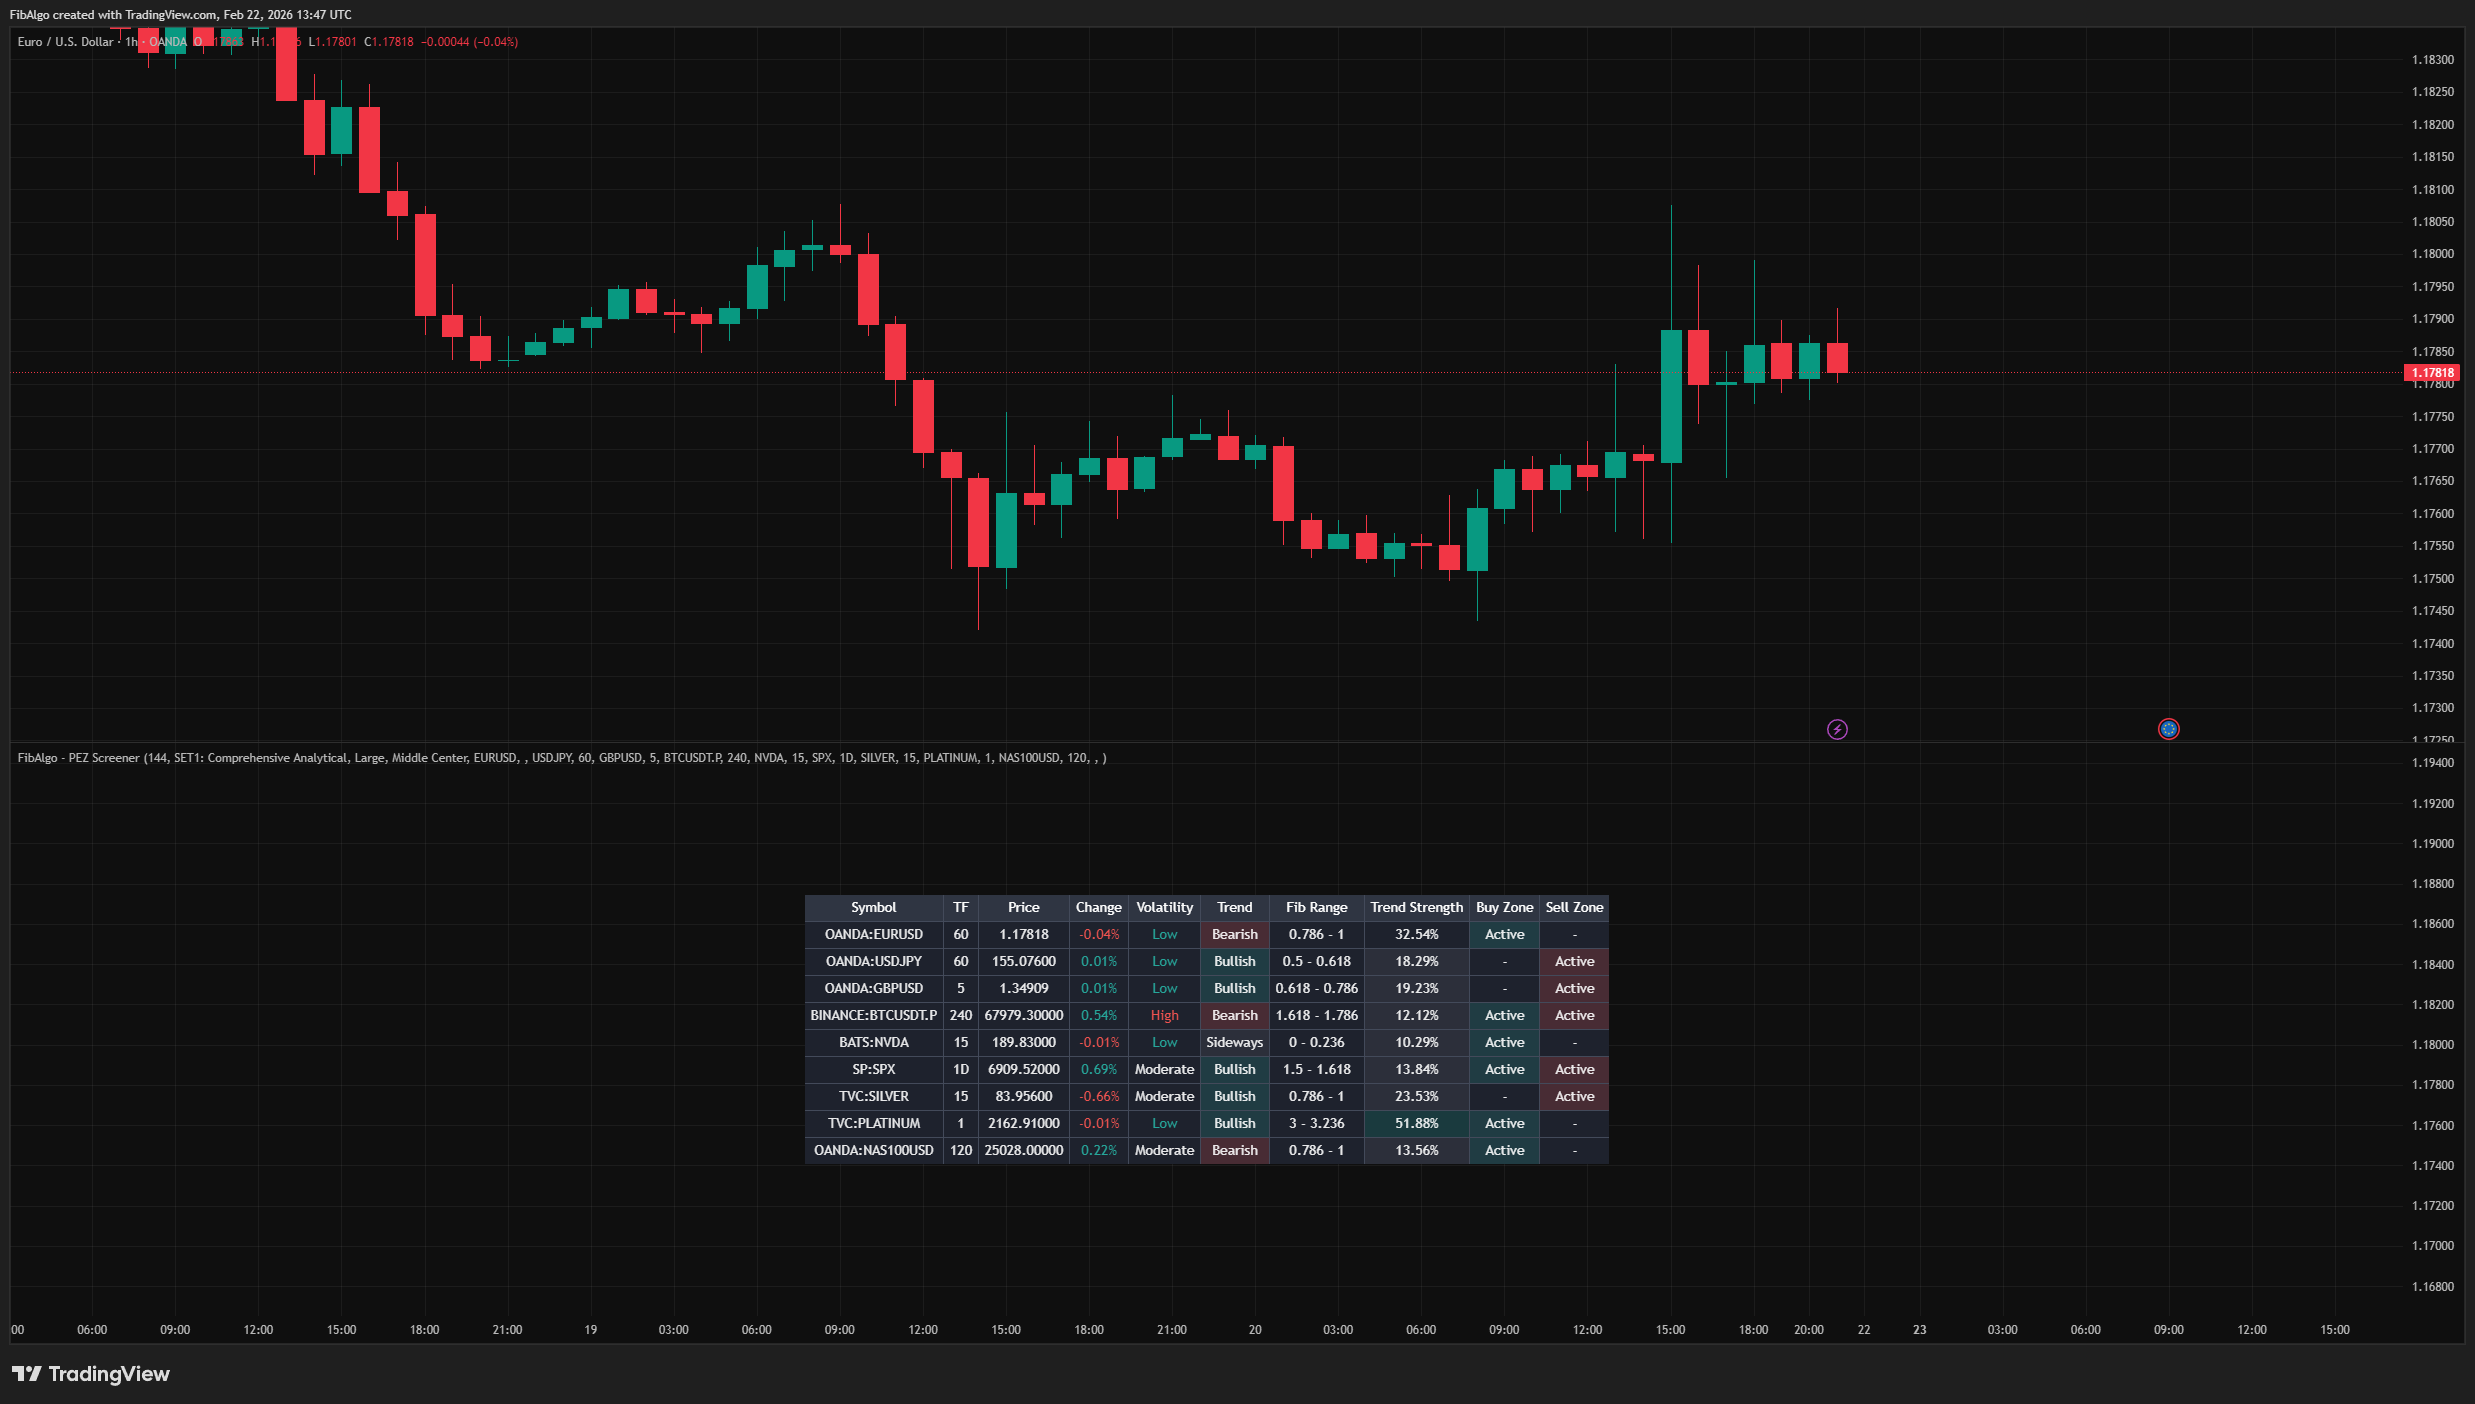
Screener (PEZ)
Multi-symbol TradingView screener that monitors up to 10 symbols simultaneously with Fibonacci range positions, trend direction, and zone status.
See Details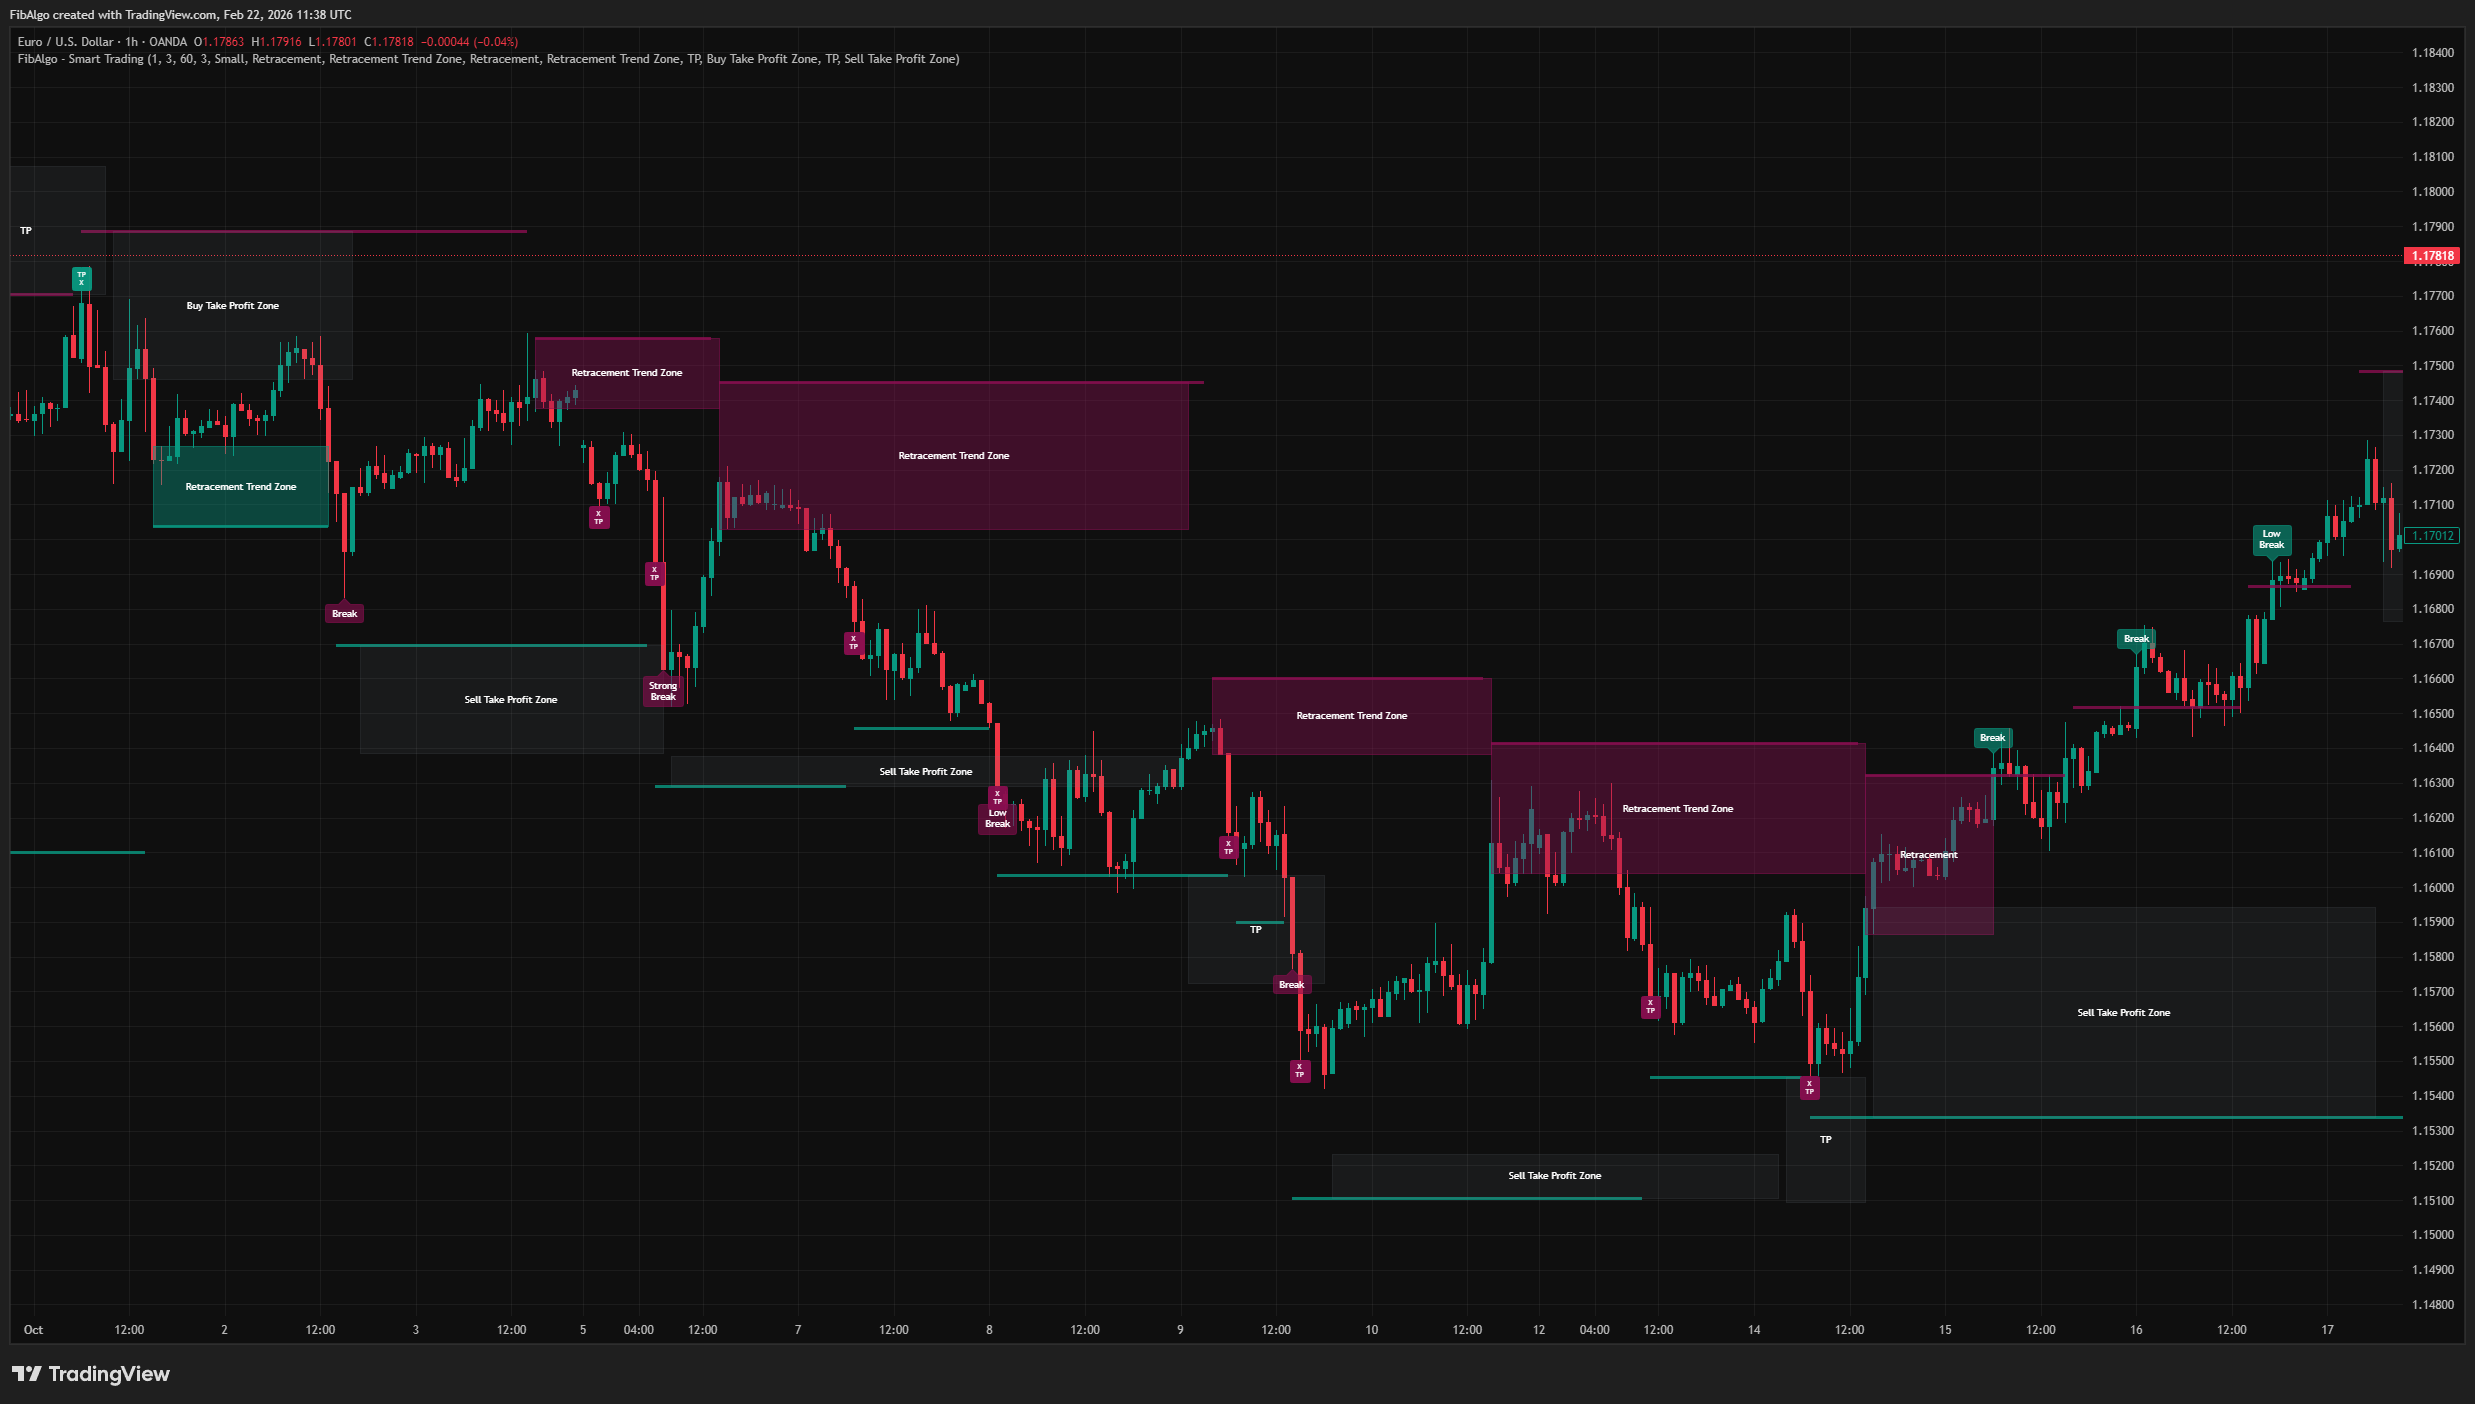
Smart Trading
Volatility-adaptive trend analysis indicator for TradingView that identifies dynamic support and resistance levels with breakout classification and take-profit zones.
See Details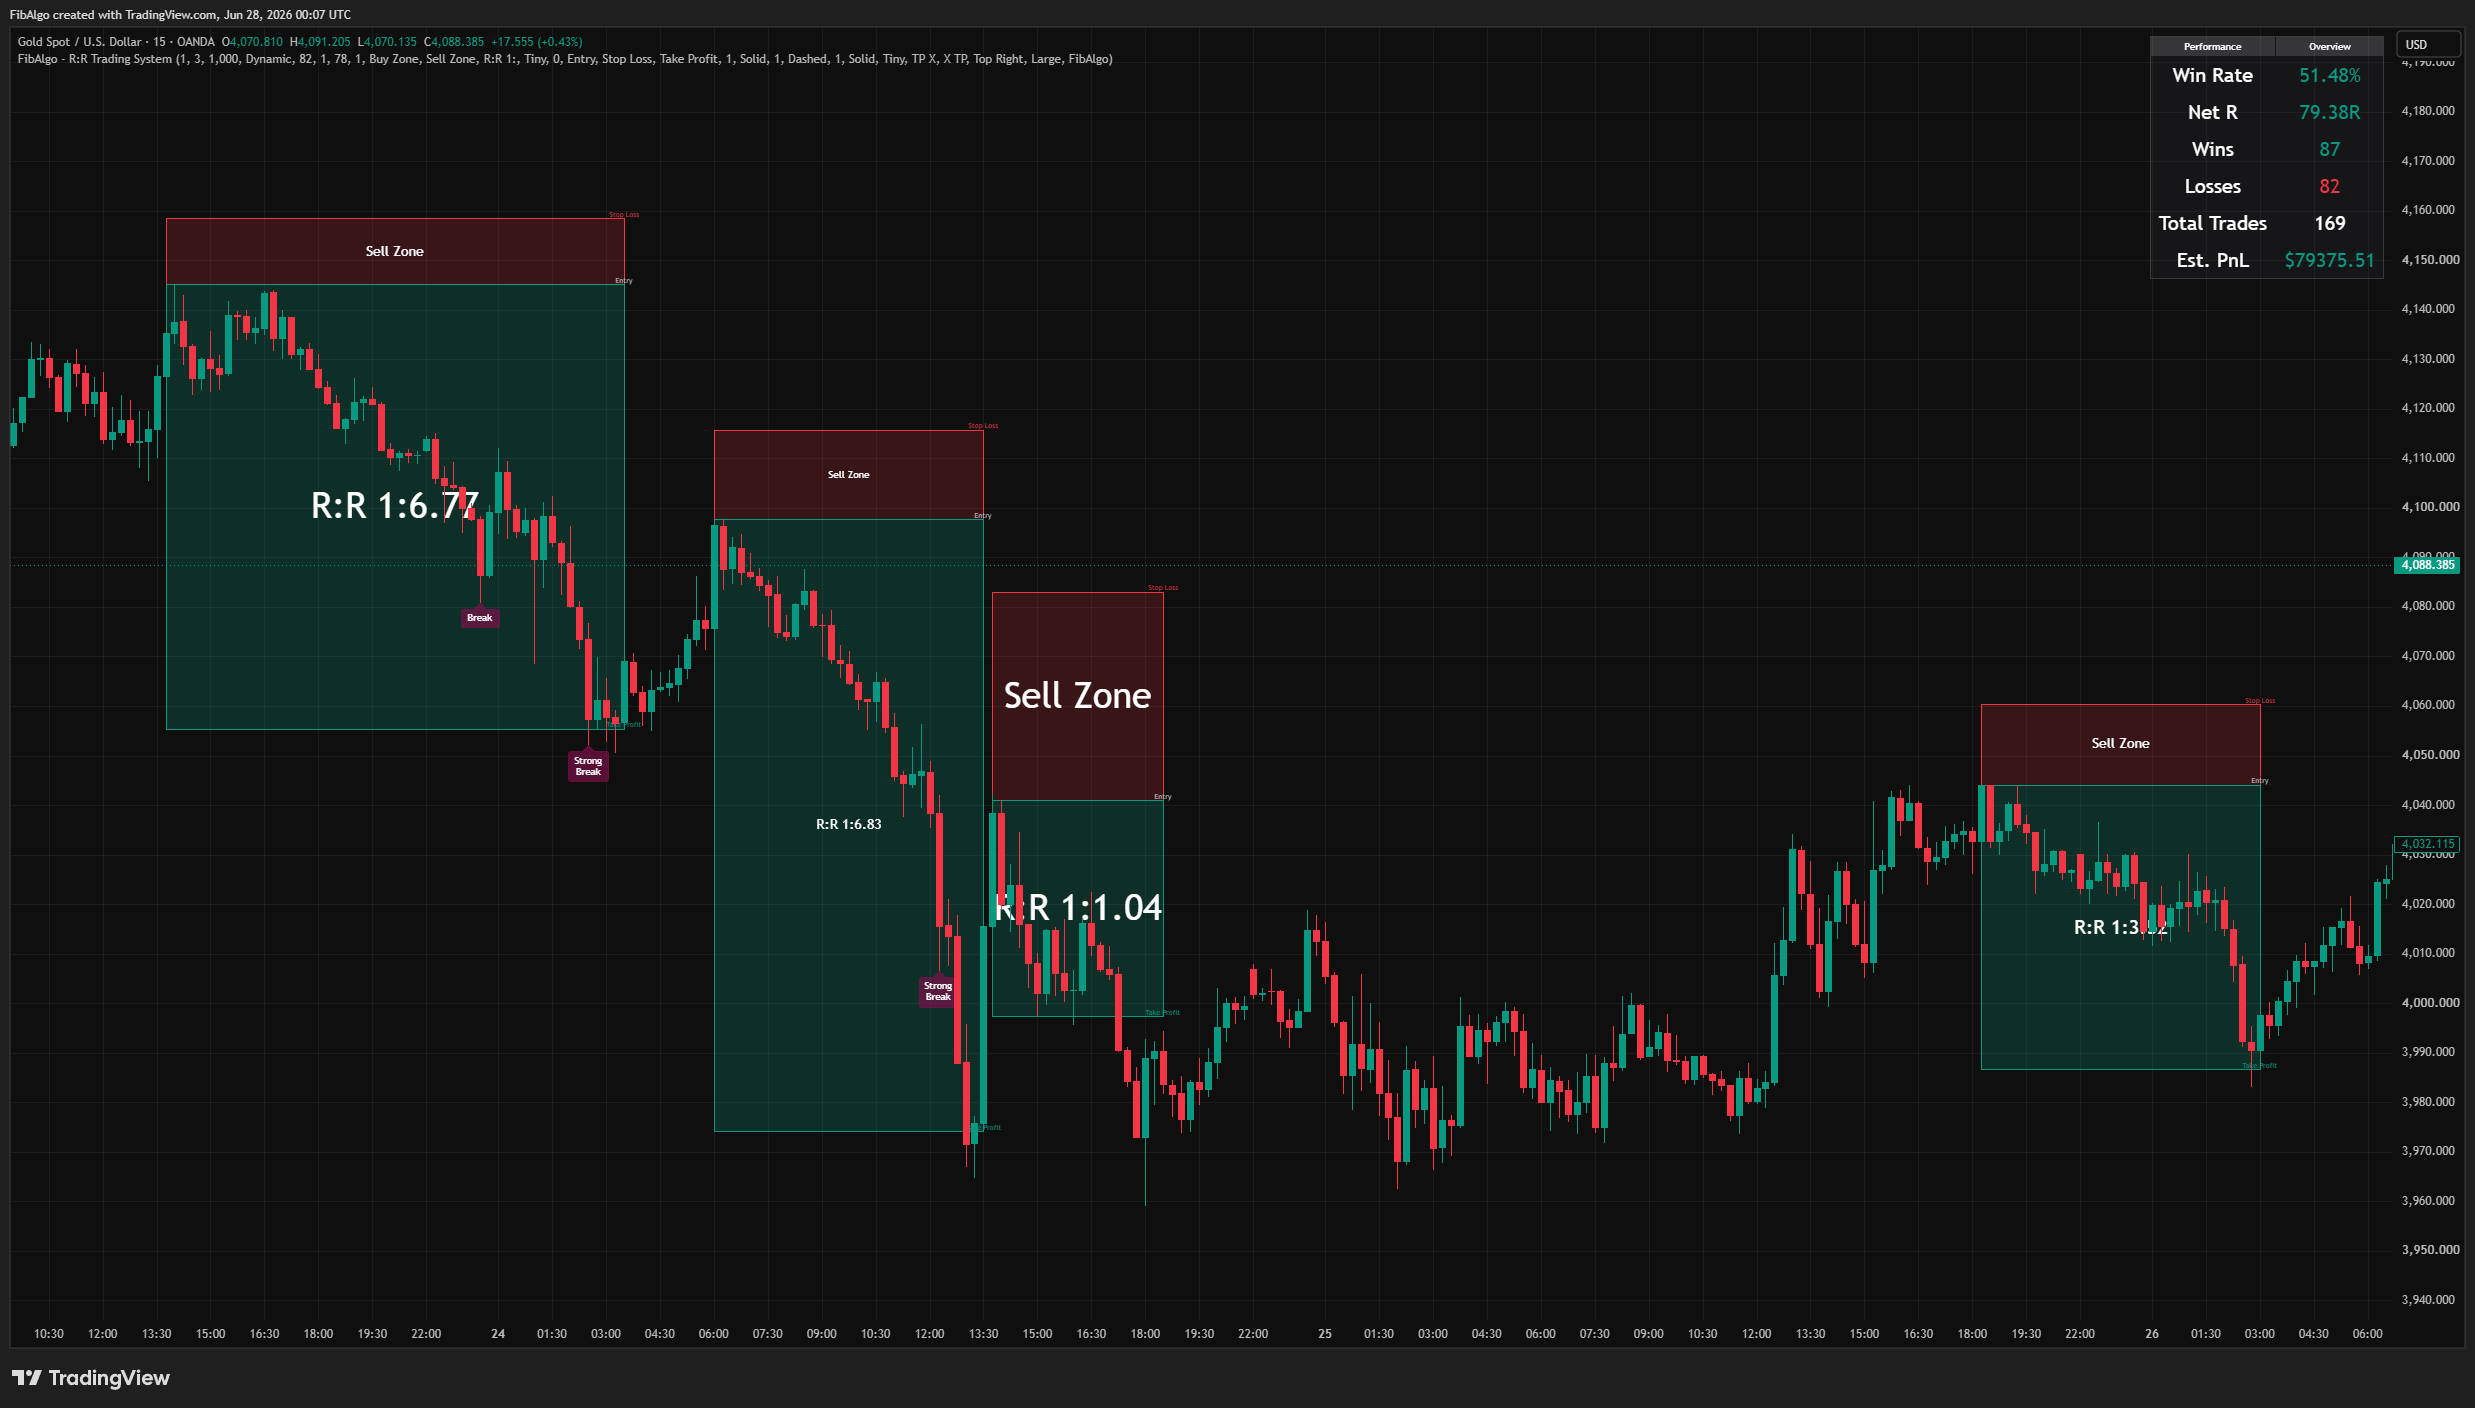
R:R Trading System
Volatility-adaptive support and resistance indicator for TradingView that classifies breakout strength, draws retracement entry zones, and auto-frames a complete risk-to-reward setup with live performance tracking.
See Details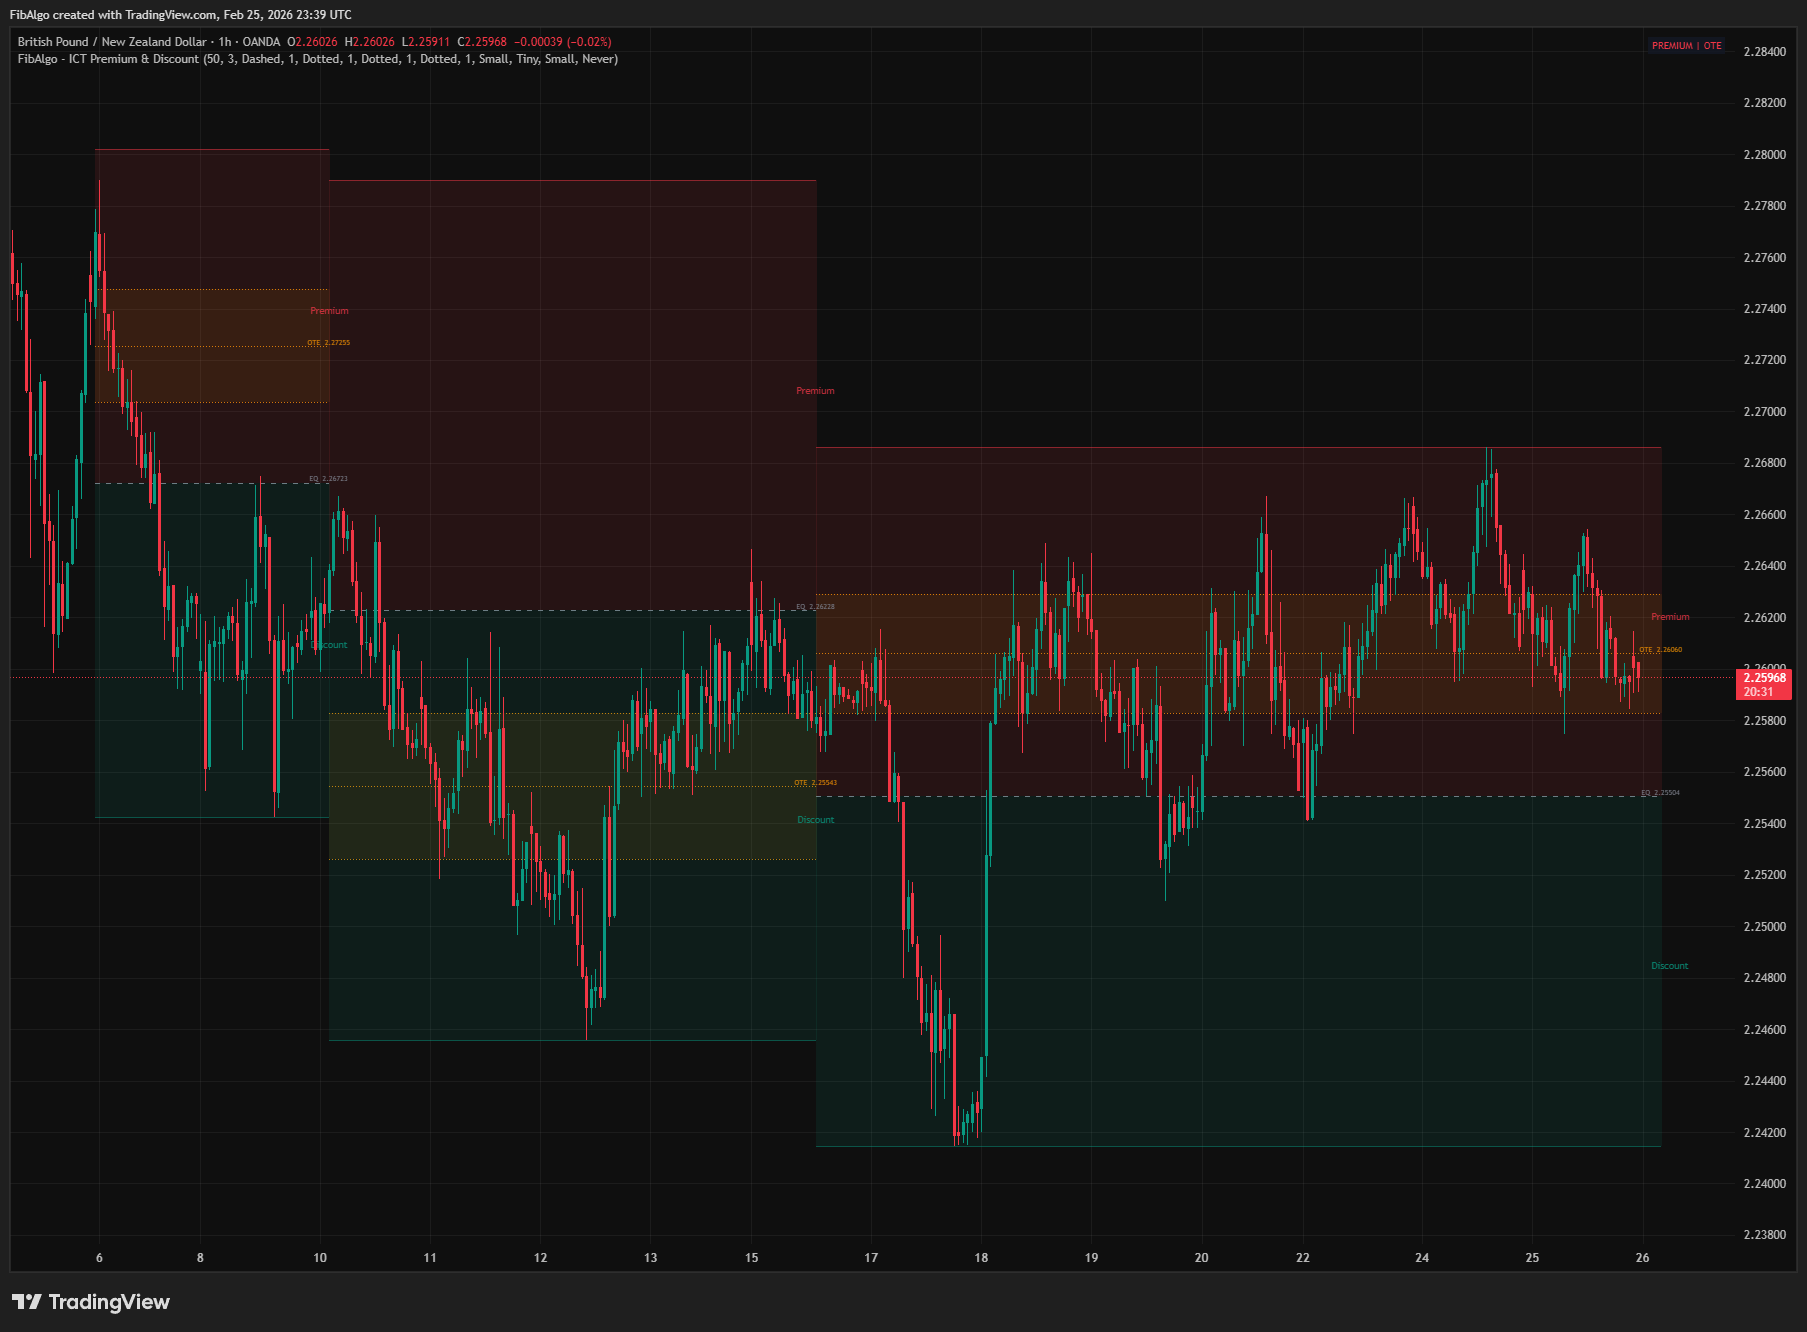
ICT Premium & Discount
TradingView indicator that detects ICT Premium and Discount zones in real-time using zigzag analysis with Equilibrium and OTE retracement highlights.
See Details