Overview
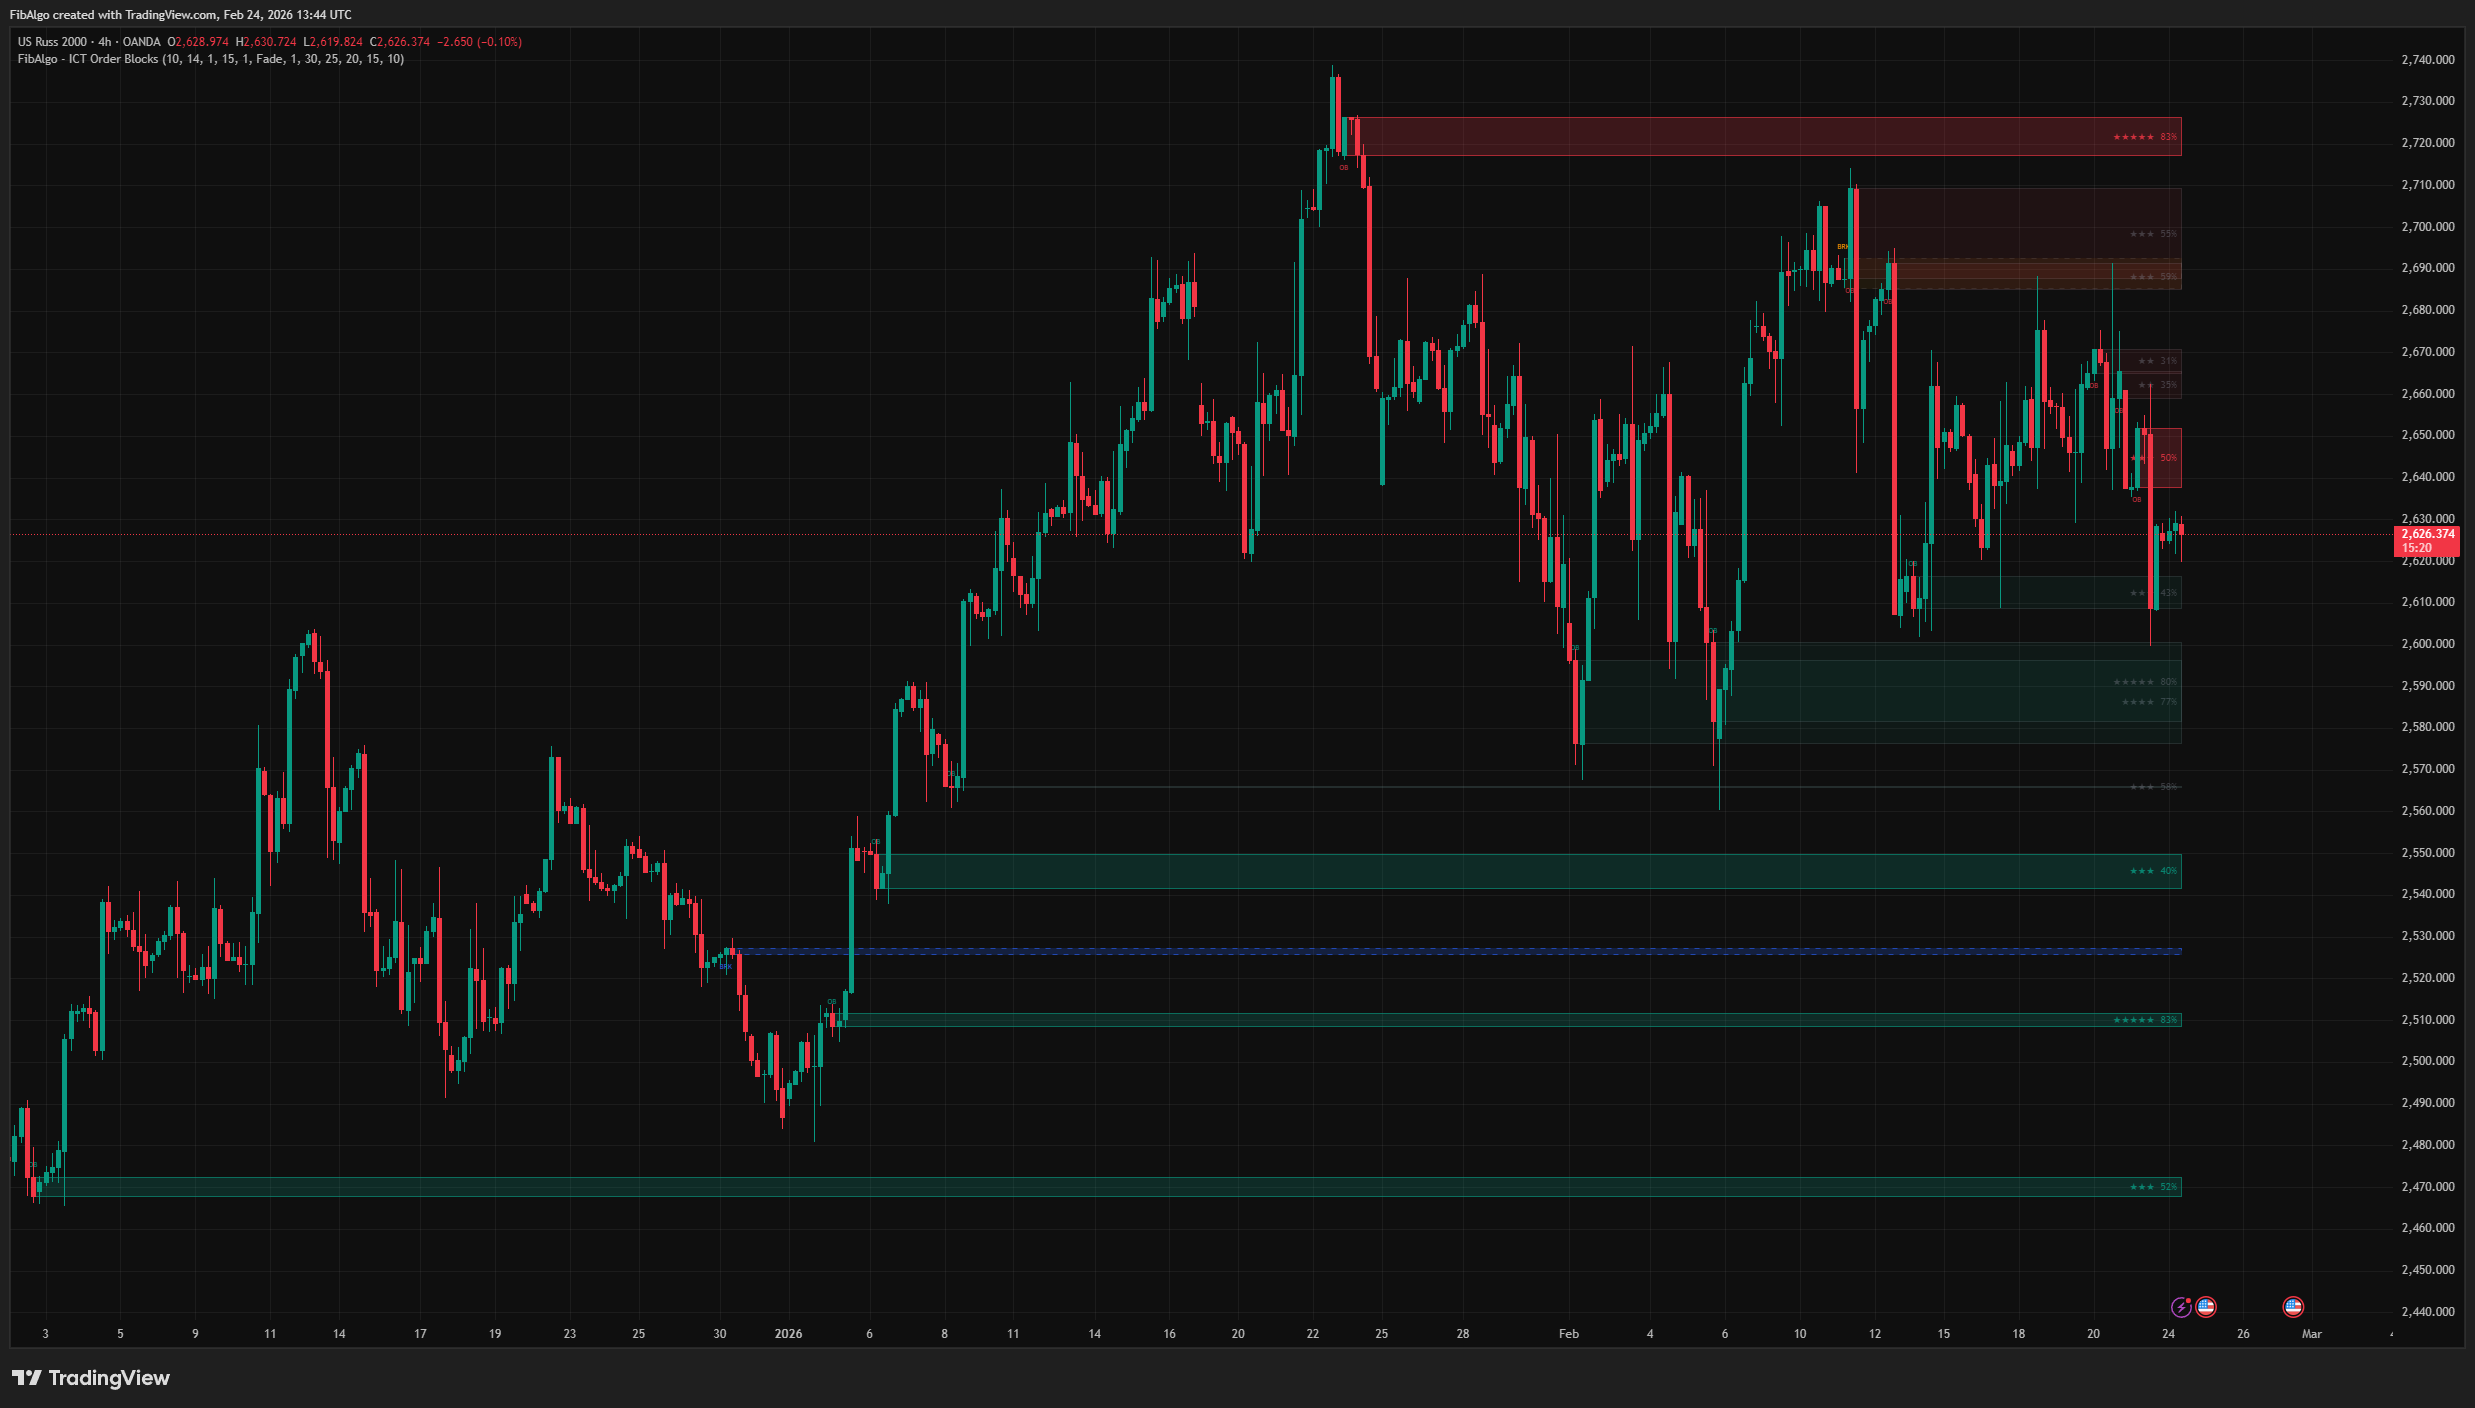
This indicator detects and manages ICT (Inner Circle Trader) Order Blocks — key institutional supply and demand zones where large market participants accumulate or distribute positions. It identifies Order Blocks through displacement analysis, converts invalidated zones into Breaker Blocks, tracks mitigation events, and provides a unique Strength Rating system that scores each Order Block based on five ICT-grounded quality factors.
Key Concepts
- Order Block (OB) — The last opposing candle before an institutional displacement move. A Bullish OB is the last bearish candle before a strong bullish push; a Bearish OB is the last bullish candle before a strong bearish push. These zones represent areas where institutions placed their orders.
- Displacement — A large-bodied candle (or consecutive candles) that moves price aggressively in one direction, confirming institutional participation. The indicator uses ATR-based measurement to objectively identify displacement.
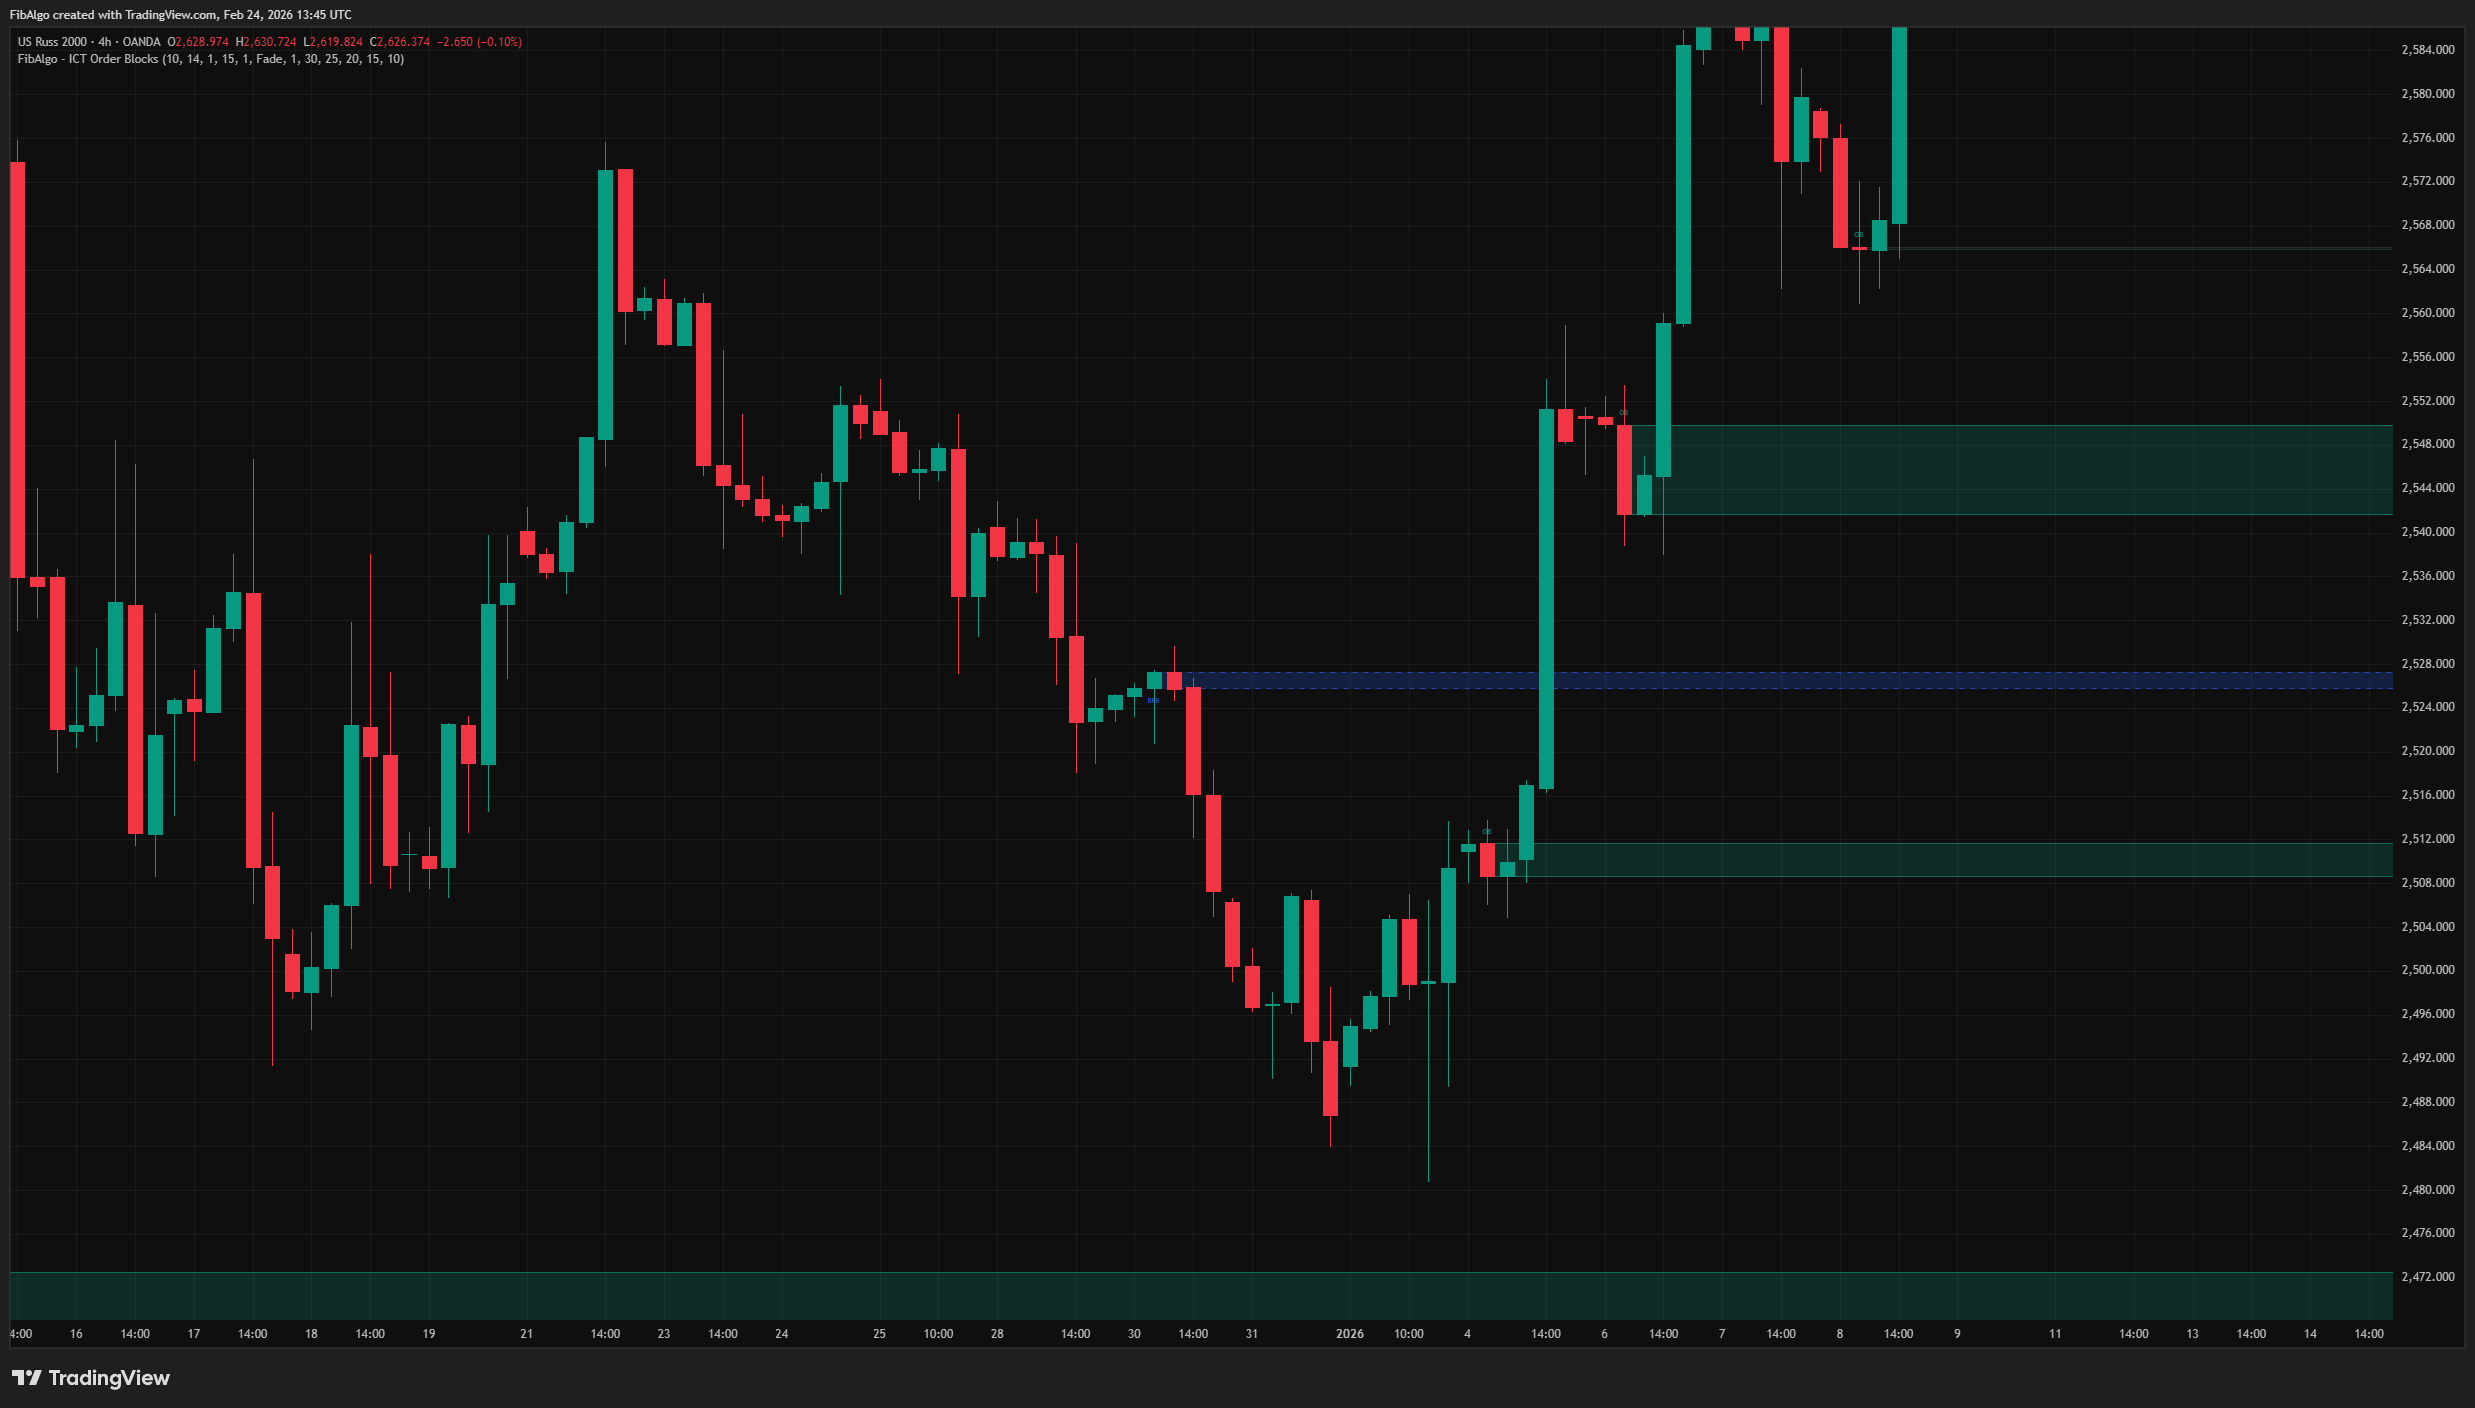
- Breaker Block — When an Order Block fails (price closes beyond the zone), it flips direction and becomes a Breaker Block. A failed Bullish OB becomes a Bearish Breaker (resistance); a failed Bearish OB becomes a Bullish Breaker (support). Breaker Blocks are high-probability reversal zones.
- Mitigation — When price returns to an active zone and enters it without closing beyond it. This represents institutional order fulfillment ("mitigation" of open positions). Mitigated zones are either faded or removed based on user preference.
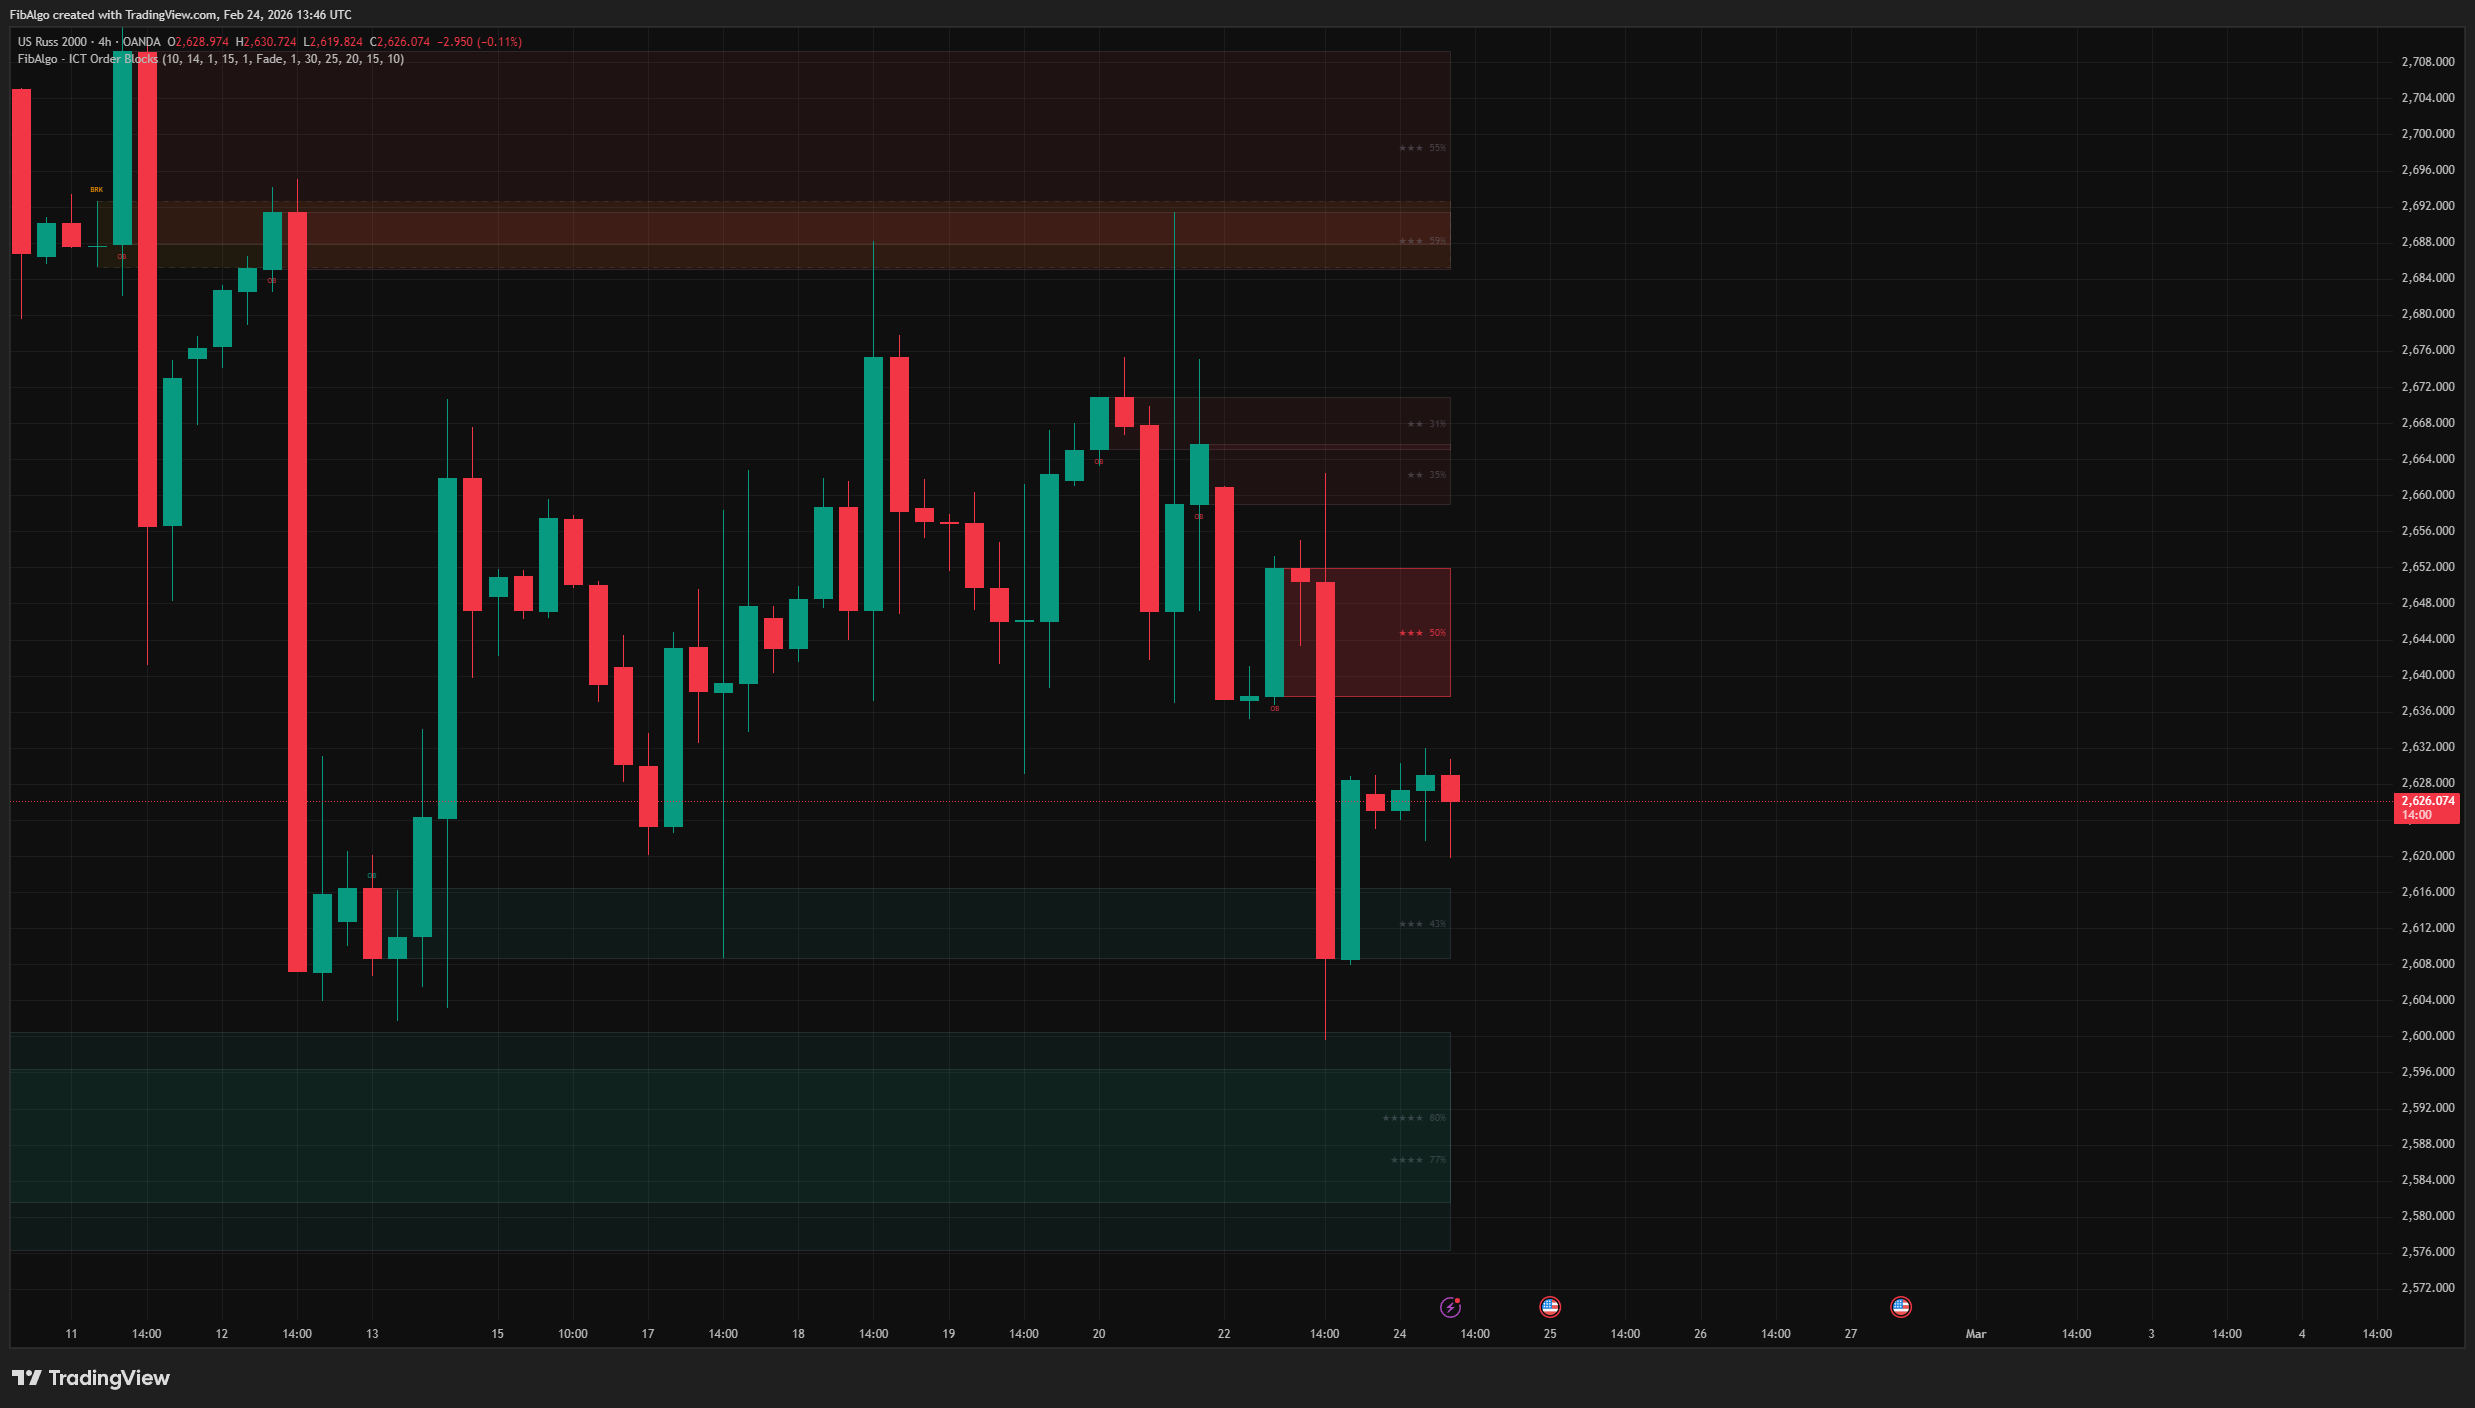
- Strength Rating — A proprietary scoring system (0–100%) that evaluates each Order Block based on five ICT-grounded quality factors: displacement magnitude, FVG creation, body-to-range ratio, multi-candle displacement, and volume spike.
How It Works
1. Displacement Detection The indicator identifies institutional displacement using ATR-based measurement. A candle qualifies as displacement when its body exceeds ATR multiplied by the user-defined multiplier. Multi-candle displacement is supported: when 2–3 consecutive same-direction candles are detected, their cumulative body size is evaluated against the threshold. 2. Order Block Creation When displacement is confirmed, the indicator searches backwards through the lookback window (starting after the displacement candles) for the last opposite-color candle. This candle's body (or full range) defines the Order Block zone. A proximity check ensures that the displacement actually moved price away from the zone — preventing false OB detection when the origin candle is far from the displacement. 3. Breaker Block Conversion When price closes beyond an Order Block zone (invalidation), the zone is not simply deleted. Instead, it flips direction and converts to a Breaker Block — shown with dashed borders and distinct colors (blue for Bullish Breaker, orange for Bearish Breaker). Breaker Blocks receive a fresh birth bar to prevent immediate false mitigation on the conversion candle. 4. Mitigation Tracking When price enters an active zone (wick touches for Bullish OB: low reaches OB top; for Bearish OB: high reaches OB bottom), the zone is considered mitigated. Users choose the response:- Fade — Zone opacity increases, border turns gray, indicating the zone has been touched but may still hold.
- Remove — Zone is deleted from the chart entirely.
- Displacement Magnitude (default weight: 30) — How much the displacement candle body exceeds the ATR threshold. A 3x ATR displacement scores higher than a 1.1x.
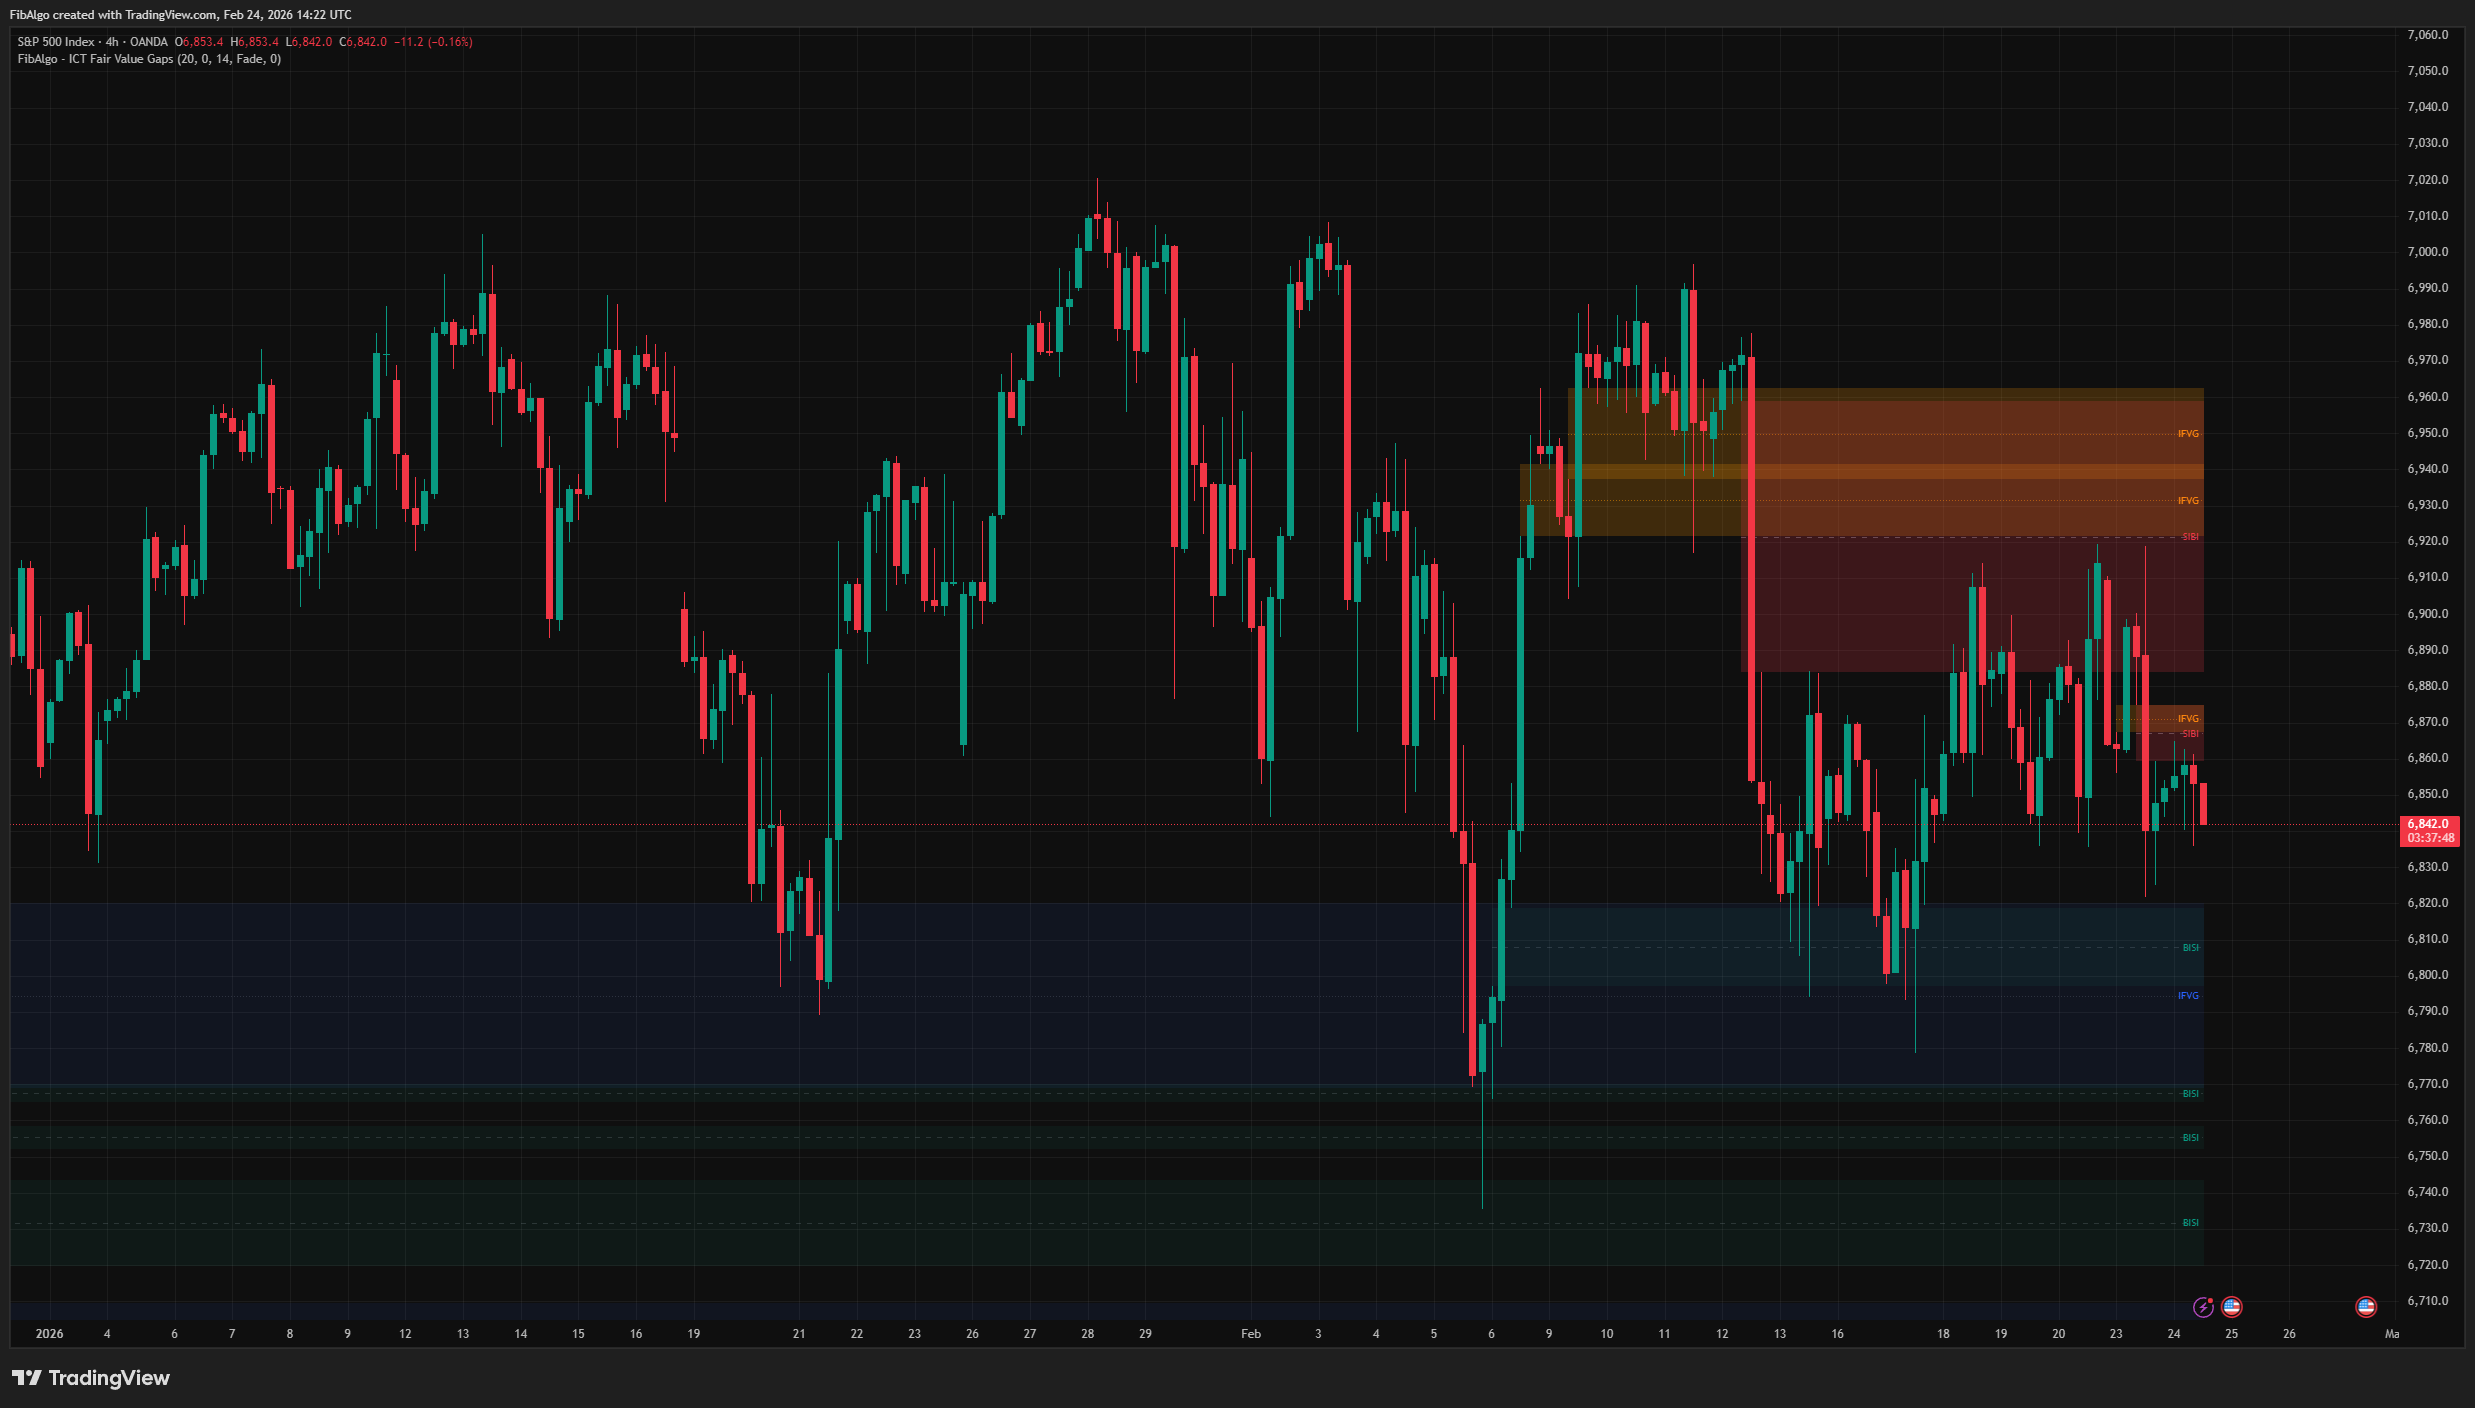
- FVG Creation (default weight: 25) — Whether the displacement left a Fair Value Gap (price gap between candles). FVG creation is a key ICT confirmation of institutional aggression.
- Body / Range Ratio (default weight: 20) — The ratio of candle body to total range. Institutional candles have large bodies with minimal wicks, indicating decisive order flow.
- Multi-Candle Displacement (default weight: 15) — Bonus for 2–3 consecutive displacement candles, indicating sustained institutional commitment.
- Volume Spike (default weight: 10) — Whether volume exceeds 1.5x its 20-bar average, confirming real institutional participation.
Each factor can be toggled on/off and its weight adjusted (0–50), allowing users to customize the scoring formula. The score is normalized to 0–100% regardless of which factors are active.
Features
- ATR-Based Displacement — Objective, volatility-adjusted identification of institutional moves.
- Multi-Candle Displacement — Supports 1–3 consecutive candle displacement detection.
- Breaker Block Conversion — Automatic flip from failed OB to opposite-direction Breaker with visual differentiation.
- Mitigation Tracking — Fade or Remove response with distinct visual feedback.
- Strength Rating — Five-factor ICT-based quality scoring with customizable weights, displayed inside each OB box.
- Detailed Tooltips — Hover over OB labels to see a full breakdown of each strength factor.
- Duplicate Prevention — Same origin bar cannot produce multiple Order Blocks.
- Zone Body or Full Range — User can choose whether OB zones cover the candle body or the full high-low range.
- Full Color Customization — Separate colors for Bullish OB, Bearish OB, Bullish Breaker, and Bearish Breaker.
- Alert System — Three configurable alerts: New Order Block, Mitigation, and New Breaker Block. Each includes price zone, symbol, and timeframe.
How to Use
- Zone Quality: Focus on high-strength Order Blocks (4–5 stars, 60%+). These have the strongest ICT confirmation: large displacement, FVG present, clean body, possibly multi-candle, volume confirmed.
- Breaker Blocks: When a Bullish OB fails and converts to a Bearish Breaker, treat the zone as resistance on the next touch. Vice versa for Bullish Breakers acting as support.
- Mitigation: A faded zone has already been touched once. Subsequent touches carry less significance than the initial reaction.
- Displacement Tuning: Increase the ATR multiplier (1.5–2.0) to filter out weak displacement and focus only on high-conviction zones. Decrease it (0.5–0.8) for more sensitive detection.
- Multi-Timeframe: Use higher timeframe Order Blocks for directional bias and lower timeframe OBs for entry refinement.
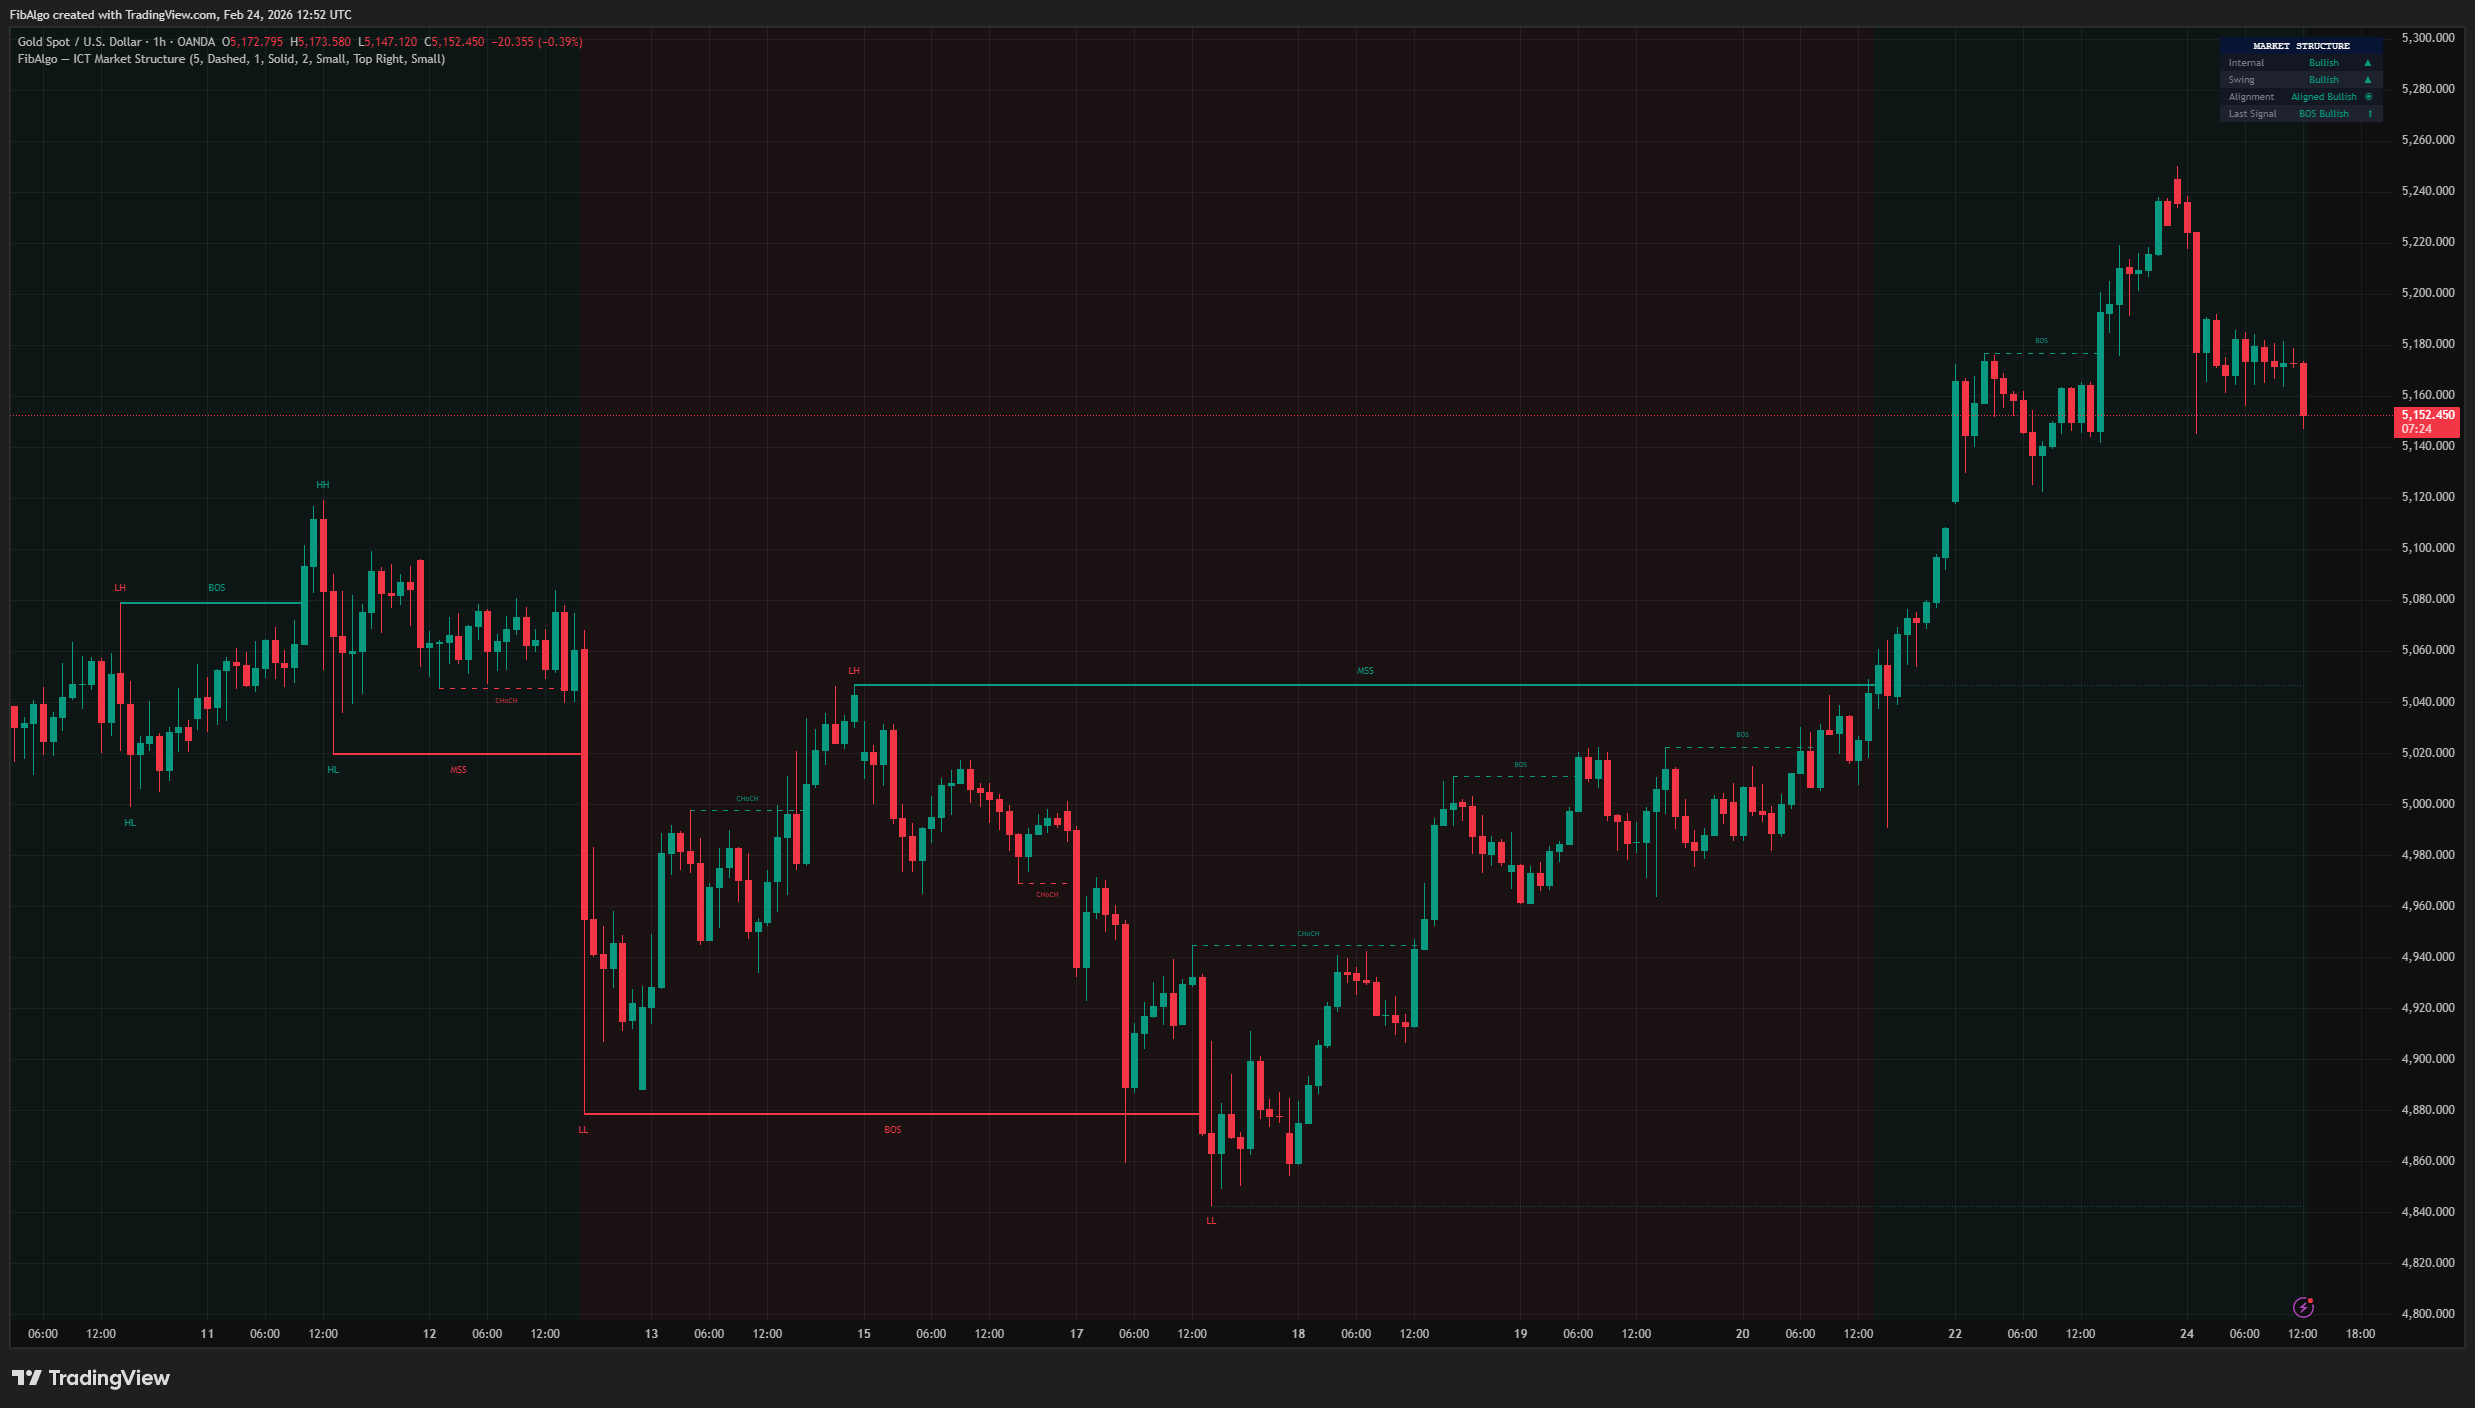
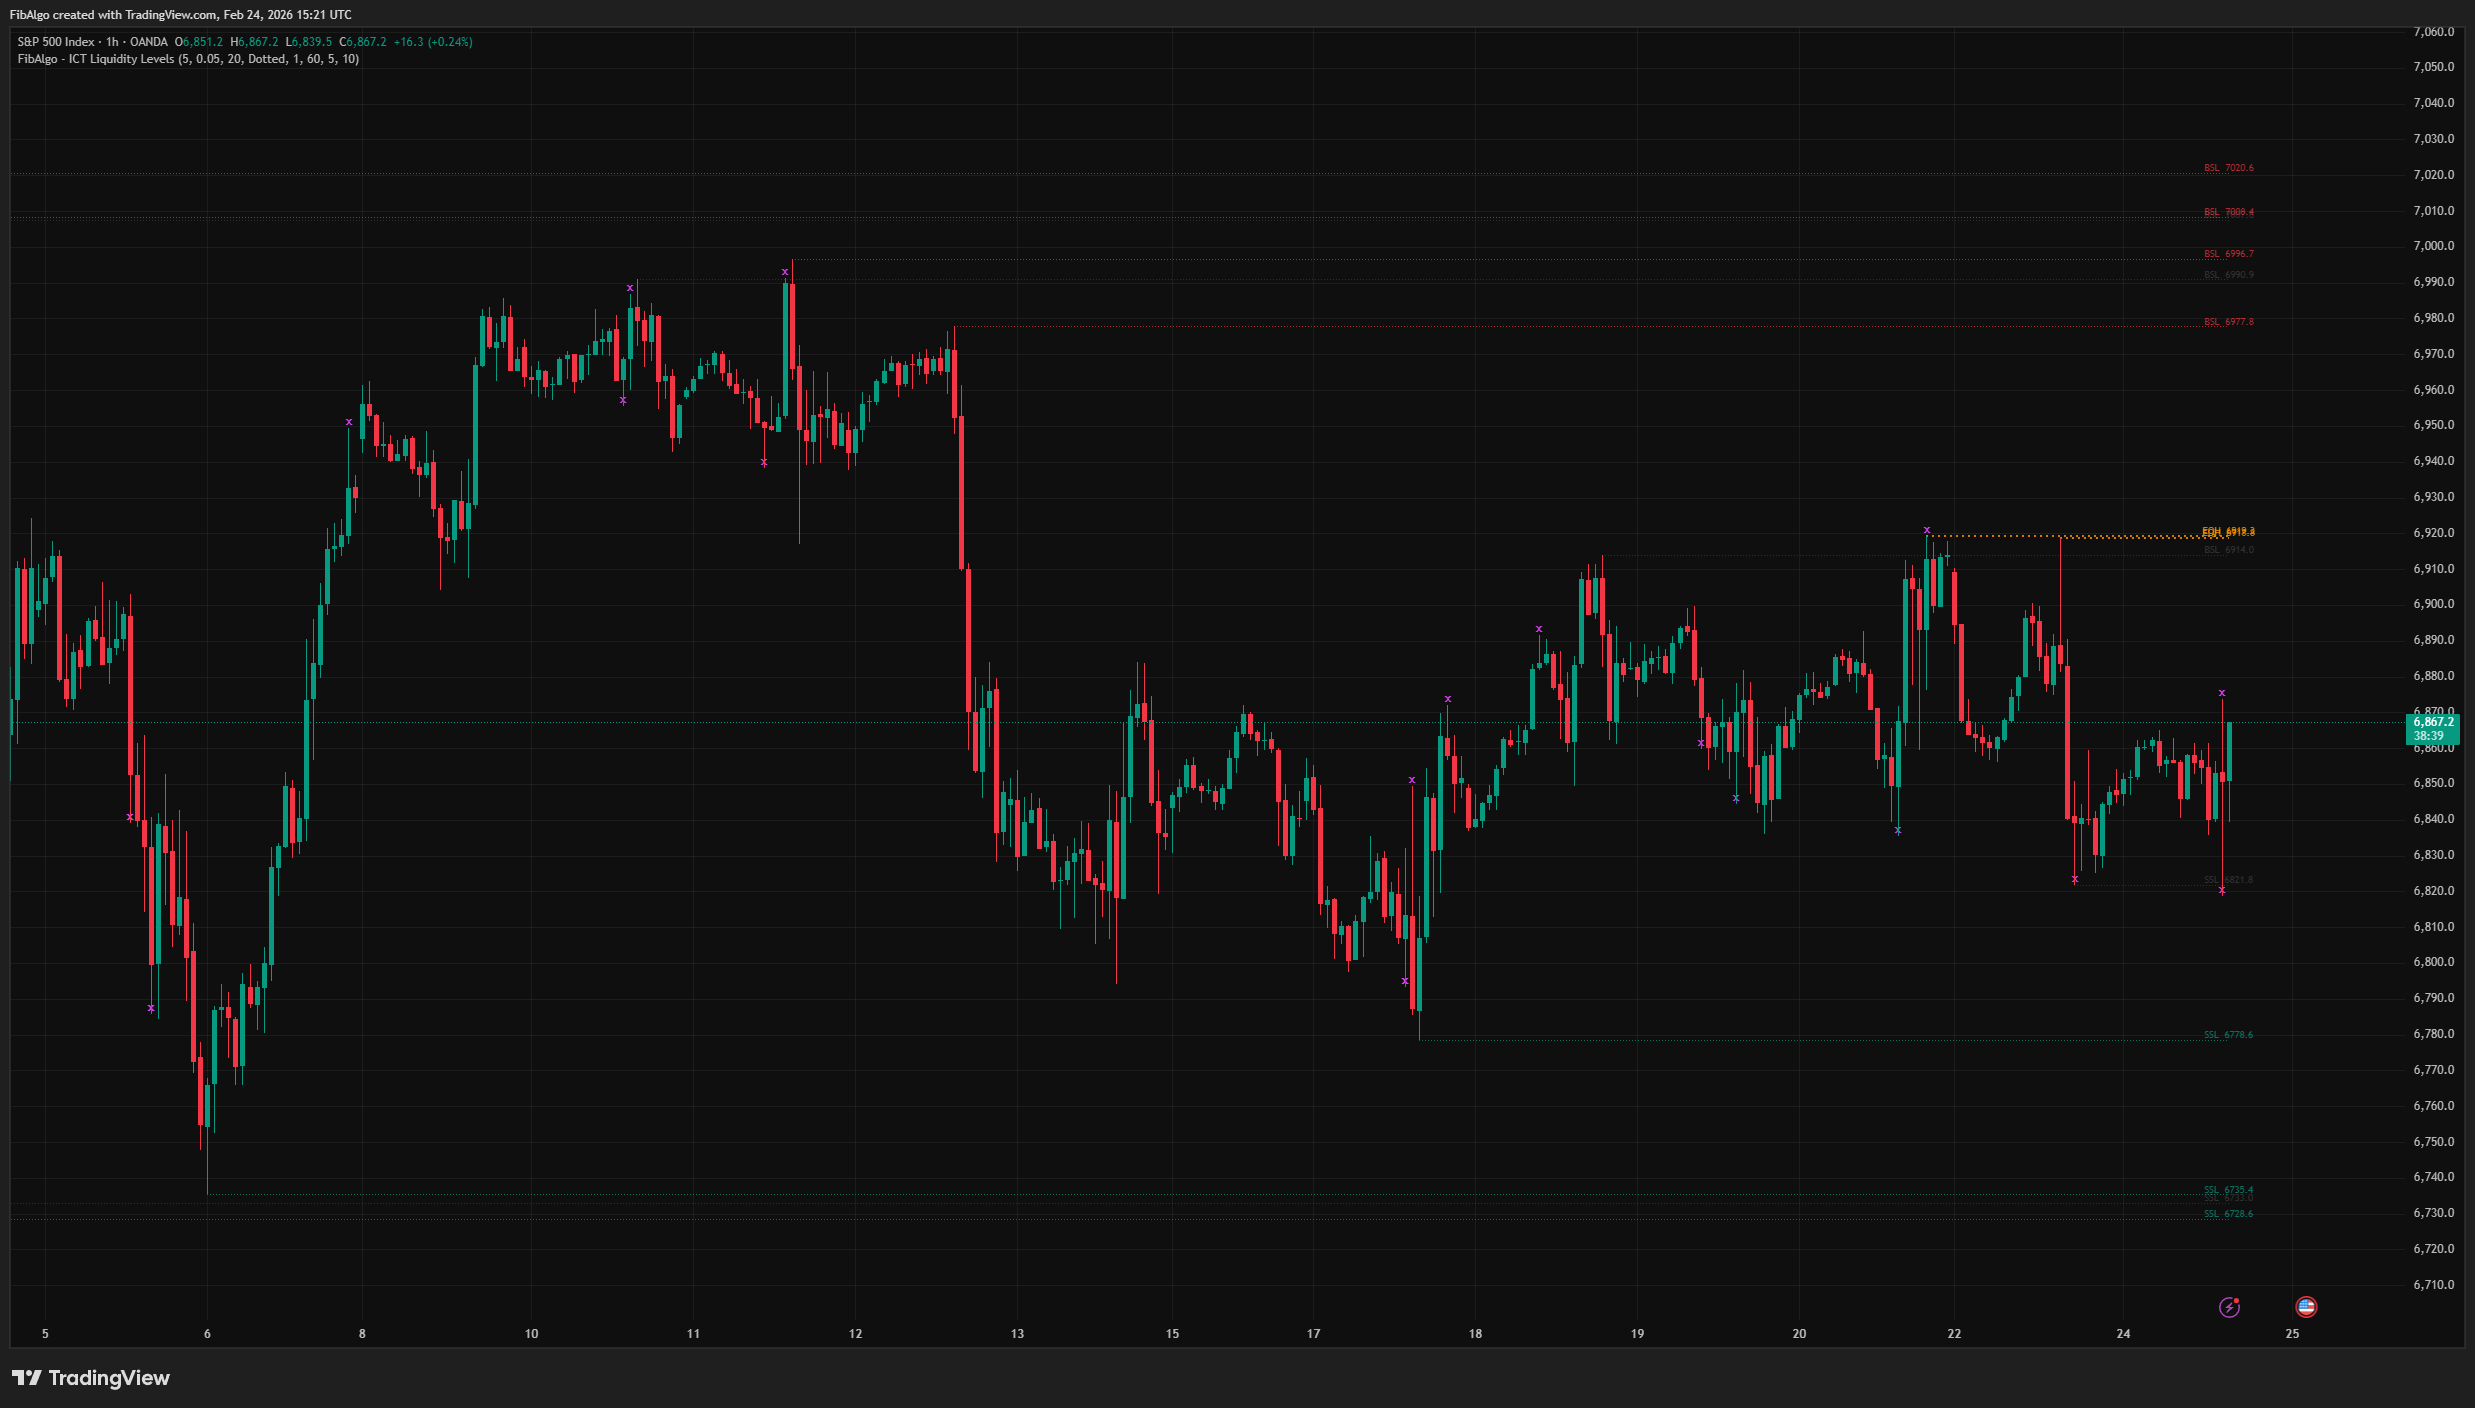
- Combine with Structure: Order Blocks are most effective when aligned with market structure (BOS/CHoCH/MSS), Fair Value Gaps, and liquidity sweeps.
Limitations
- Order Block detection requires sufficient historical data for ATR calculation (minimum: ATR Period bars).
- The Strength Rating is a quality heuristic — it evaluates formation characteristics, not future price behavior. A 5-star OB can still fail.
- FVG detection within the strength formula uses a simplified 3-bar gap check on the current timeframe. It does not account for lower-timeframe fills.
- Volume data may not be available on all instruments (e.g., some forex pairs). When volume is unavailable, the Volume Spike factor contributes zero to the score.
- This indicator identifies institutional zones — it does not generate buy/sell signals. Combine with market structure, liquidity analysis, and risk management for complete trade setups.
Tags
#Smart Money#Support & Resistance#Price Action